
Customer Users vs. Customer Contacts
In Cabo, it's important to distinguish between users and contacts, as they serve different roles within the platform and in customer relationships.
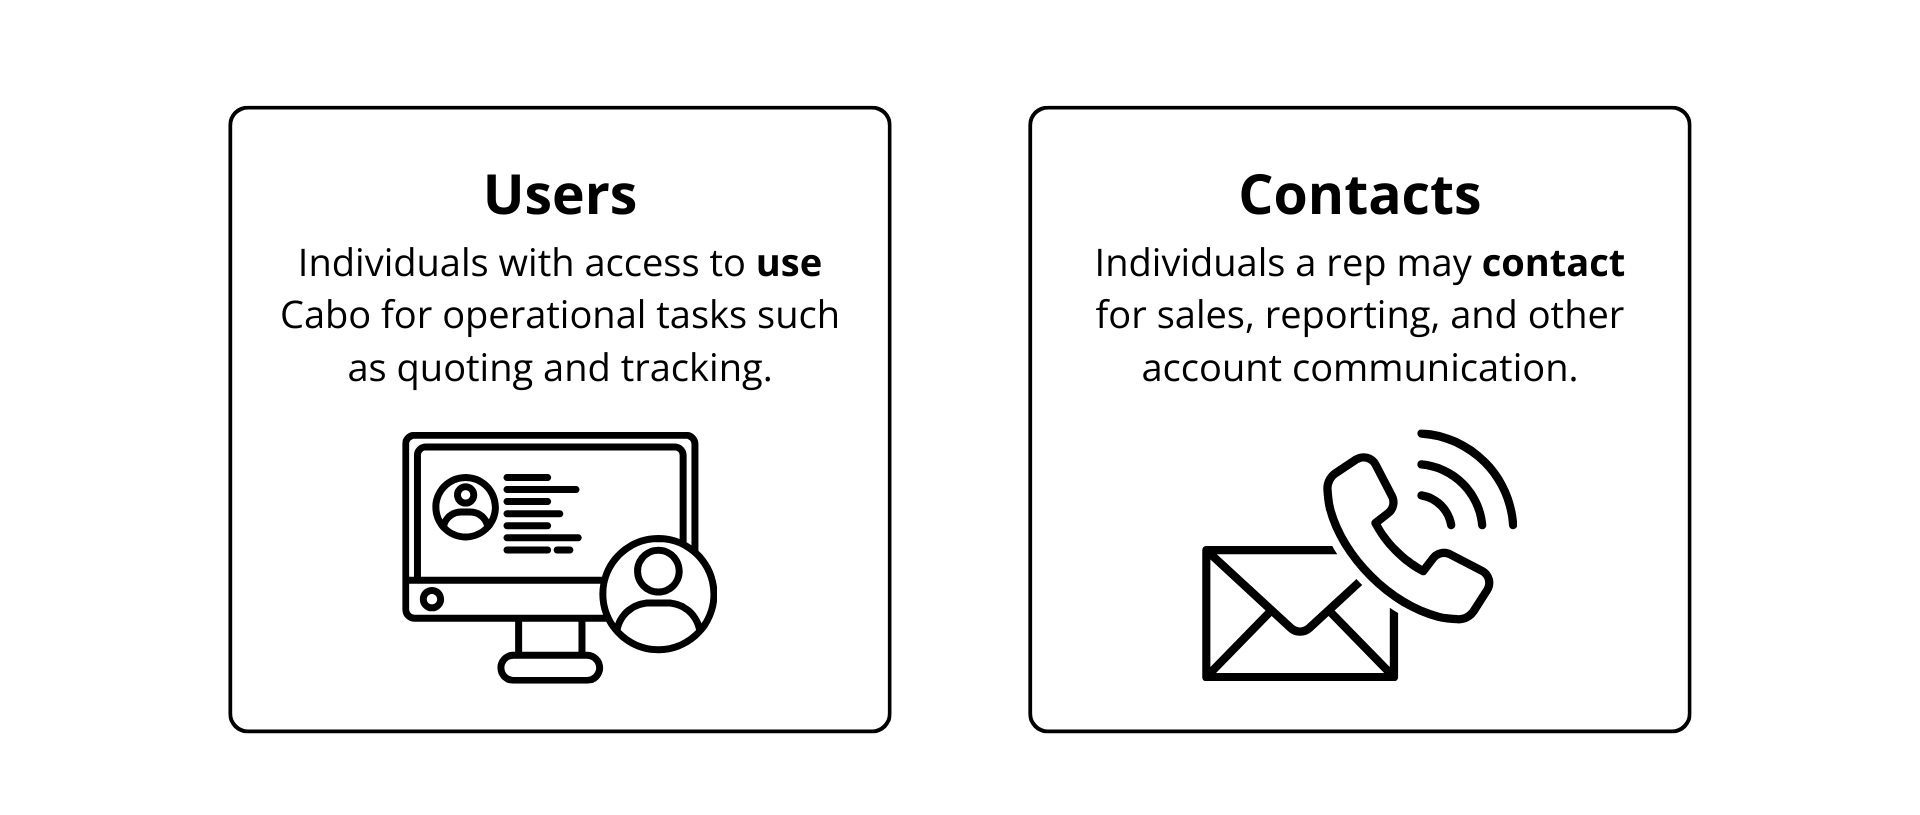
Users
Users are individuals who log into Cabo to perform operational tasks such as quoting, booking, and tracking shipments. Users are actively engaged with the system and have credentials to access the platform. There are two user types in Cabo:
- Billing users: Have access to billing-related functions on the Cabo epayment portal.
- Non-billing users: Have access to operational tasks without access to the epayment portal.
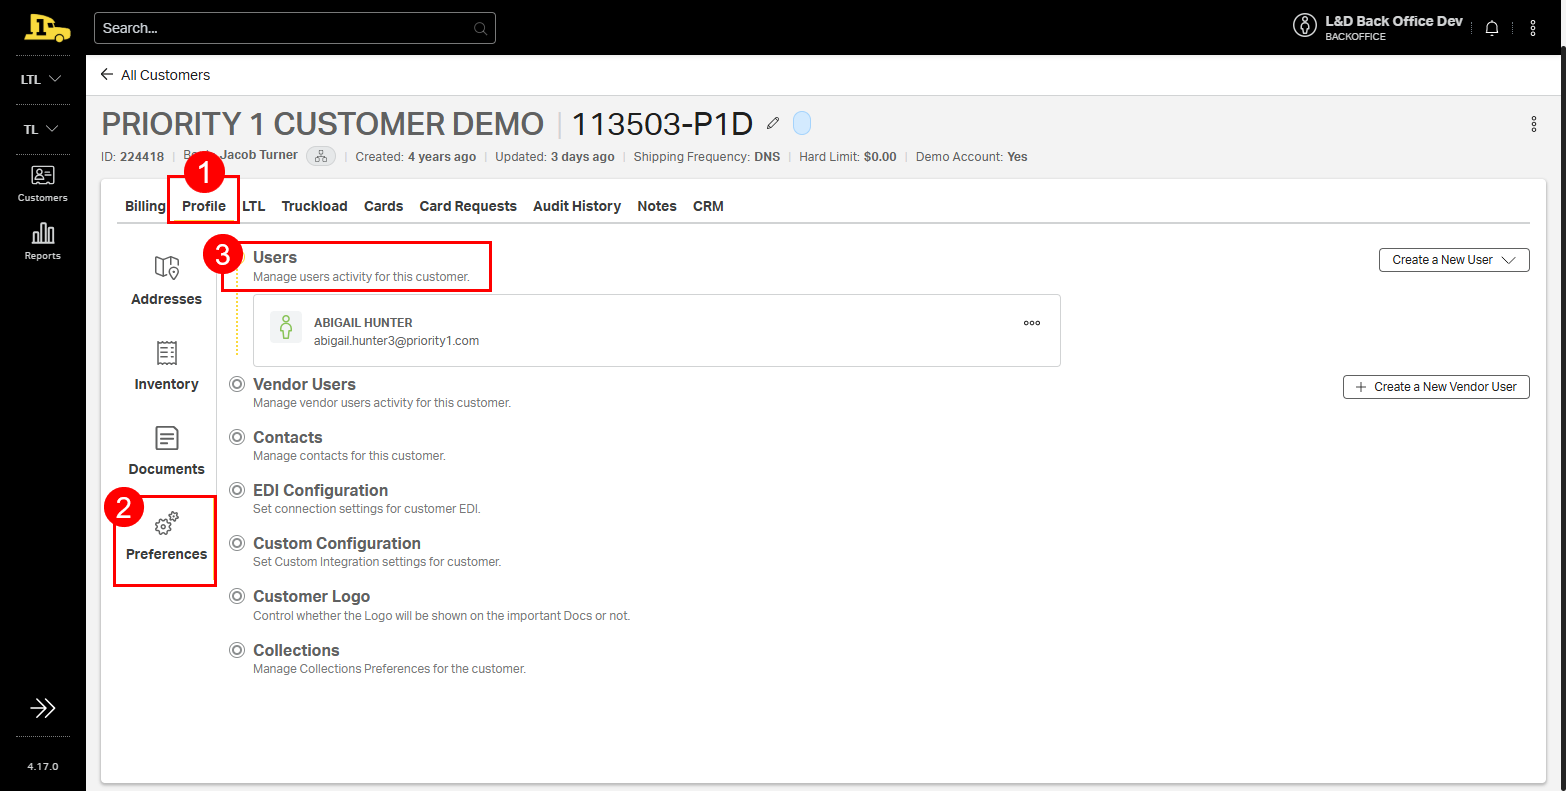
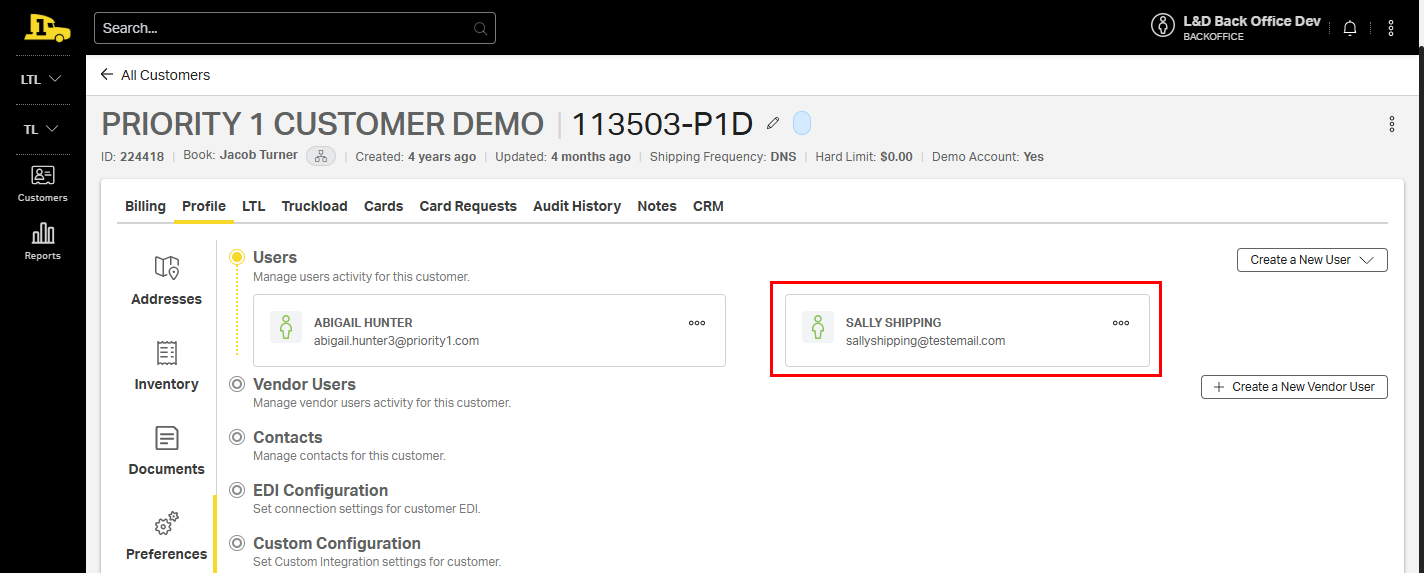
Locating Users
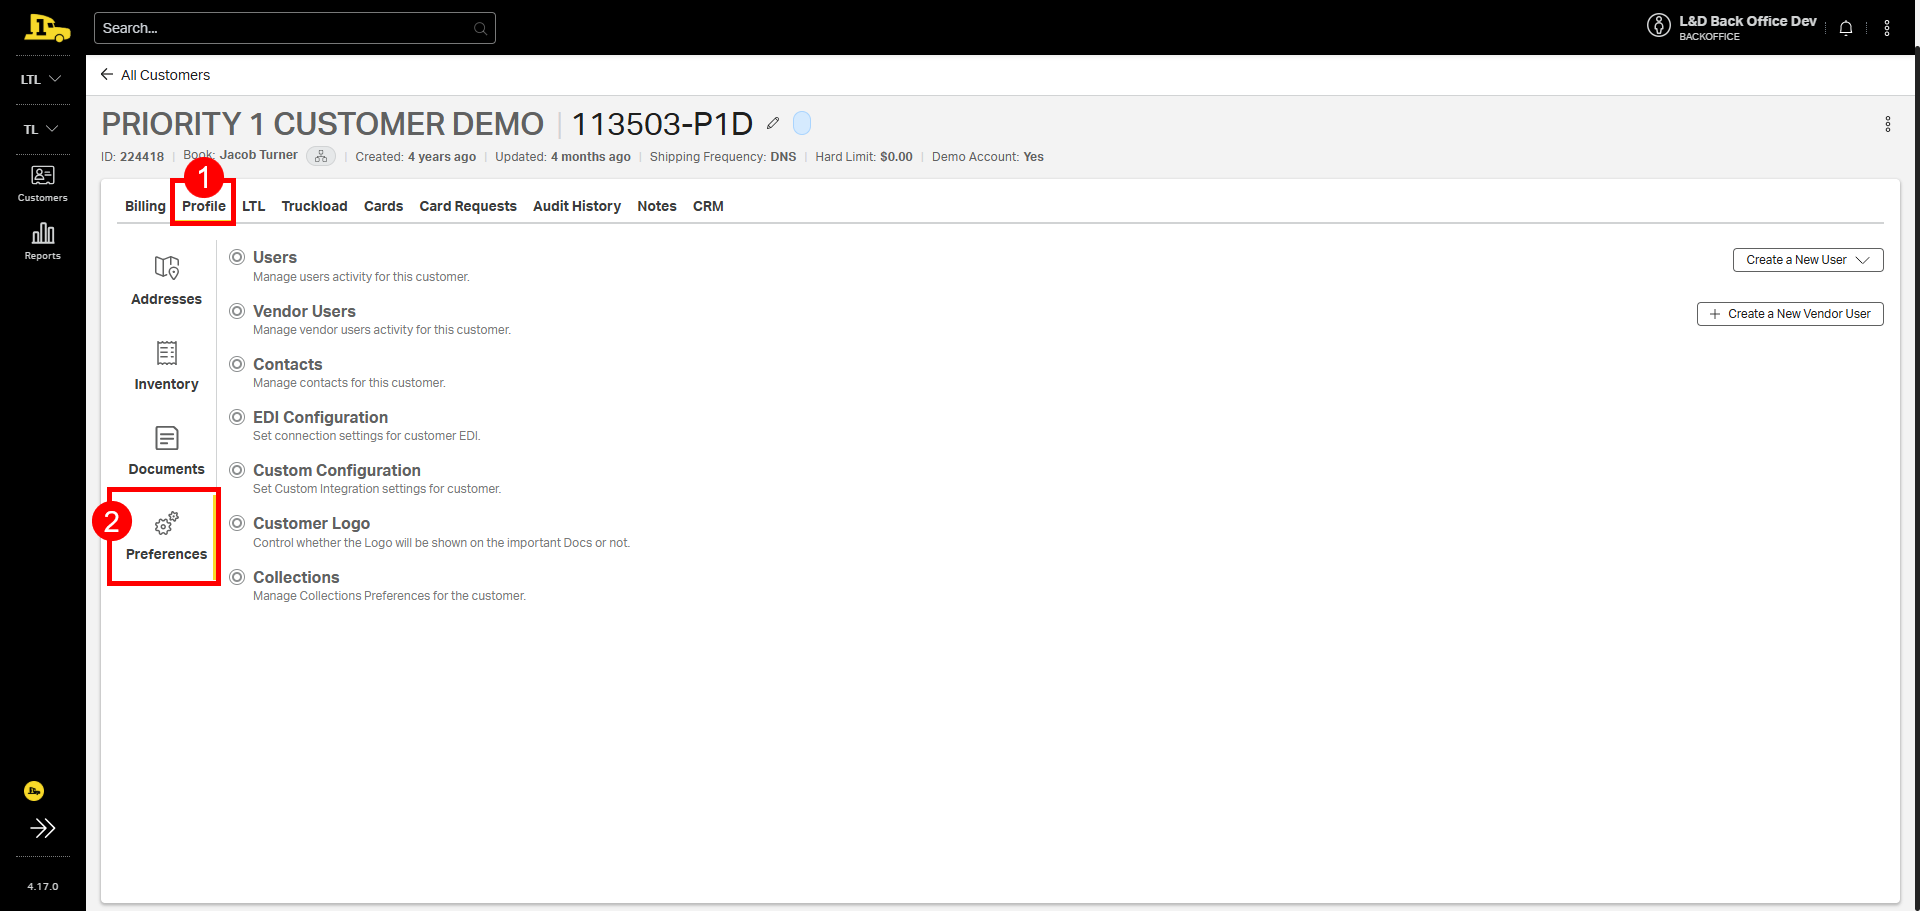
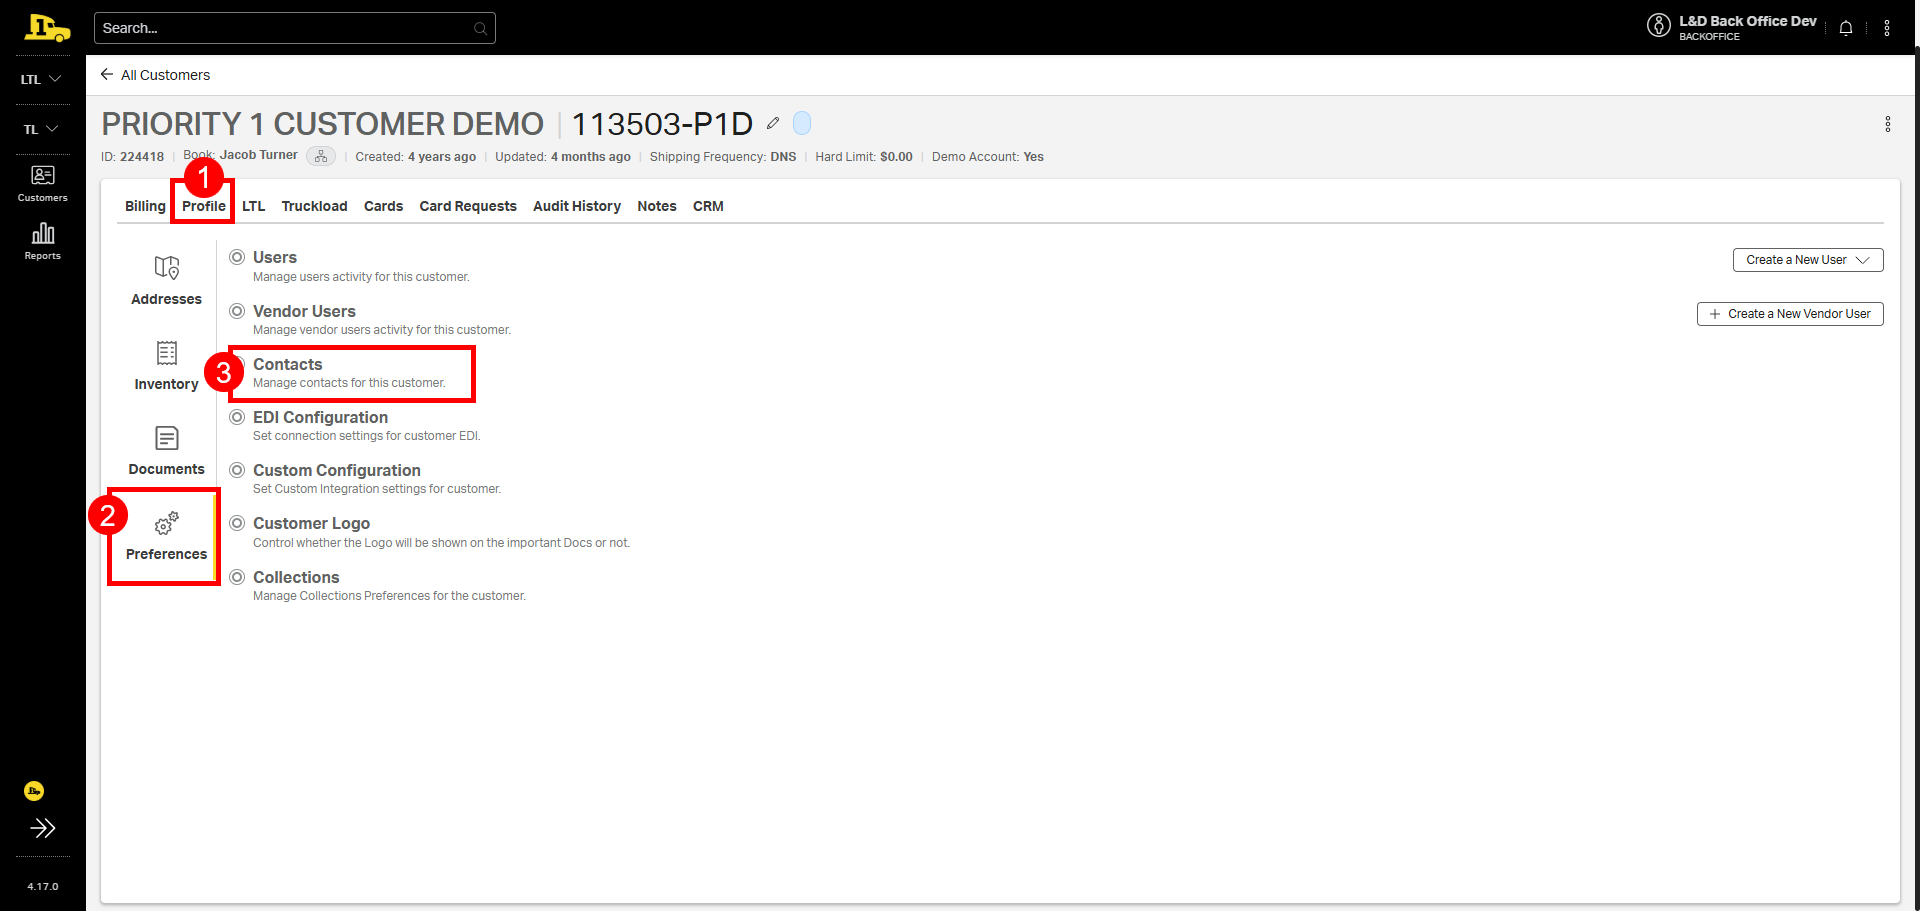
1. From the customer account, select Profile.
2. Select Preferences.
3. Select Users. Current users will populate on this screen.
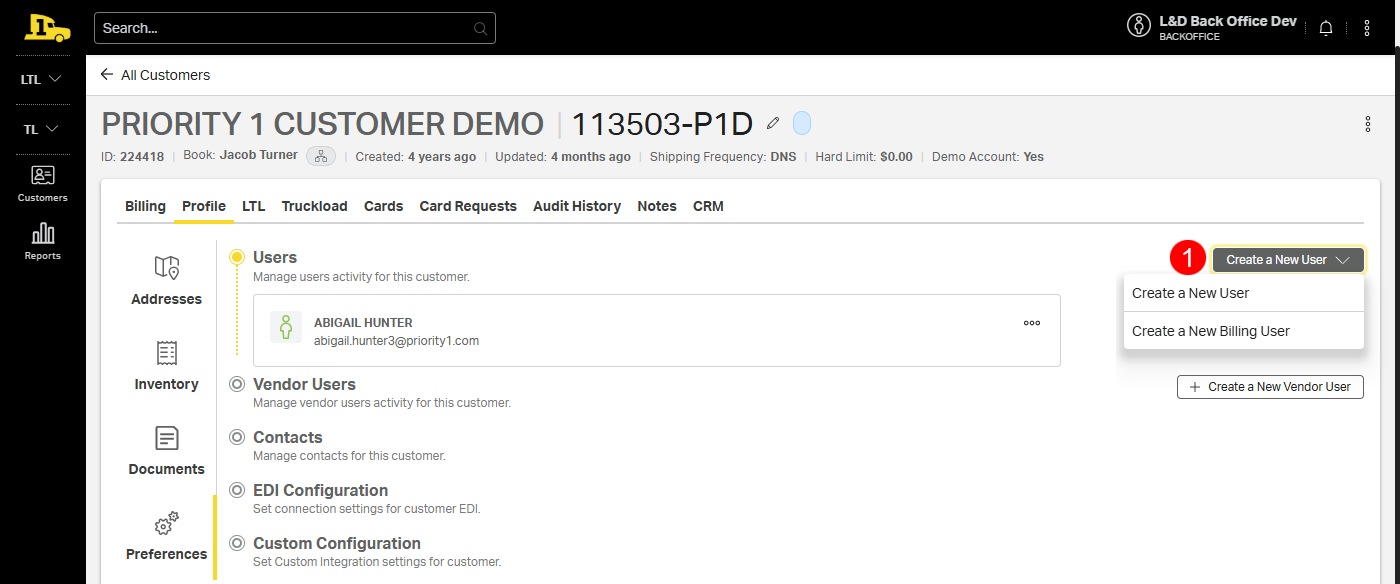
Adding a New User
Start at Customer > Profile > Preferences
1. Select Create a New User; then choose the user type from the resulting options.
ℹ️ The process for adding a new user is identical for both billing and non-billing users. However, it is important to select the correct user type from the dropdown menu to ensure the appropriate authorization is automatically assigned.
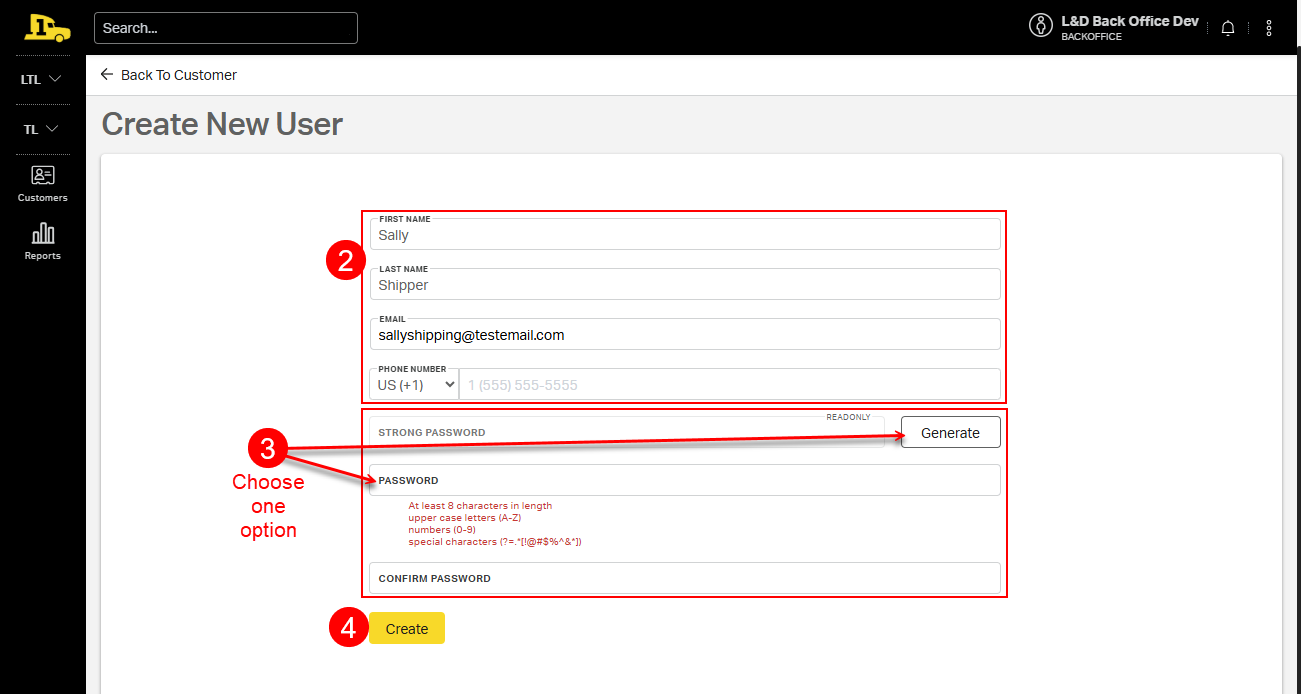
On the resulting Create New User form,
2. enter the user's name and contact information;
3. select Generate to create a randomized alphanumeric strong password or enter and confirm a chosen password;
4. select Create.
The new user will now be listed under Users on the customer's Preferences page.
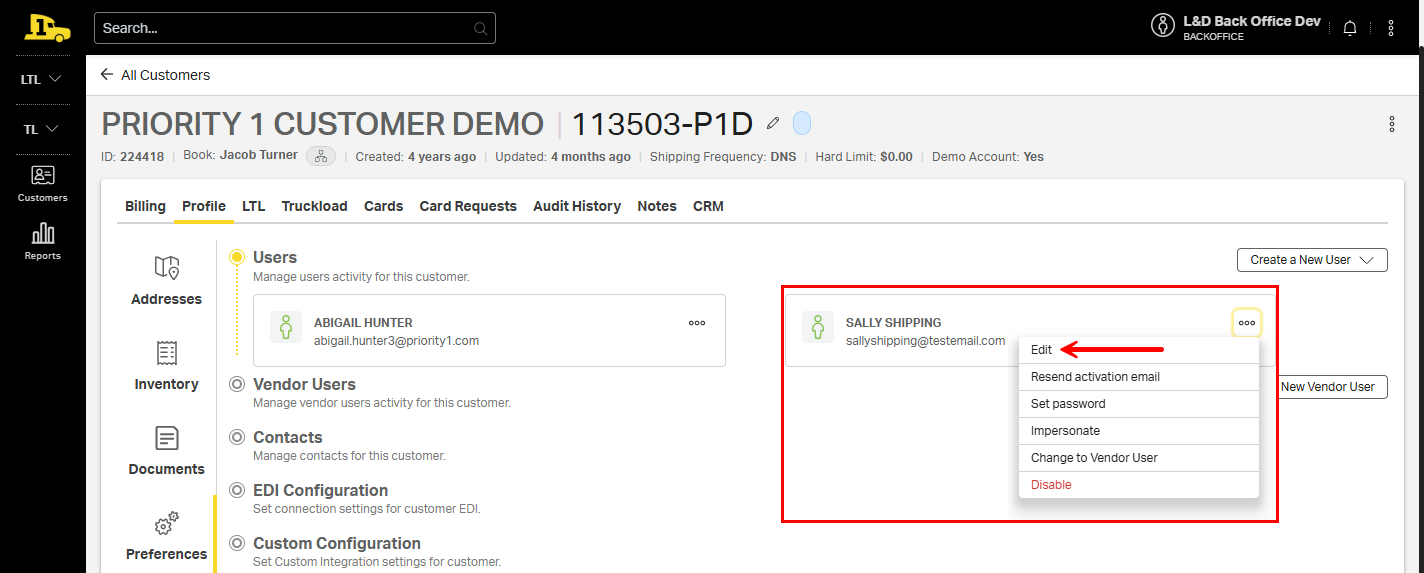
Editing a Current User
Start at Customer > Profile > Preferences
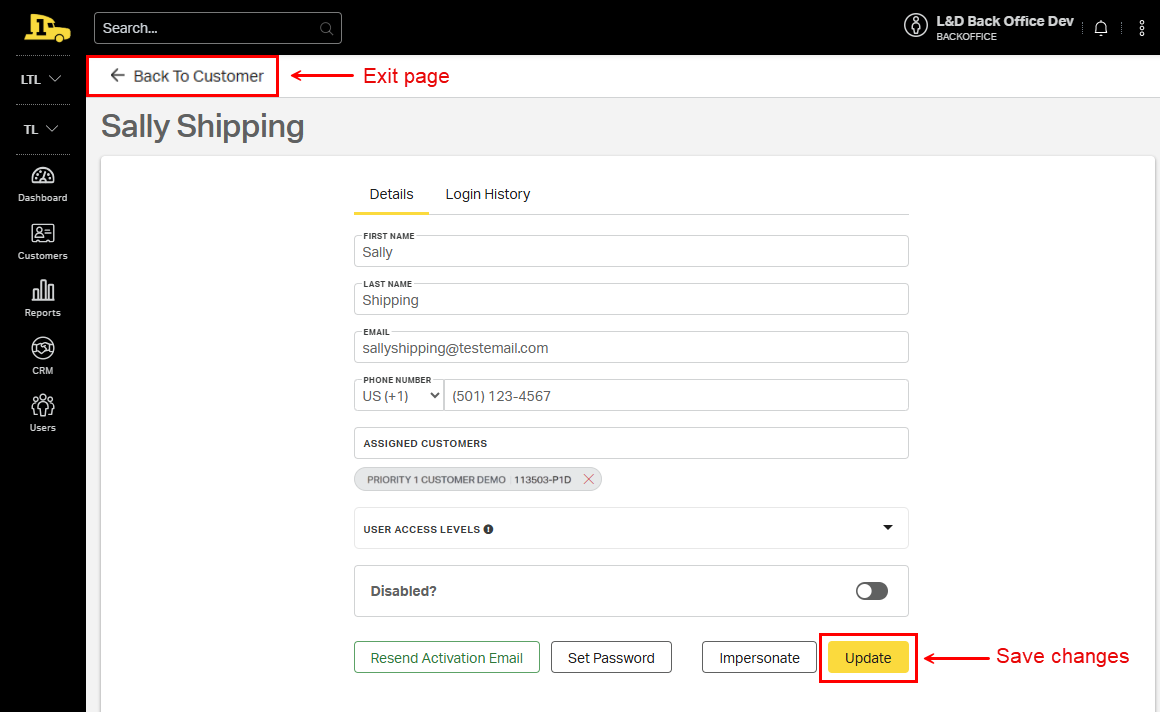
Navigate to the user's profile card; then select the meatball menu in the upper right corner of the card to open the dropdown options. To make changes that are not available in the dropdown, including adjusting the user's access level, select Edit.
Updating User Details
Selecting a user to edit—or submitting the Create New User form—opens the User Details page. Use this page to confirm or edit the following details:
1. Contact Information. Confirm or edit the user's information
2. Assigned Customers. Grant the user access to additional customer accounts. This is particularly helpful when creating or updating users for parent-child accounts.
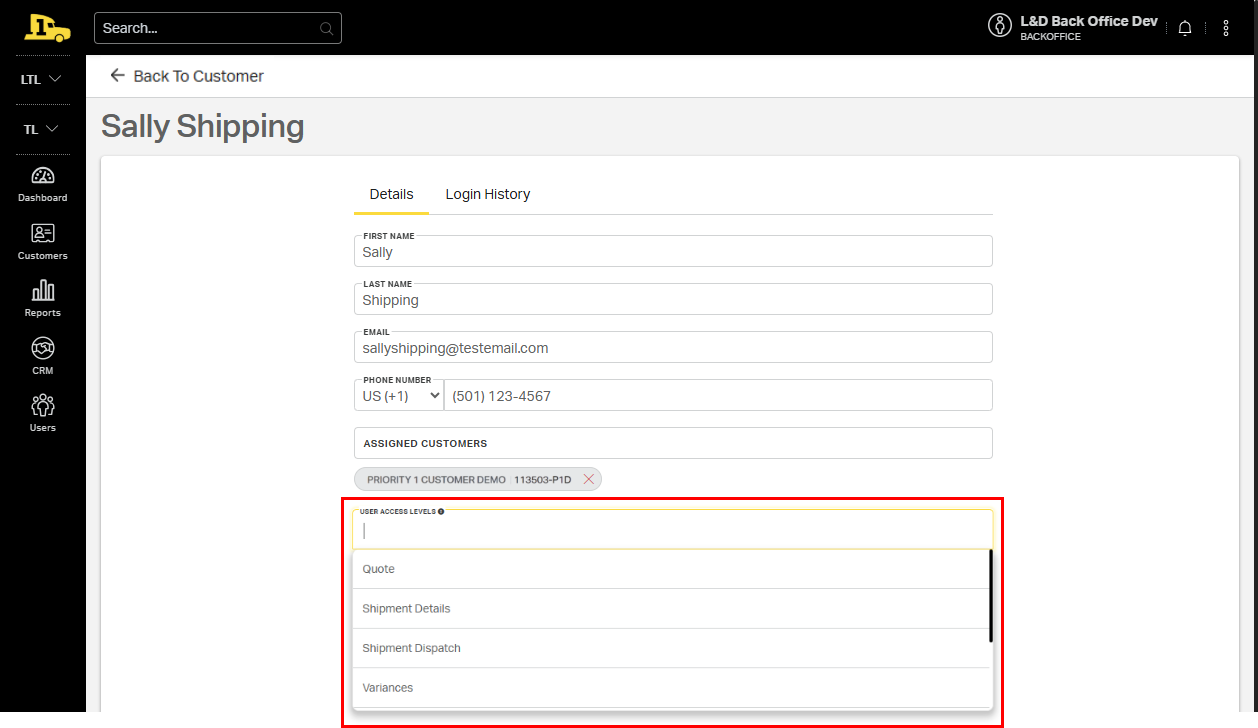
3. User Access Level. Determine specific activities and information the user can access.
4. Login assistance. Assist with password updates and system access, or impersonate the user to see the user's exact experience.
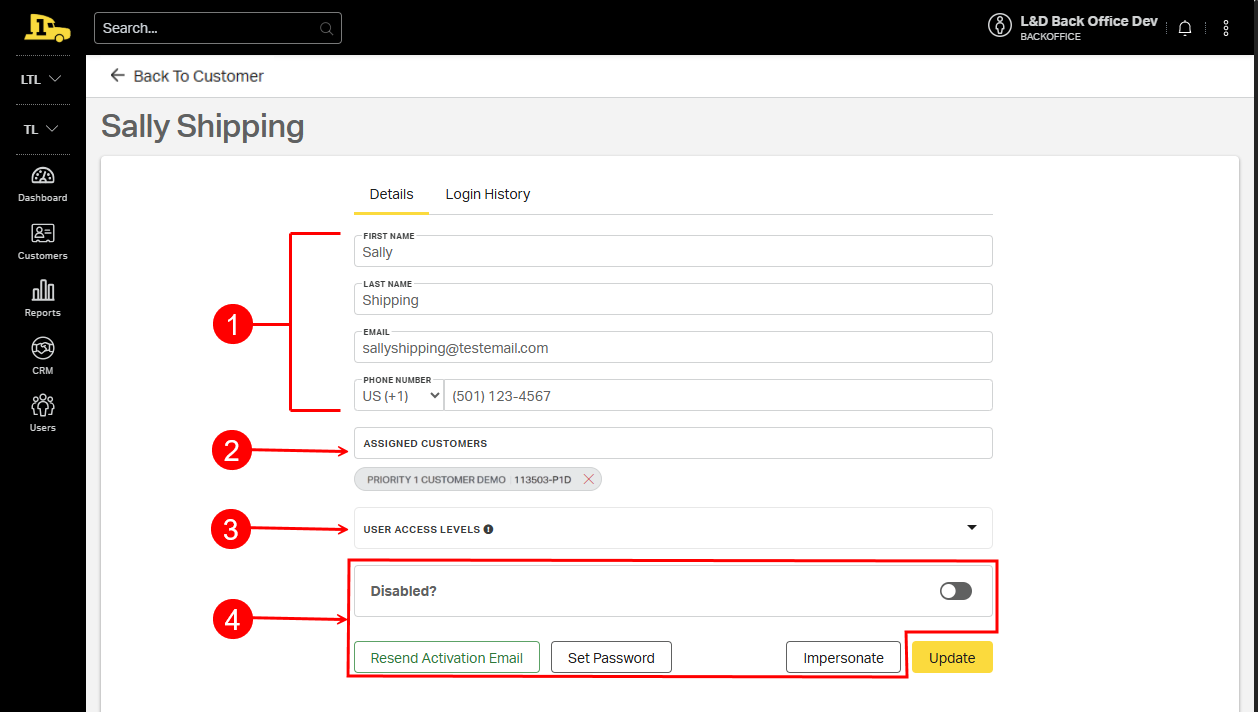
ℹ️ Customize the user's visibility and permissions by selecting the appropriate options from the User Access Levels.
After making edits on the User Details page, select Update to save the changes. To exit the page without saving, select Back to Customer.
Contacts
Contacts are individuals at the customer’s company who may not use Cabo directly but are essential for communication, reporting, and sales outreach. These may include C-suite stakeholders, accounting contacts, and other members of the customer's company operations.
Adding a New Contact
1. From the customer account, select Profile.
2. Select Preferences.
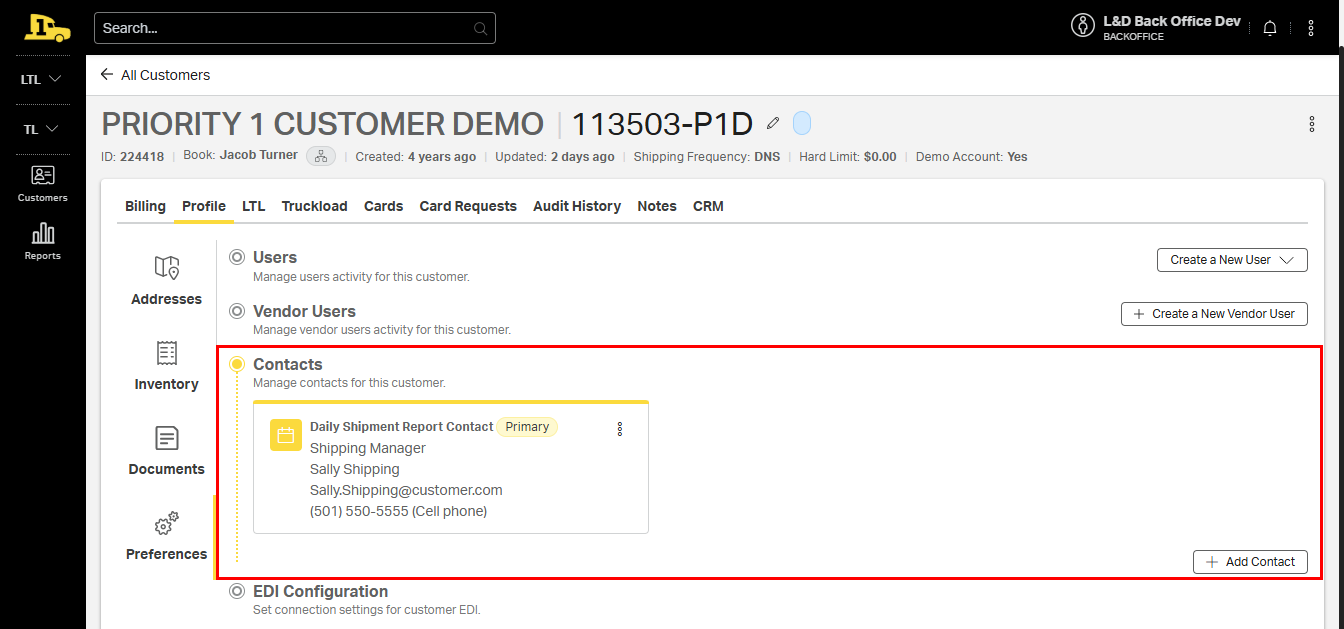
3. Select Contacts to view currently saved contacts.
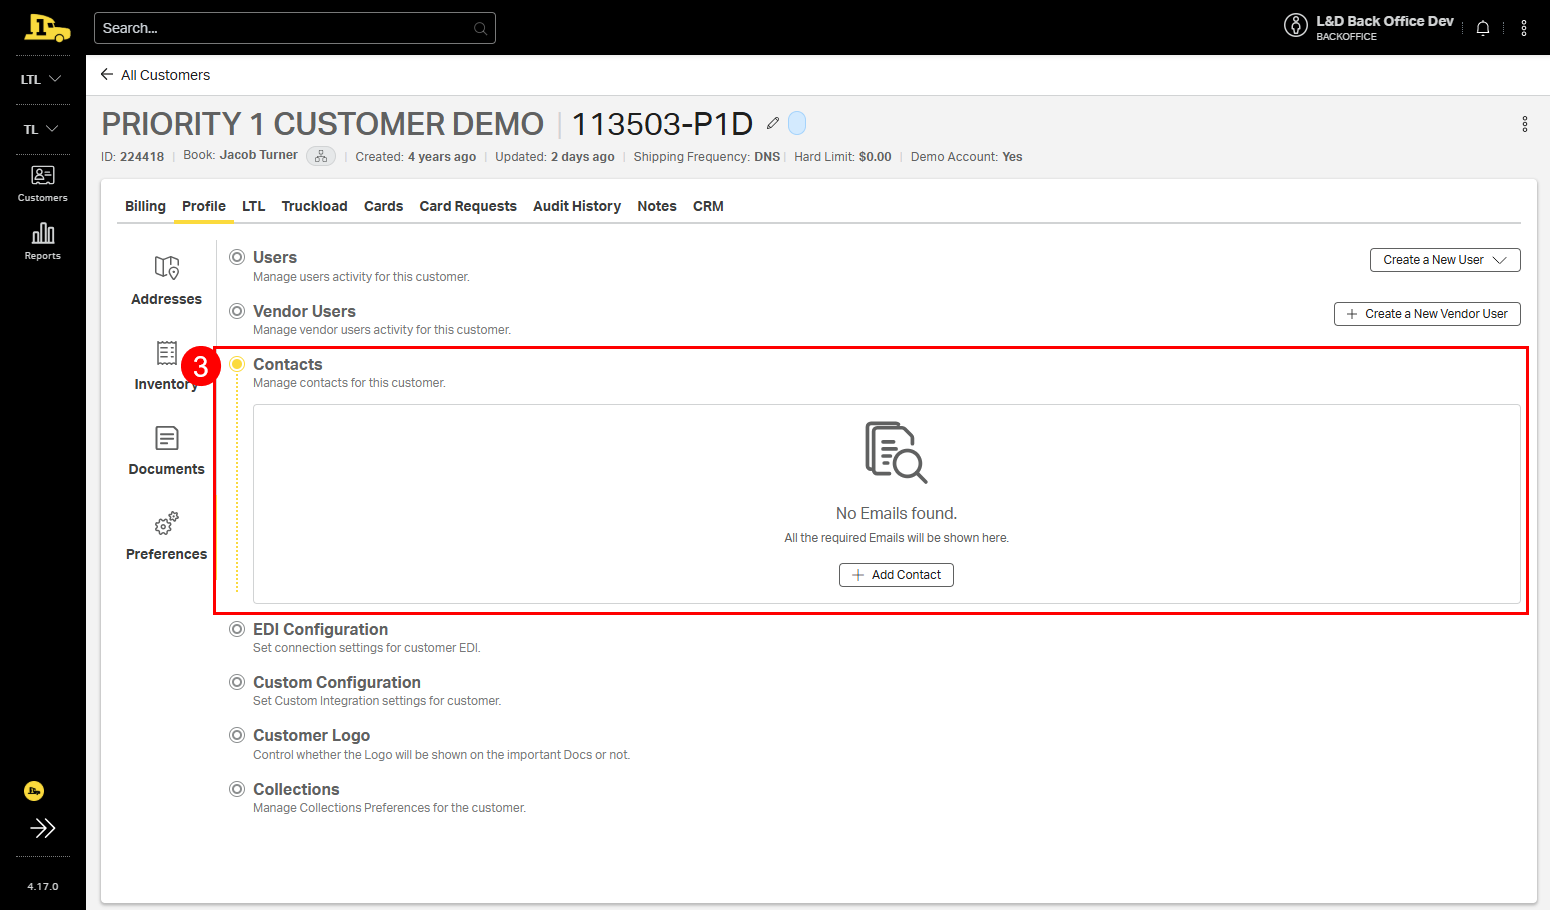
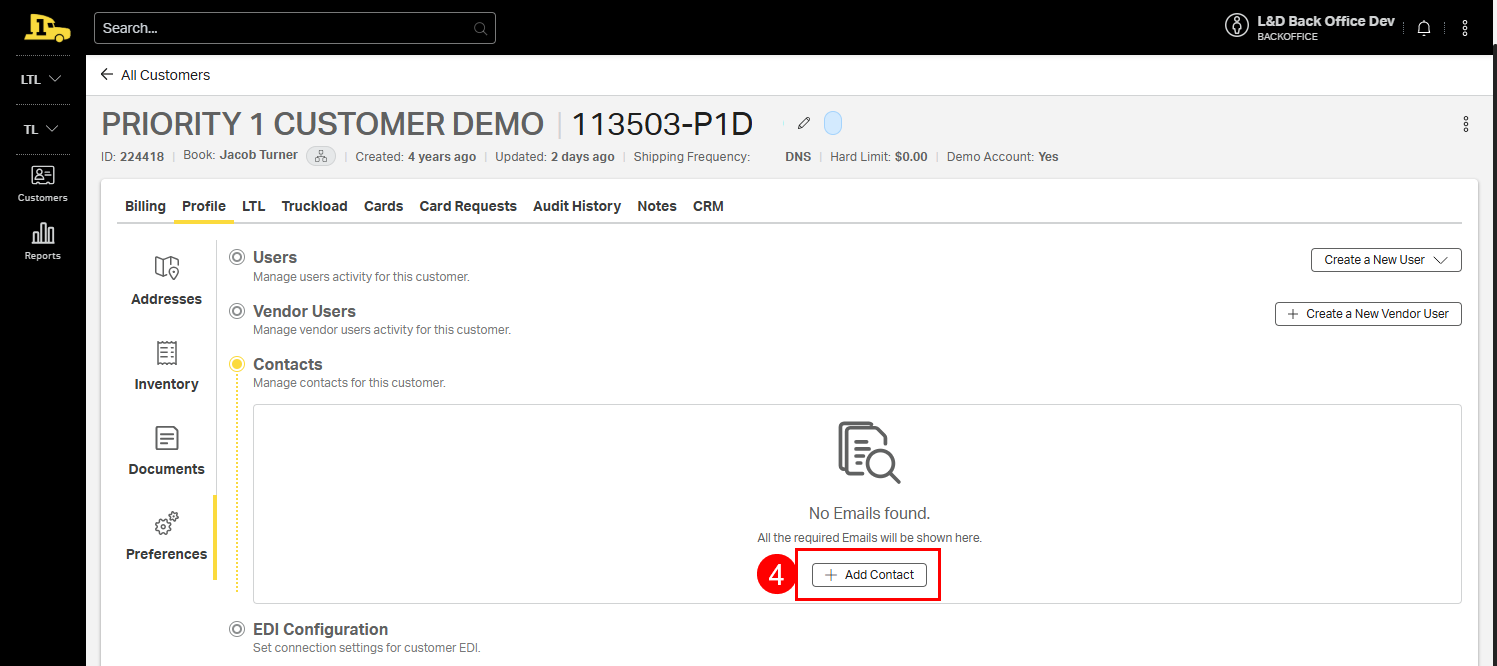
4. Select +Add Contact.
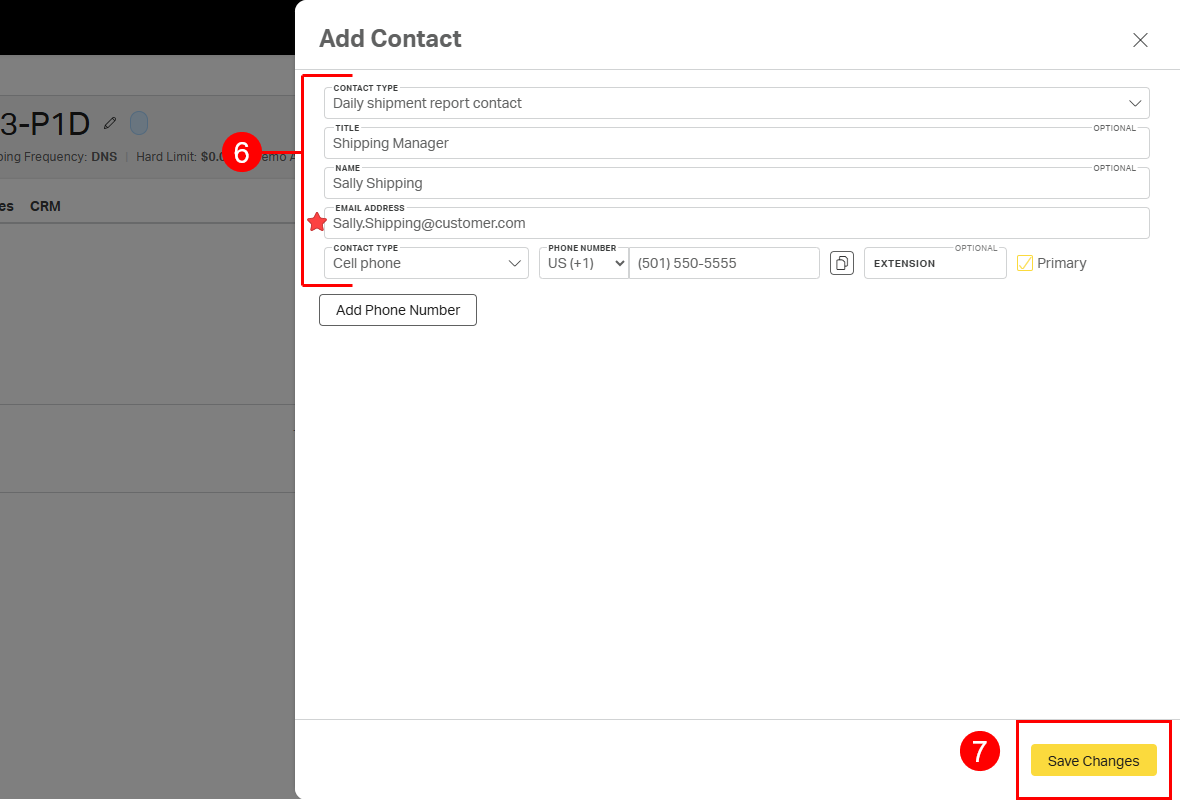
5. The Add Contact form will appear on the screen. Begin by selecting the appropriate Contact Type from the drop down list.
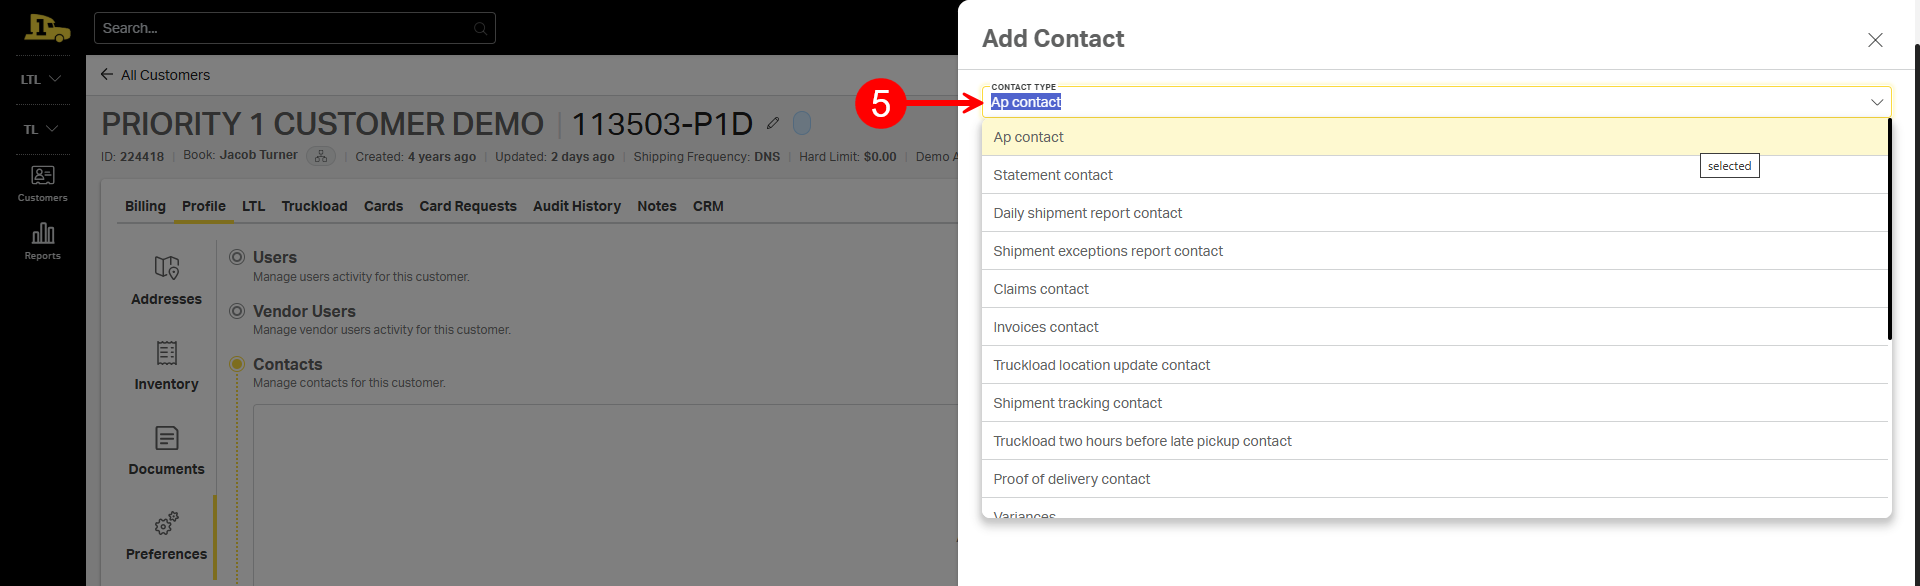
6. Complete the remainder of the form. An email address is required.
7. Select Save Changes to save the contact and exit the form.
The new contact will now be listed in the customer's contacts.
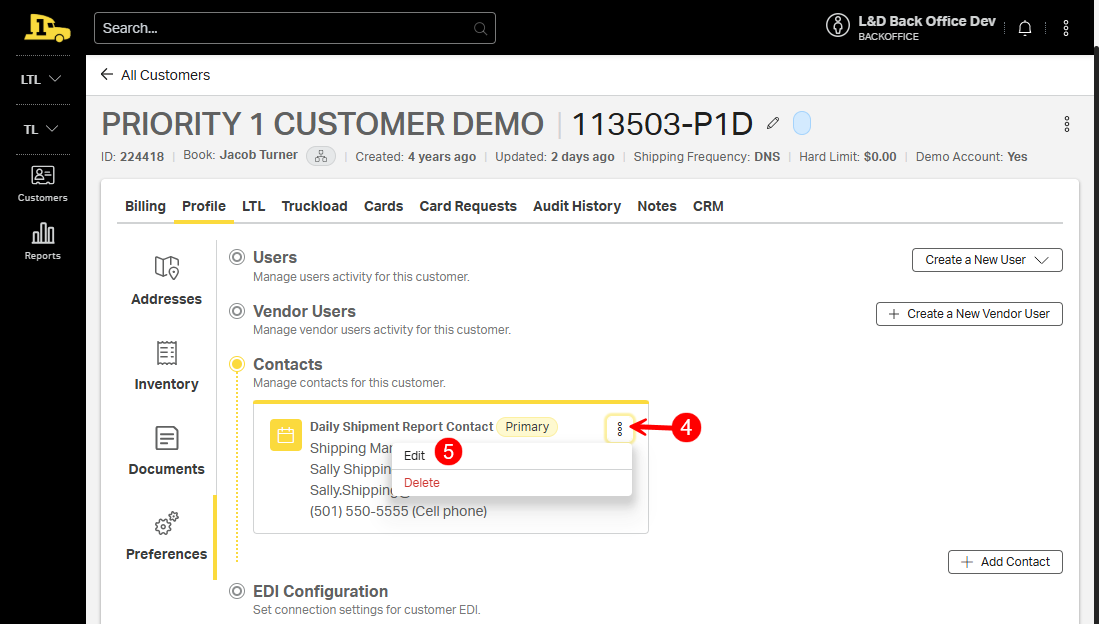
Editing an Existing Contact
1. From the customer account, select Profile.
2. Select Preferences.
3. Select Contacts to view currently saved contacts.
4. Select the kebab menu on the desired contact card.
5. Select Edit.
6. Use the resulting Edit Contact form to update the contact's information.
7. Select Save Changes to save the updates and exit the form.

⚠️ Note: Only members of the Priority1 collections team can update AP contacts. If changes are needed, contact a member of the collections team directly.