
Using the Inventory List
The Inventory feature in Cabo helps you streamline LTL quoting by saving commonly used commodity details for a customer. This reduces time spent re-entering data, and more importantly, prevents reclass and reweigh variances by ensuring accurate, consistent commodity info on each quote.
How to Add Inventory Items
You can save inventory items several ways, including directly from the quote form and from the customer’s profile.
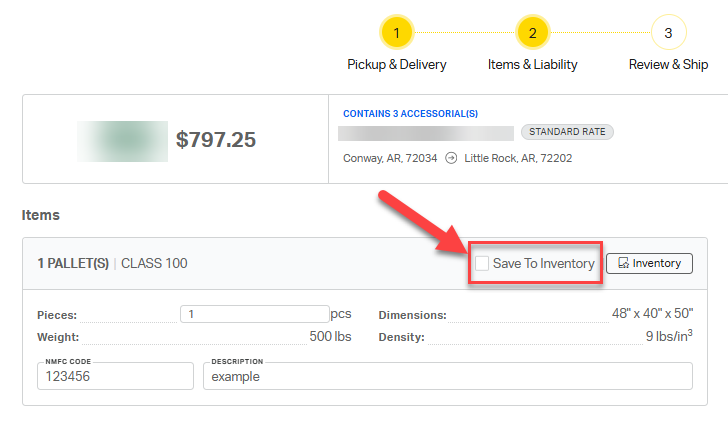
Option 1: From the Booking Page
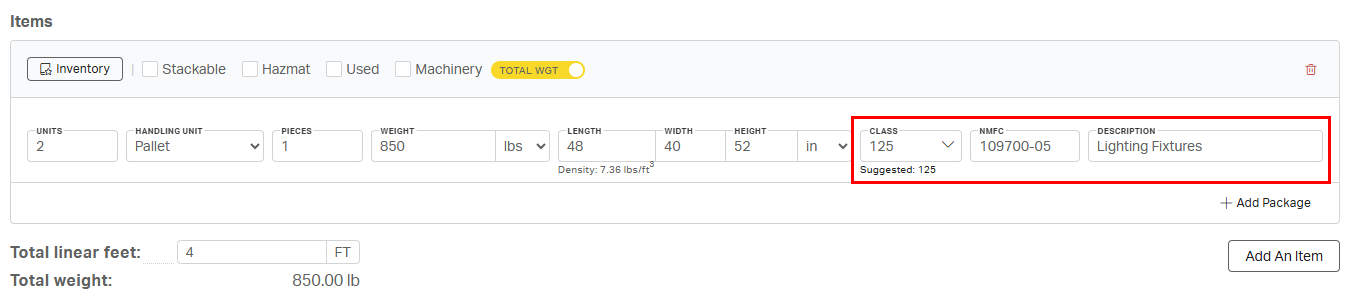
- On Step 2: Items & Liability, enter the item details as usual.
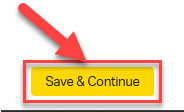
- Check the Save to Inventory box before selecting Save & Continue.
This adds the item to that customer’s inventory list for future use.
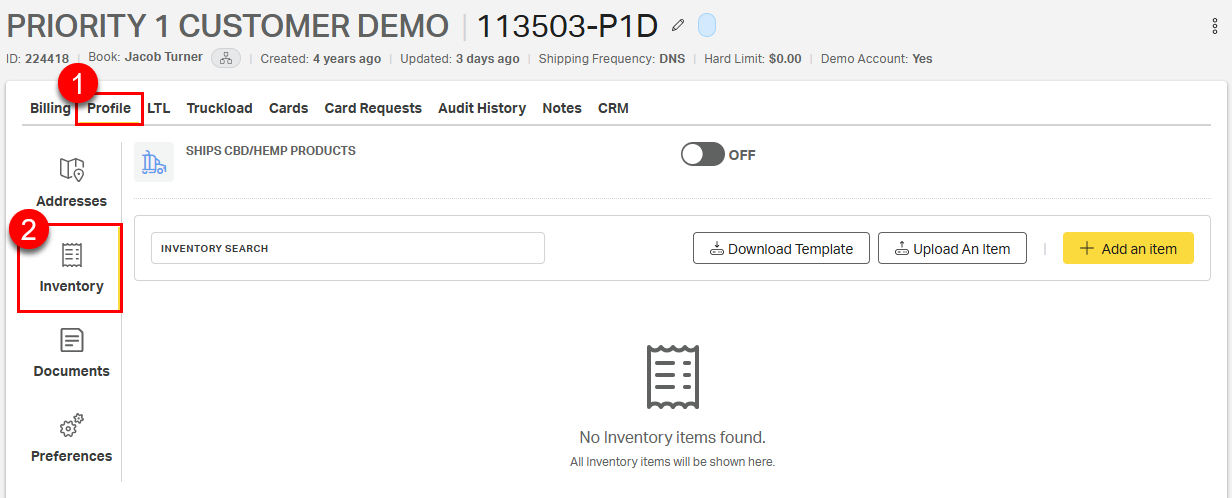
Option 2: Individually from the Customer’s Profile
Go to the customer’s Profile, then select the Inventory tab.
Select + Add an Item.
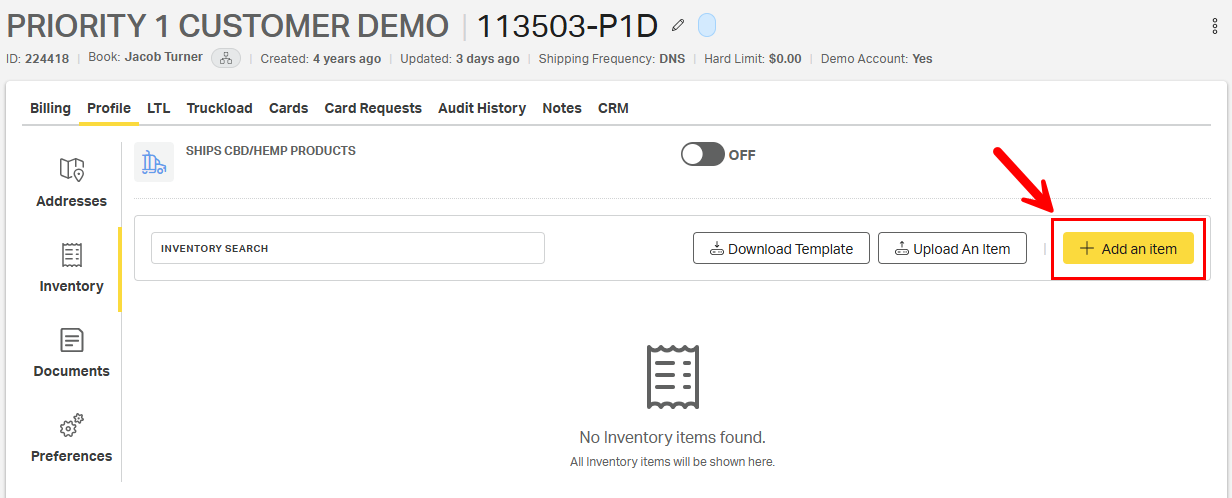
Fill in the required details and select Add Item to save.

Auto-Fill for Common Items
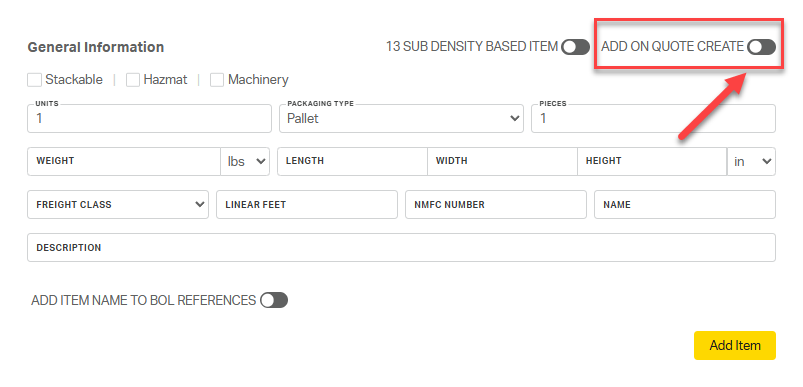
- When adding an inventory item, you’ll see an ADD ON QUOTE CREATE toggle.
- Turn this ON to have that item automatically added to every new quote for that customer.
- Only use this if the customer consistently ships the exact same item with the same weight, dimensions, and class.
⚠️Note: Only use auto-fill with a straight class NMFC and consistent density. Otherwise, it may lead to incorrect classifications.
Auto-Fill for Density Items (13 Subclasses)
- 13 SUB DENSITY BASED ITEM is the second available toggle found on the Add Item page.
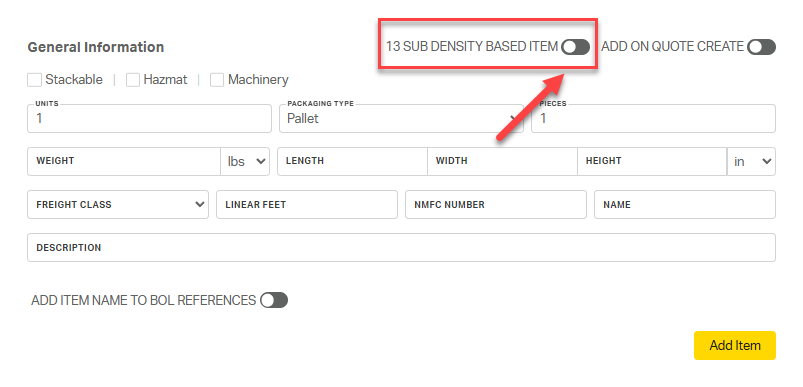
- Turn this ON to have the item's subclass automatically added to the end of the NMFC number on the quote screen. Once toggled on, weight, dimensions, freight class, and linear feet fields will no longer be available.
⚠️Note: The auto populated subclass assumes the item has 13 subclasses. If your item has a different number of subclasses, the populated subclass may be incorrect.
Option 3: In Bulk from the Customer’s Profile
For customers with many commodity types or density-based commodities, use the bulk-add feature to quickly build the customer's inventory.
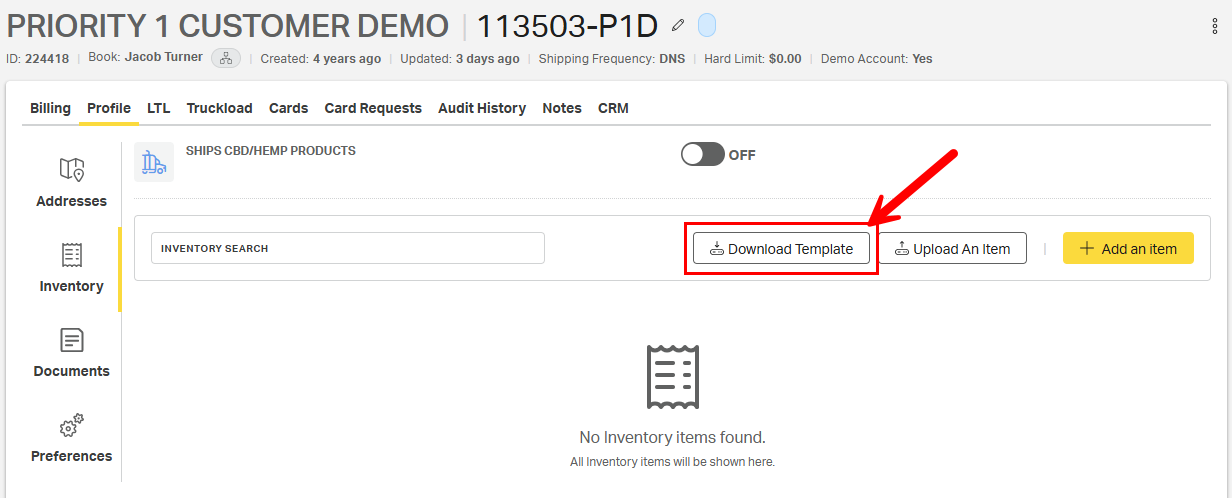
From the customer’s Profile, select Inventory.
Select Download Template.
Fill in the resulting Excel download with the commodity information, using the SAMPLE sheet as a guide.
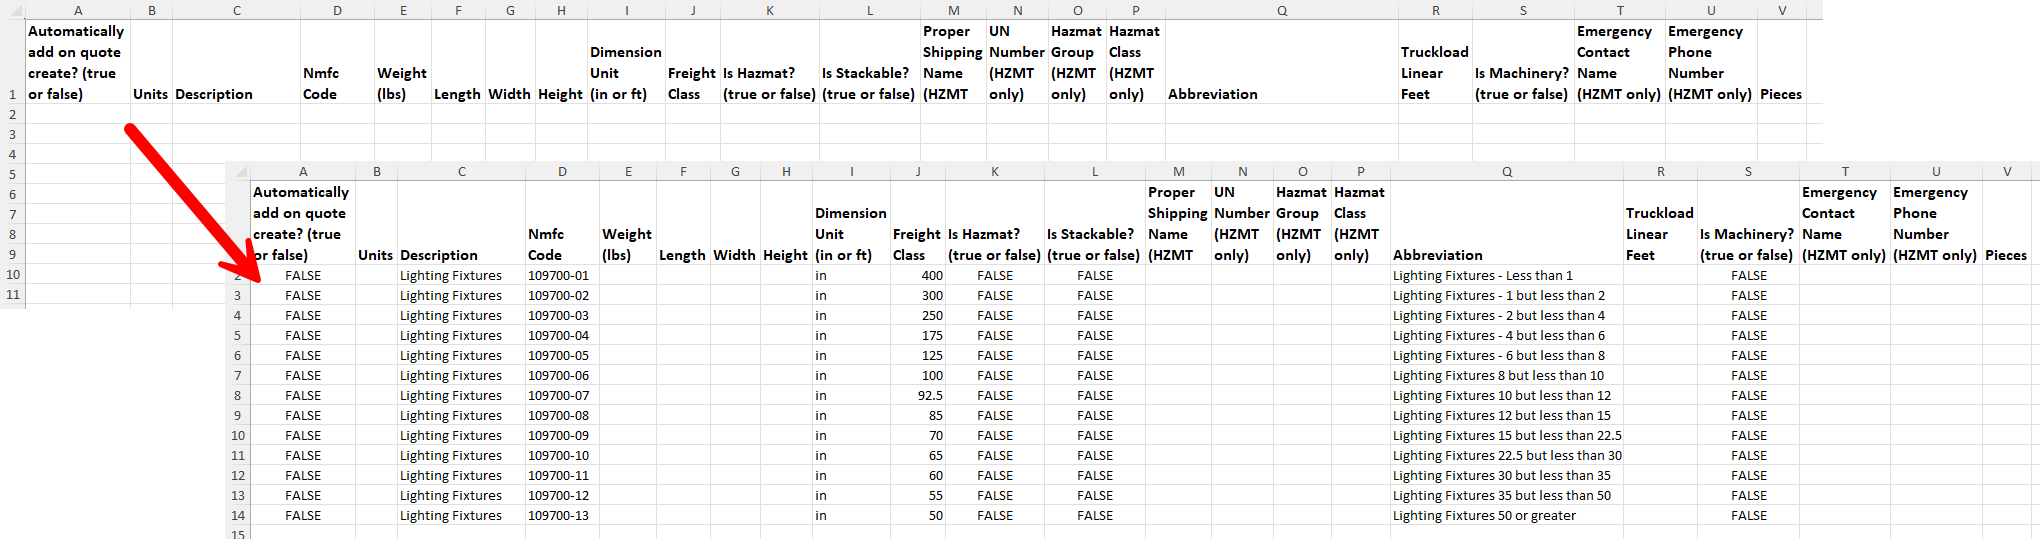
Understanding Key Template Fields
- Automatically Add on Quote Create. An item marked "true" in Automatically Add on Quote Create will be automatically added to all future quotes. Only one item can be marked "true" in the Automatically add on quote create column.
- Description. Anything typed in Description will be populated into the item description field on the LTL quote request form.
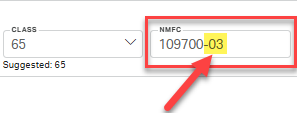
- NMFC Code. For density-based items, include the subclass with your NMFC code to deter variances.
- Abbreviation. The abbreviation is how the item will be listed in the inventory. Adding hints, such as a density range, with the item can be helpful for quickly selecting the correct inventory item on the LTL quote request form.

Uploading the File
Once the inventory form is complete, delete the sample sheet and save the file.
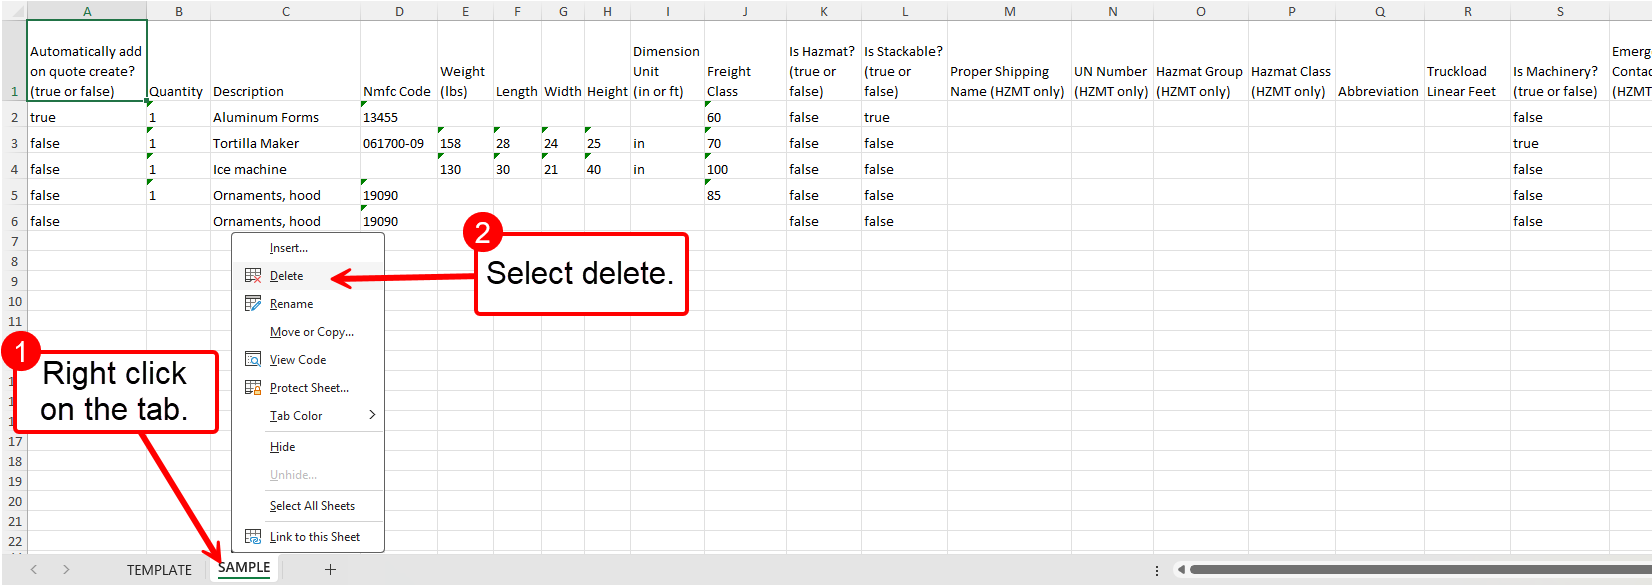
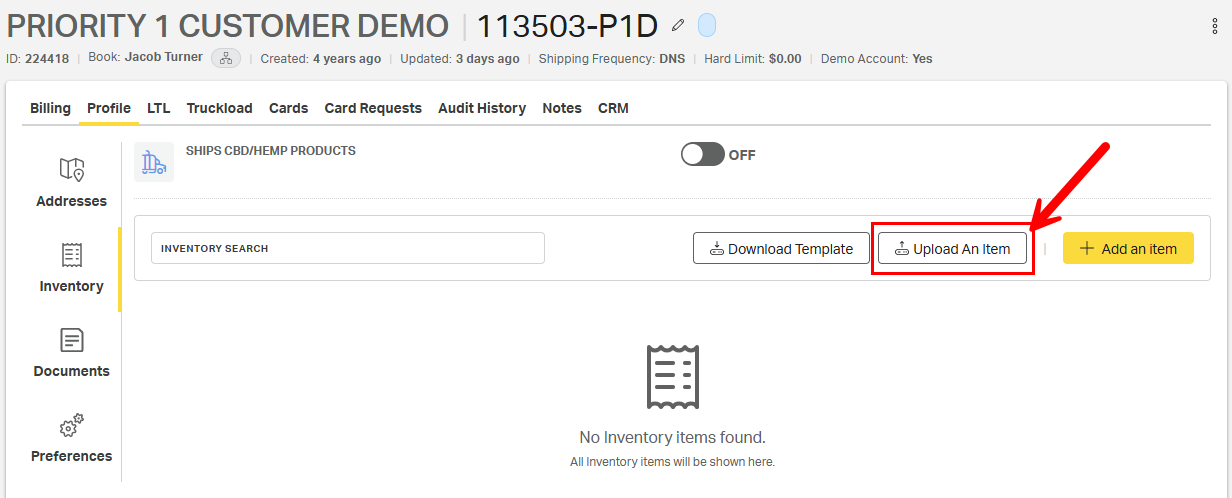
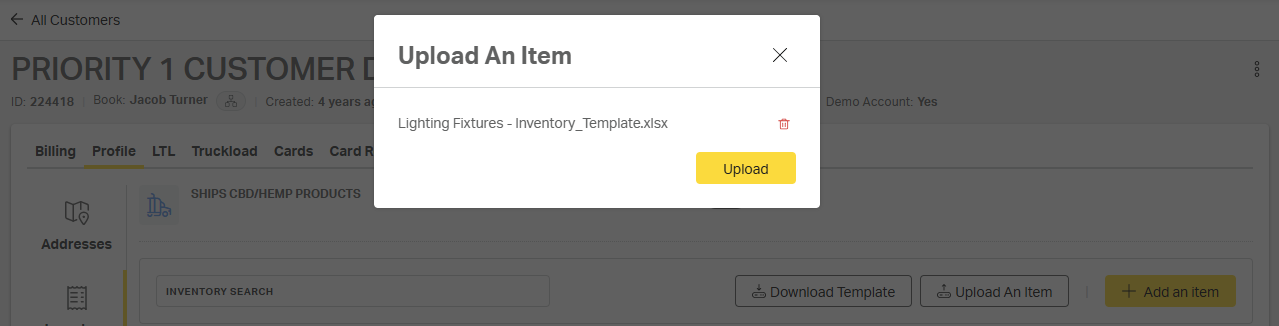
The file is now ready to upload. Return to the customer inventory page (Customer > Profile > Preferences > Inventory) and select Upload An Item.
Add the saved file with the resulting dialogue box and select Upload an Item.
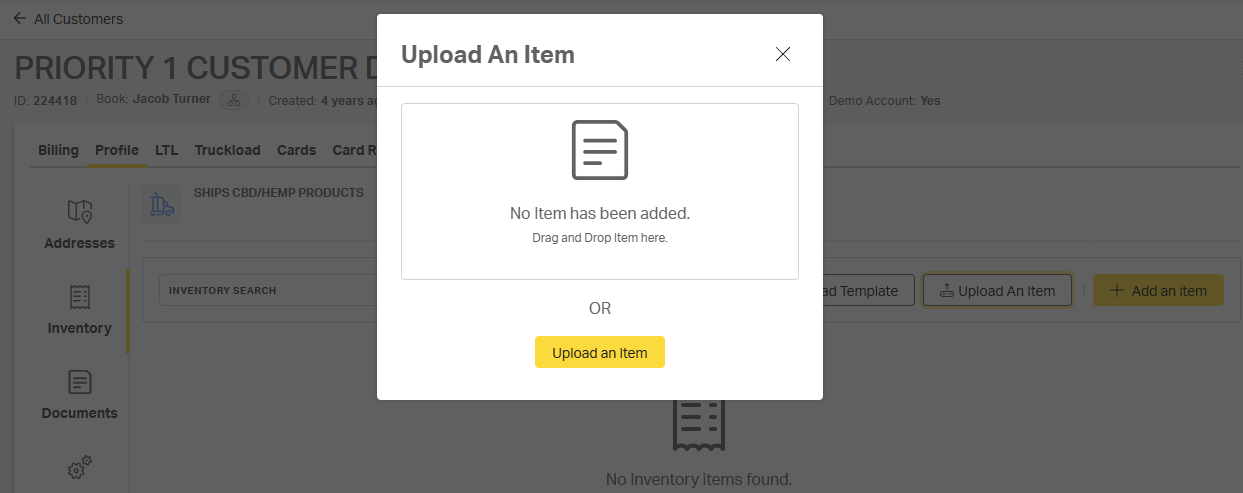
Select Upload to confirm the file upload.
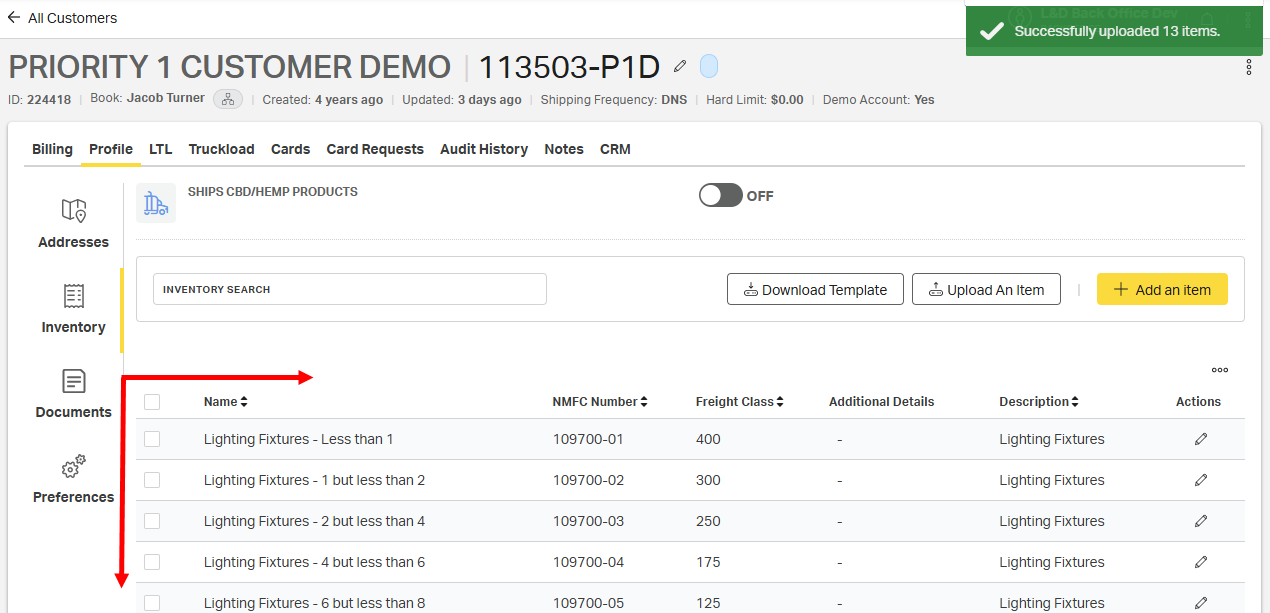
All of the items in the template upload will be added to the customer's inventory.
Option 4: Copied from Another Customer Profile
When setting up a new customer who ships the same items as an existing customer, use the Copy All Inventory feature to quickly create a complete inventory for the new customer.
To begin, navigate to the customer inventory that needs to be copied. From the customer inventory page:
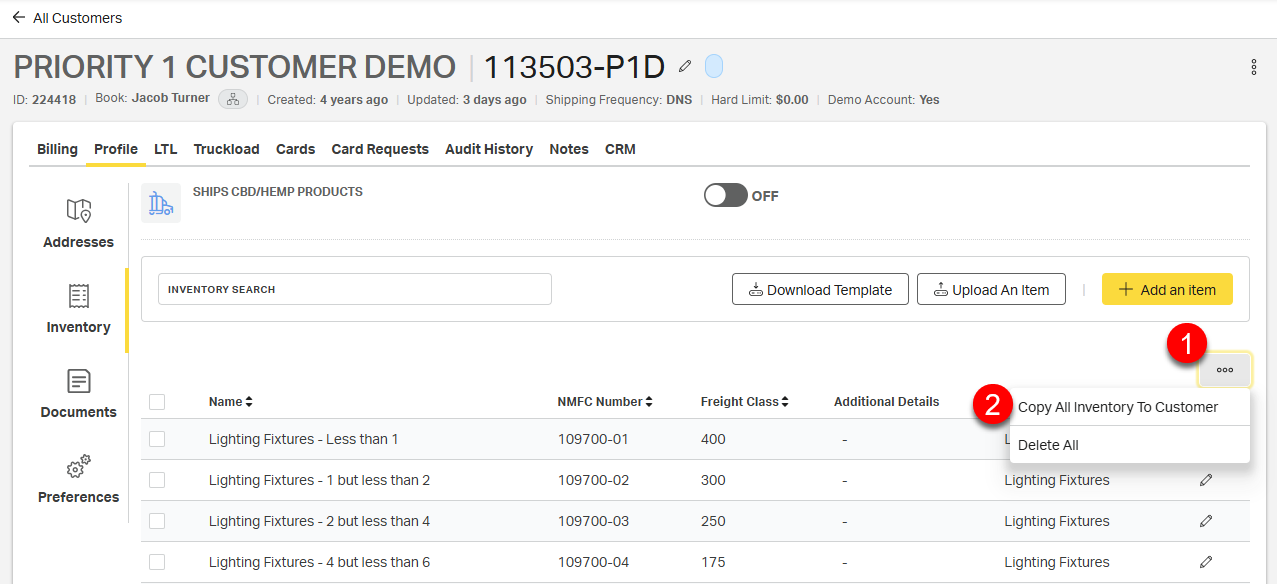
1. Select the meatball menu icon directly above the inventory items.
2. Select Copy All Inventory to Customer.
On the resulting dialogue box, search for and select the name of the customer to copy the inventory to, then select Copy.
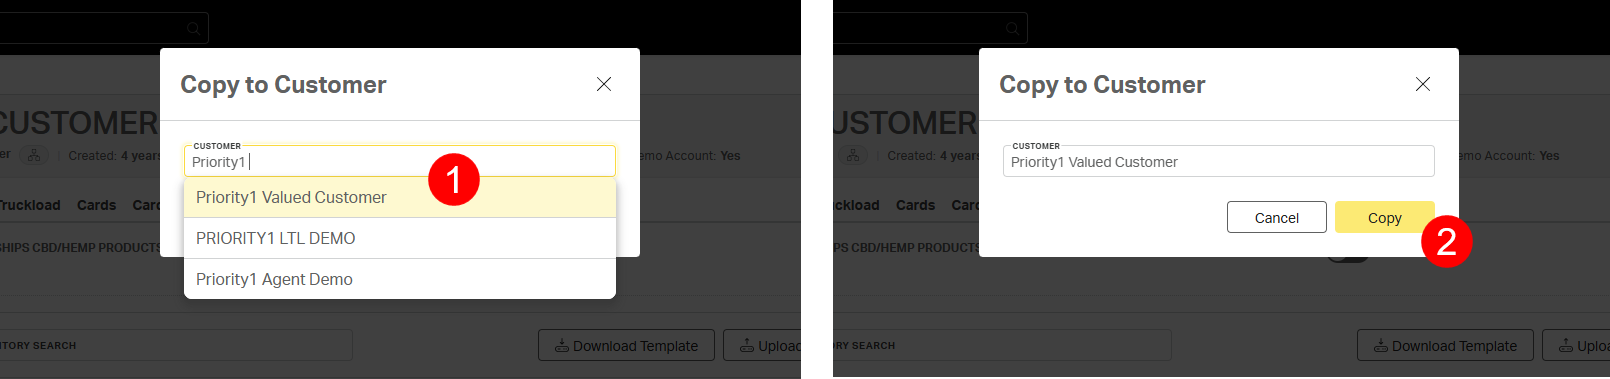
A green Inventory copied alert will appear on the screen to confirm that the process is complete.

All of the items from the existing customer will be added to the new customer's inventory.

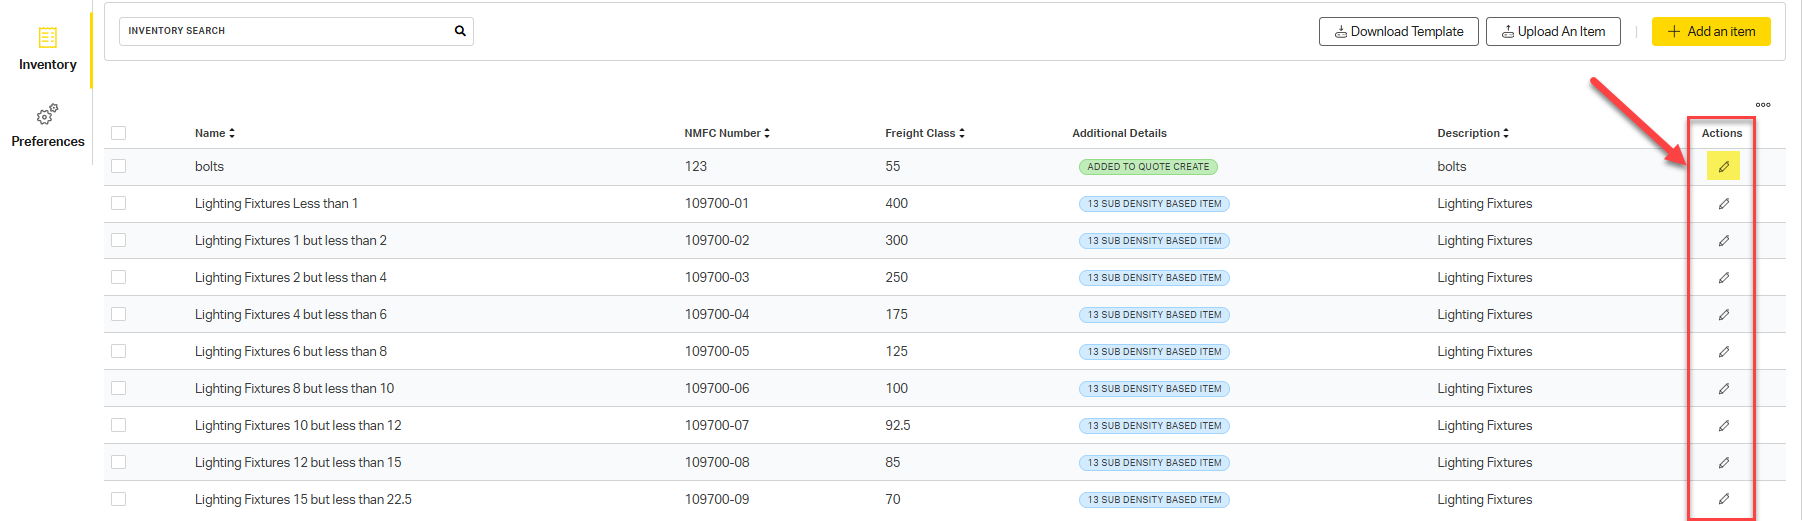
Editing Inventory Items
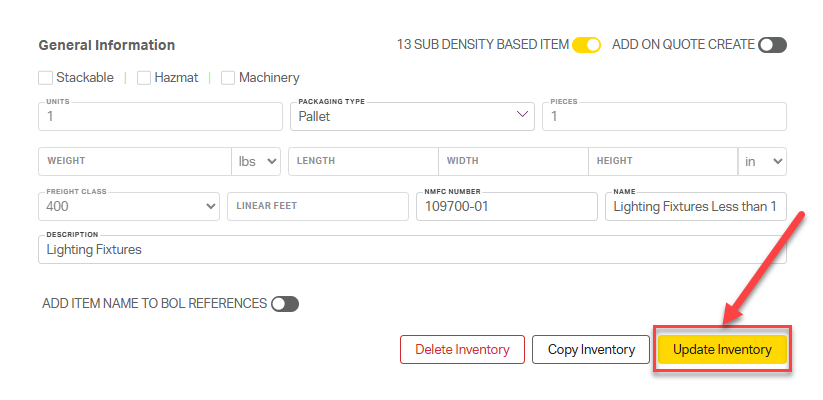
If changes need to be made on a pre-saved inventory item, select the edit pencil to the right of the item under the customer’s inventory list, make any needed updates, then select Update Inventory.
How to Use Inventory Items on a Quote
When building a new quote:
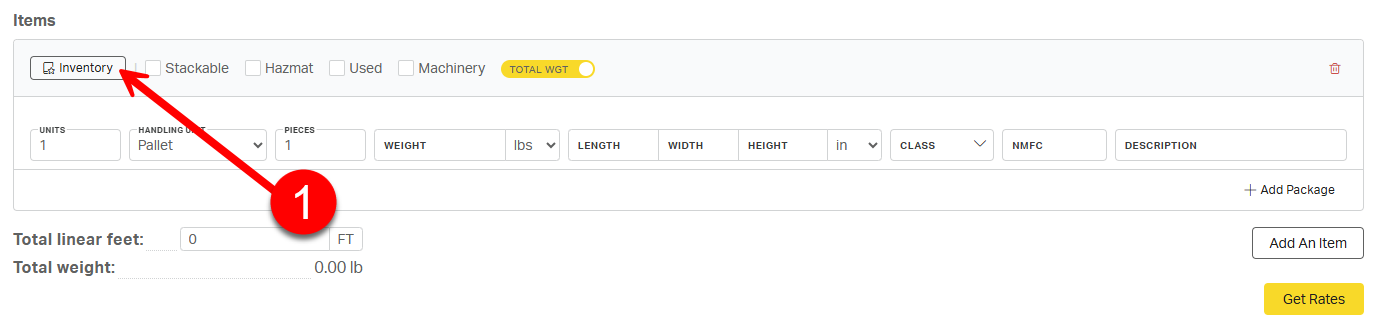
On the New Quote page, click the Inventory button under the Items section.
Select an item from the customer’s saved list.
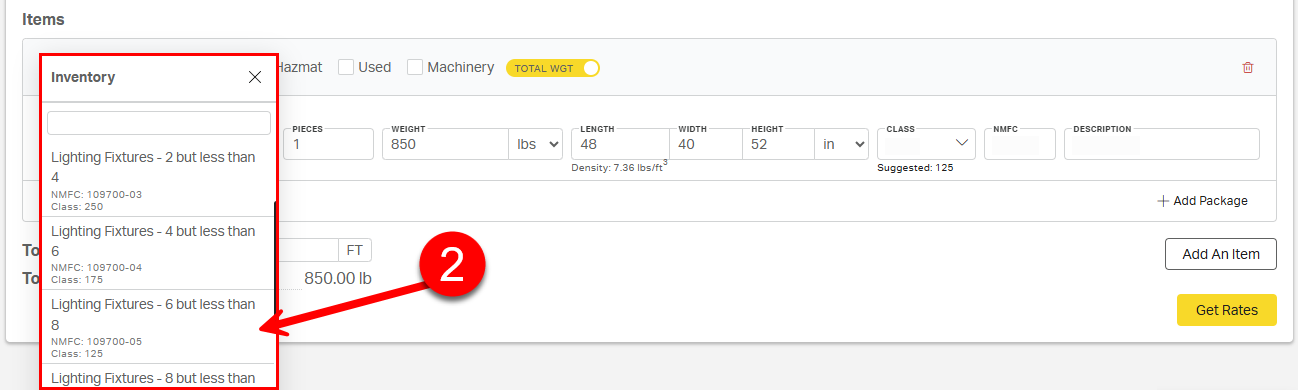
The form will auto-fill with the selected item's details.
Why It Matters
Using the inventory list:
✅ Saves time when quoting
✅ Reduces input errors
✅ Avoids reclasses and reweighs
✅ Keeps quotes consistent and accurate