
LTL Shipment Page
A Shipment page gives a detailed view of each LTL shipment, including pickup and delivery details, carrier information, reference numbers, and tracking updates. From here, users can update shipment status, set tracking notifications, and keep both internal users and customers informed.
Overview of the Shipment Screen
The shipment's BOL number and "current status" will be displayed at the top of the page, along with the date the shipment was created in Cabo.
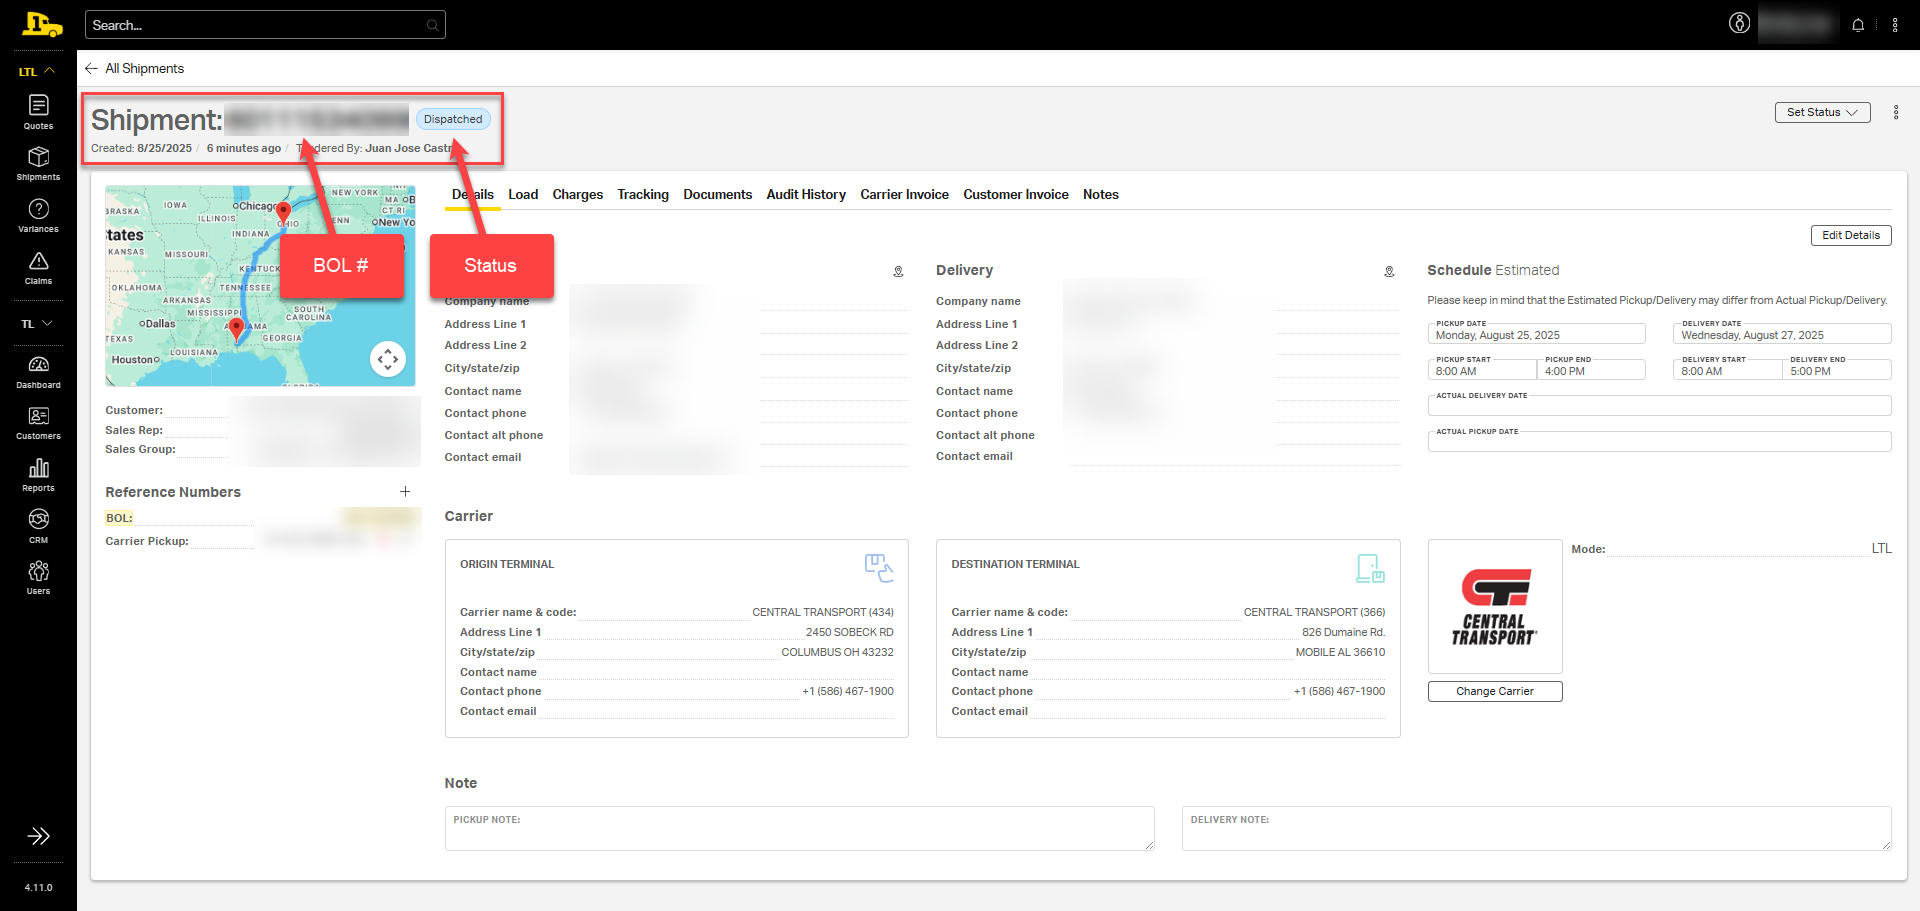
💡 Tip: Select the BOL number to copy it to your clipboard, making it easy to paste into an email for a customer or team member.
ℹ️ To learn how to navigate to this screen, review the Looking Up LTL Shipments article.
Shipment Status
Each shipment is assigned a single "current status" from the list below:
- Pending: The shipment has not been tendered to the carrier yet. Additional steps are required.
- Dispatched: The shipment has been tendered to the carrier.
- In Transit: The shipment has been picked up by the carrier and is on its way to its destination.
- Delivered: The shipment has arrived at its destination.
- Expired: The shipment was pending, but additional action was not taken in time to tender it to the carrier, and now the rate has expired. To move forward, a new quote must be created, then booked.
- Canceled: The shipment has been canceled and is no longer scheduled for pickup.

The "current status" on this example is dispatched.
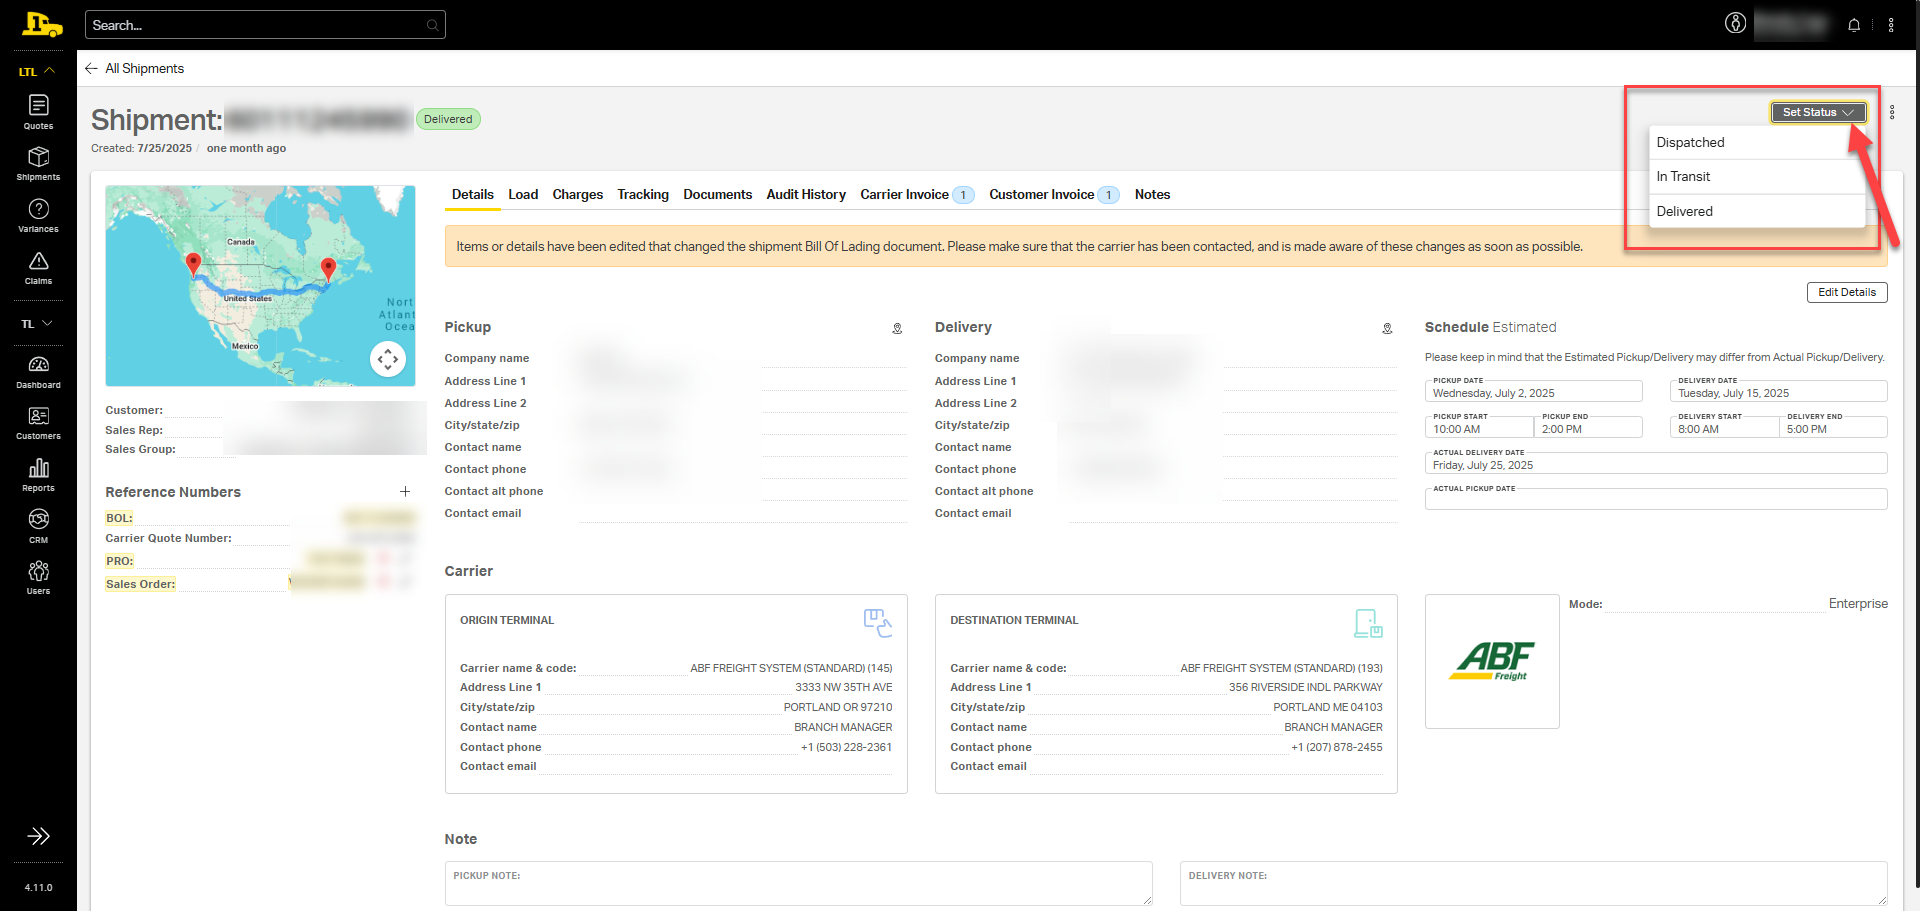
Manually Updating a Shipment's Status
- Manually update the status of a shipment by selecting the Set Status button in the top right corner of the shipment page. From the dropdown options, select the current status of the shipment and the shipment's status will automatically update in the header.
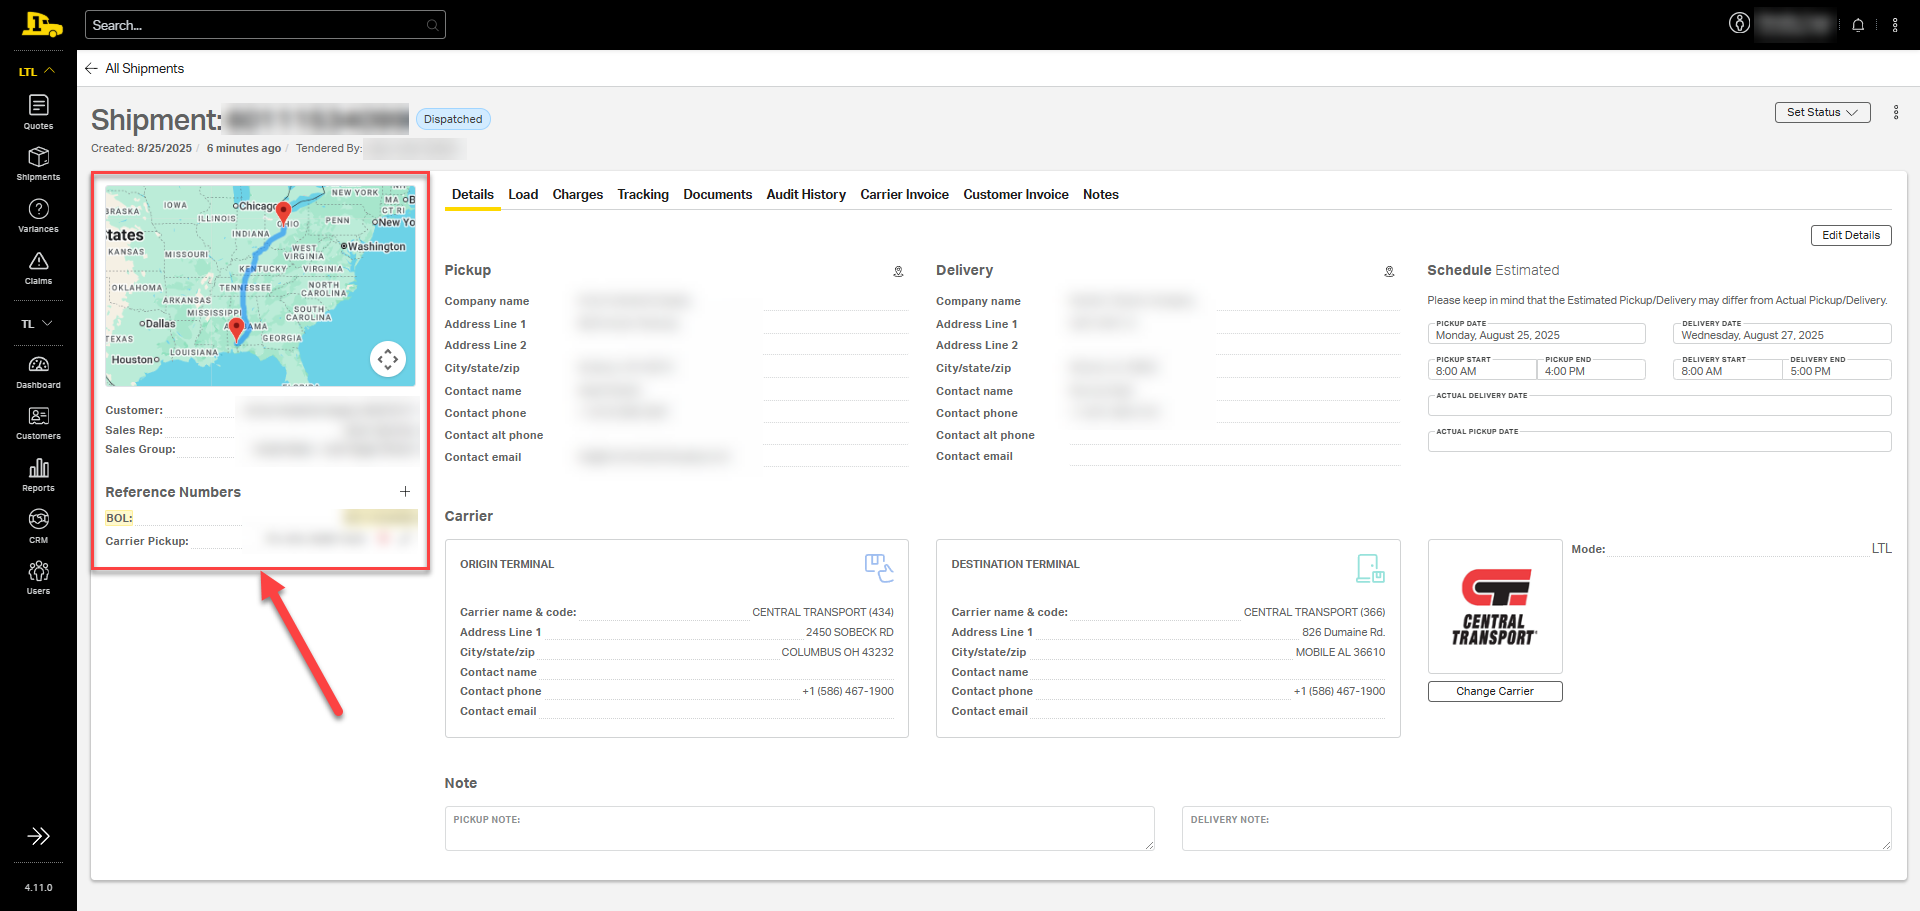
Quick Shipment Details
A snapshot of the shipment lane and key shipment details, such as the customer's name, sales representative, sales group, and shipment reference numbers can be quickly accessed from the information panel on the left side of the screen. This information panel remains visible from all tabs on the Shipment page.
Shipment Reference Numbers
Reference numbers are unique identifiers used throughout the lifecycle of a shipment. They can come from Priority1, the carrier, or the customer, and may change as the shipment moves from quoting to pickup to delivery. The most common reference numbers include:
- BOL: The bill of lading number identifies the shipment created by Priority1. BOLs are used internally and with customers.
- Carrier Quote Number: The identifier for the quote provided by the carrier.
- Carrier Pickup: The reference number provided by the carrier before shipment pickup. Once a shipment is picked up by the carrier, a pro number is issued.
- PRO Number: A unique reference number used for tracking and given by the carrier once the shipment is picked up.
- Pre PRO Number: A temporary reference number used for tracking and preparation assigned to a shipment before the official PRO number is issued.
- Customer Specific Numbers: Identifiers set by the customer for reference, such as purchase order (PO), sales order (SO), or a custom reference number.
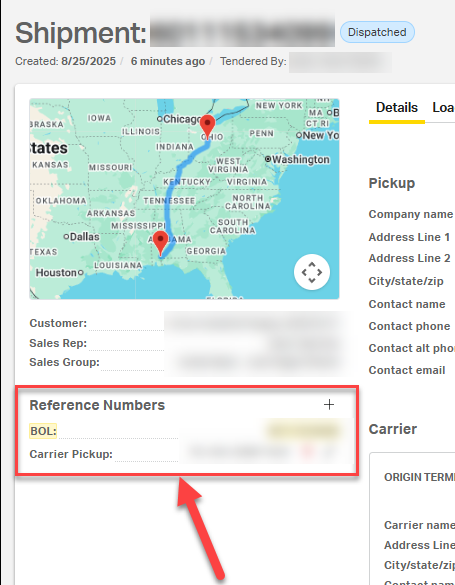
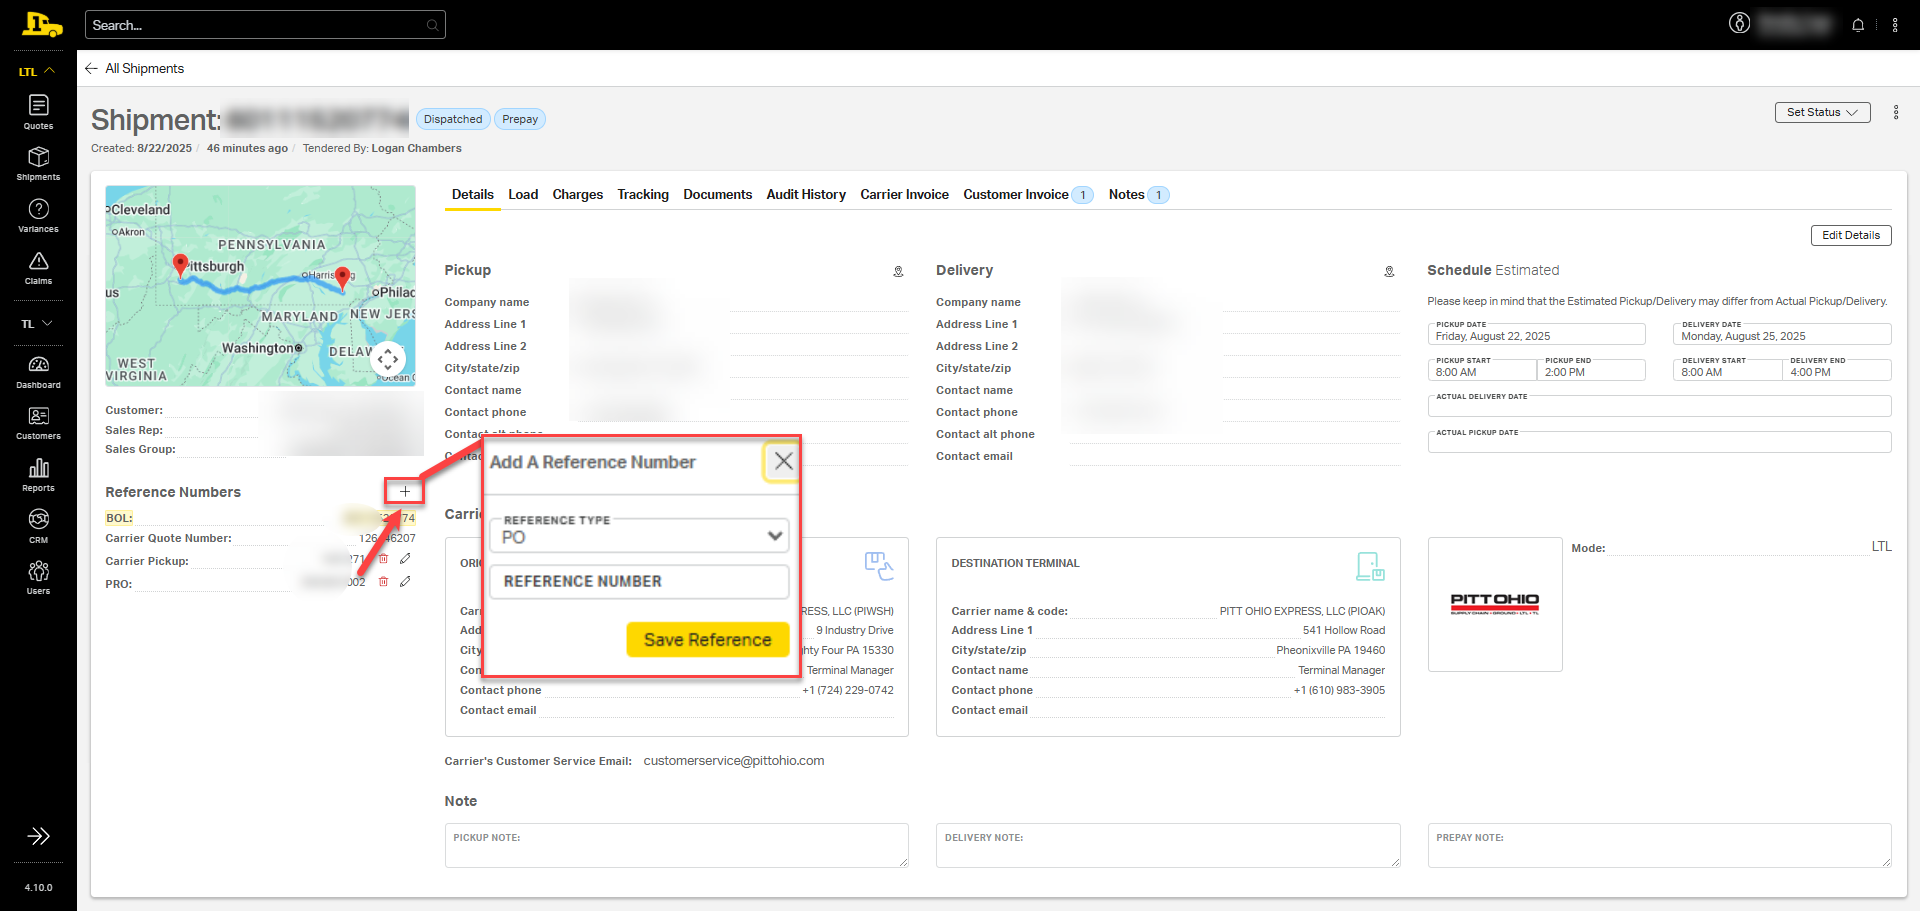
Adding a Reference Number
To manually add a new reference number to a shipment, select the plus sign (+) next to the Reference Number header; then select the reference type from the dropdown options. Type in the reference number in the text box; then select Save Reference. Any updated reference numbers will automatically update on the BOL for the shipment.
Navigating the Shipment Page
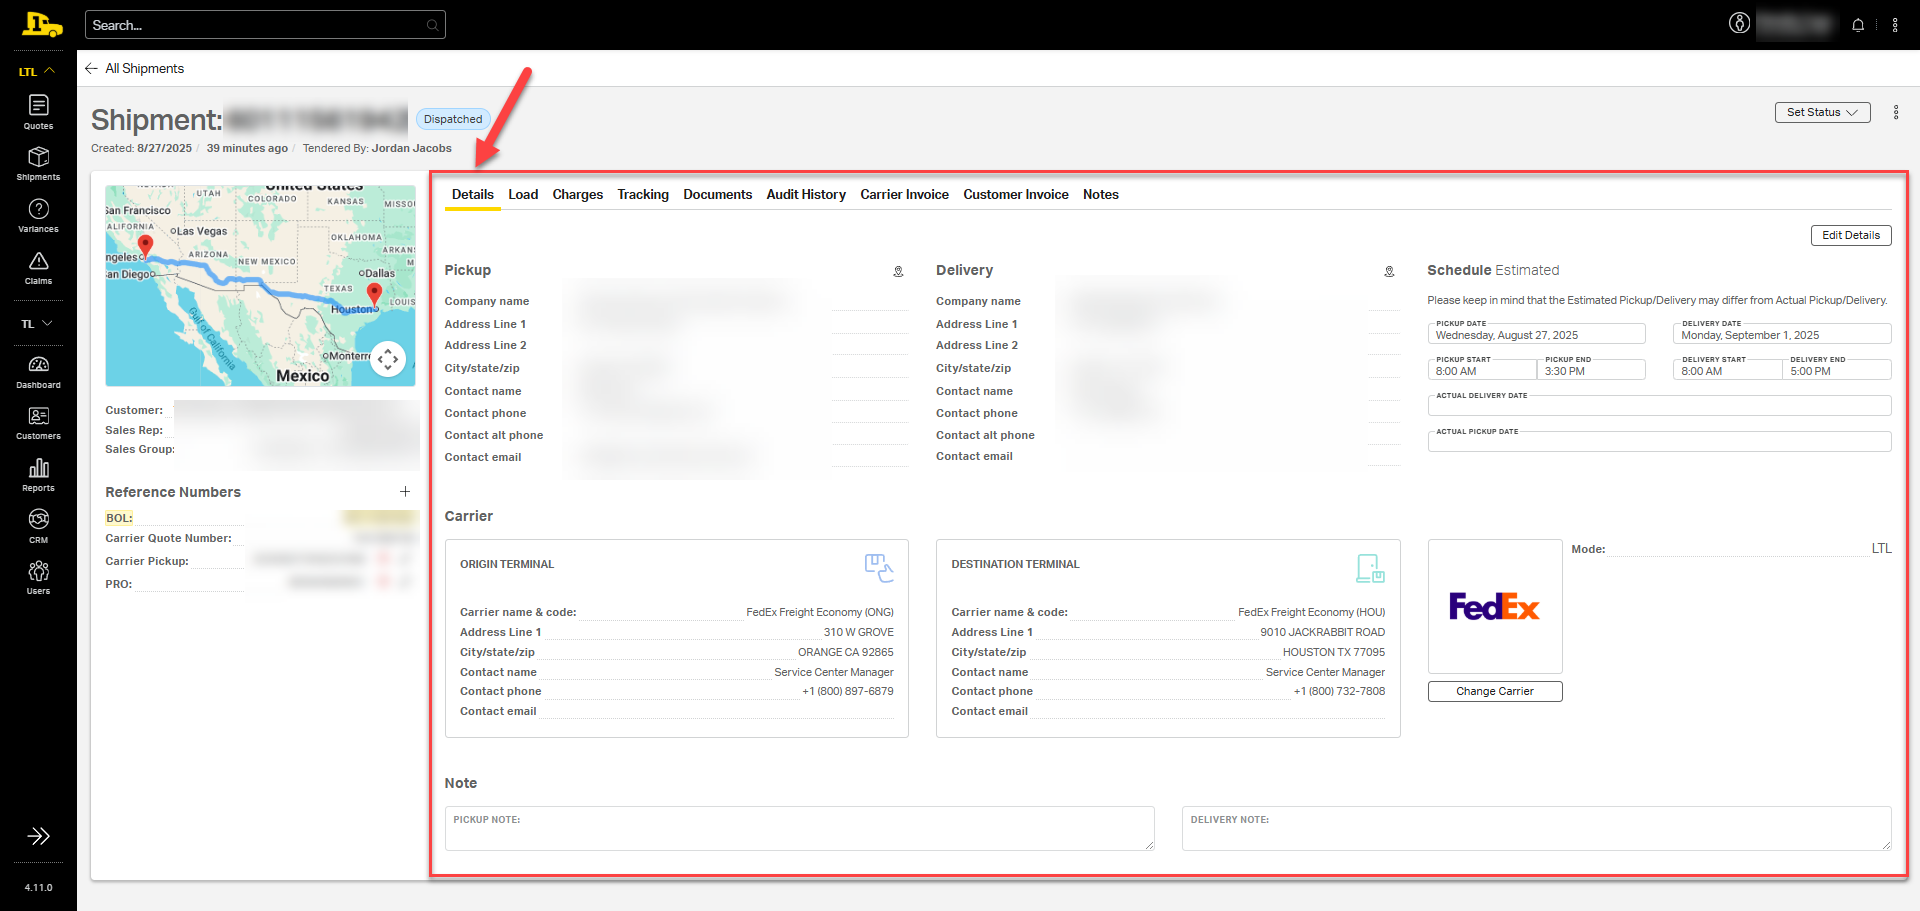
Details Tab
The Shipment page opens by default to the Details tab, which displays essential information about the shipment, making it easy to locate key details quickly.
- Pickup Details: Includes company name, full address, and contact information for pickup.
- Delivery Details: Includes company name, full address, and contact information for delivery.
- Schedule Estimated: Displays estimated pickup and delivery dates, along with pickup and delivery windows for both locations.
- ⚠️ Note: LTL shipments are not guaranteed for on-time pickup or delivery. Dates are always estimated. Set clear expectations with customers about the nature of LTL shipping.
- Carrier Origin: Details for the origin terminal, including name, code, address, and contact information.
- Carrier Destination: Details for the destination terminal, including name, code, address, and contact information
- Note: Any instructions or notifications for pickup and delivery that will appear on the BOL.
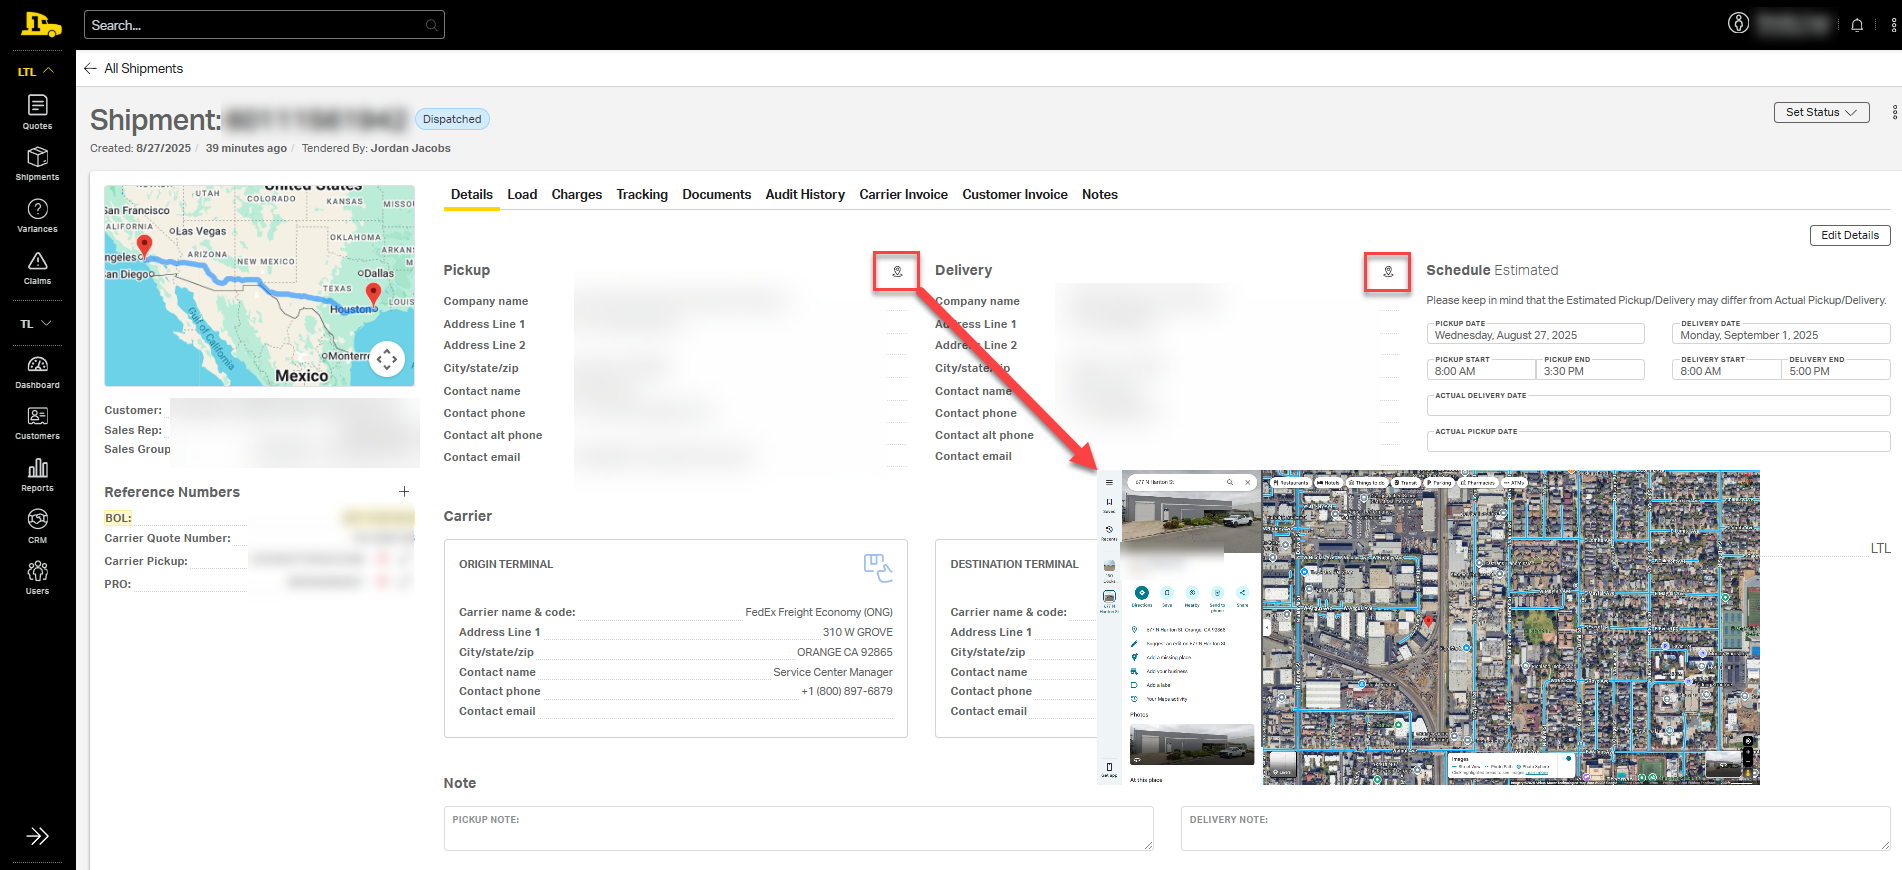
💡Tip: Selecting the pin icon next to the pickup or delivery address opens the location in Google Maps (in a new tab), making it easy to view the pickup or delivery sites to determine if any accessorials might be needed for pickup or delivery.
Load Tab
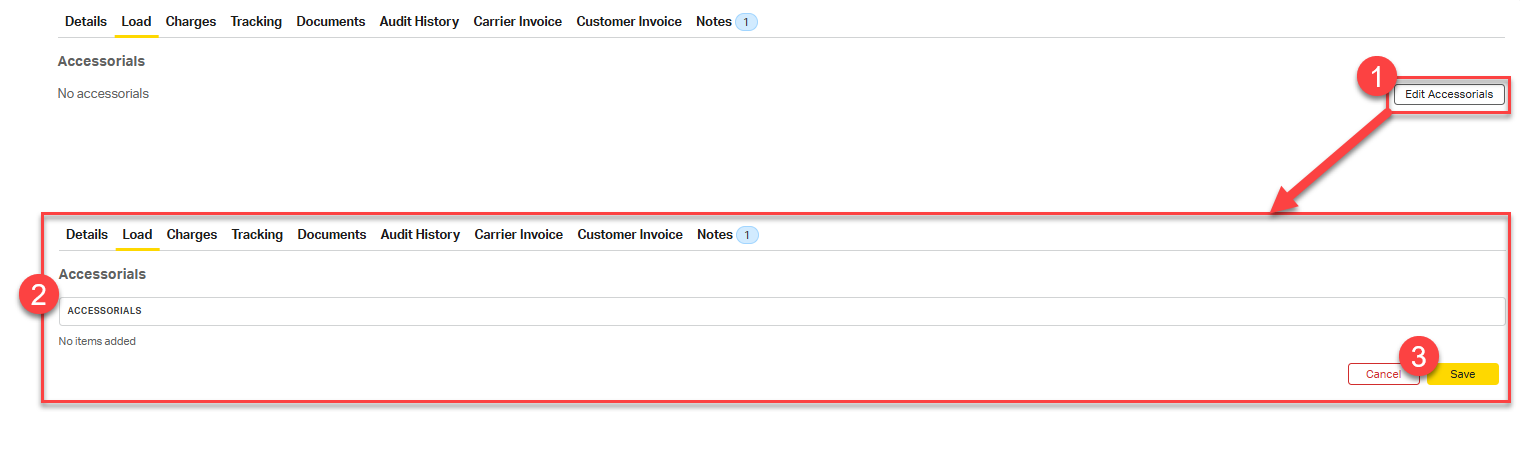
The Load tab displays details of the shipment, including accessorials, number of pallets, pieces, weight, dimensions, class, NMFC, and description. Total weight, customer cost, and revenue are shown in the bottom-right corner of the screen.
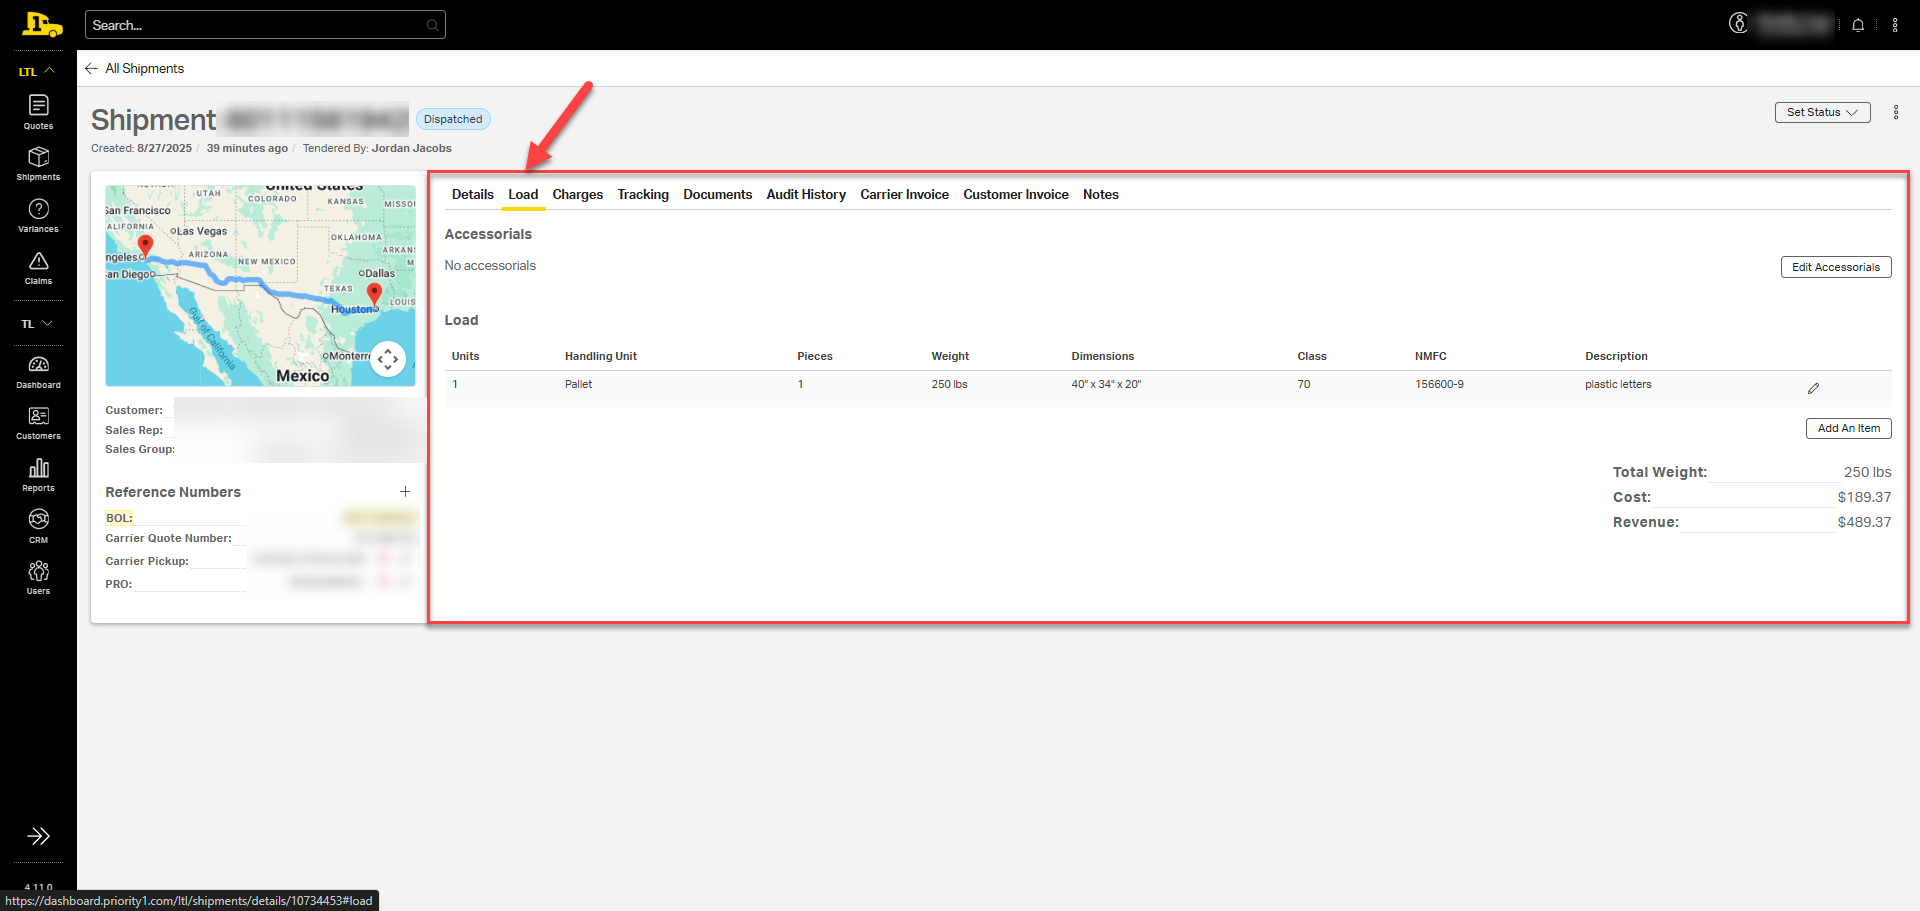
Accessorials can be added or edited from the Load tab by using the Edit Accessorials button. Any changes to accessorials will automatically update on the BOL found in the Documents tab.
Charges Tab
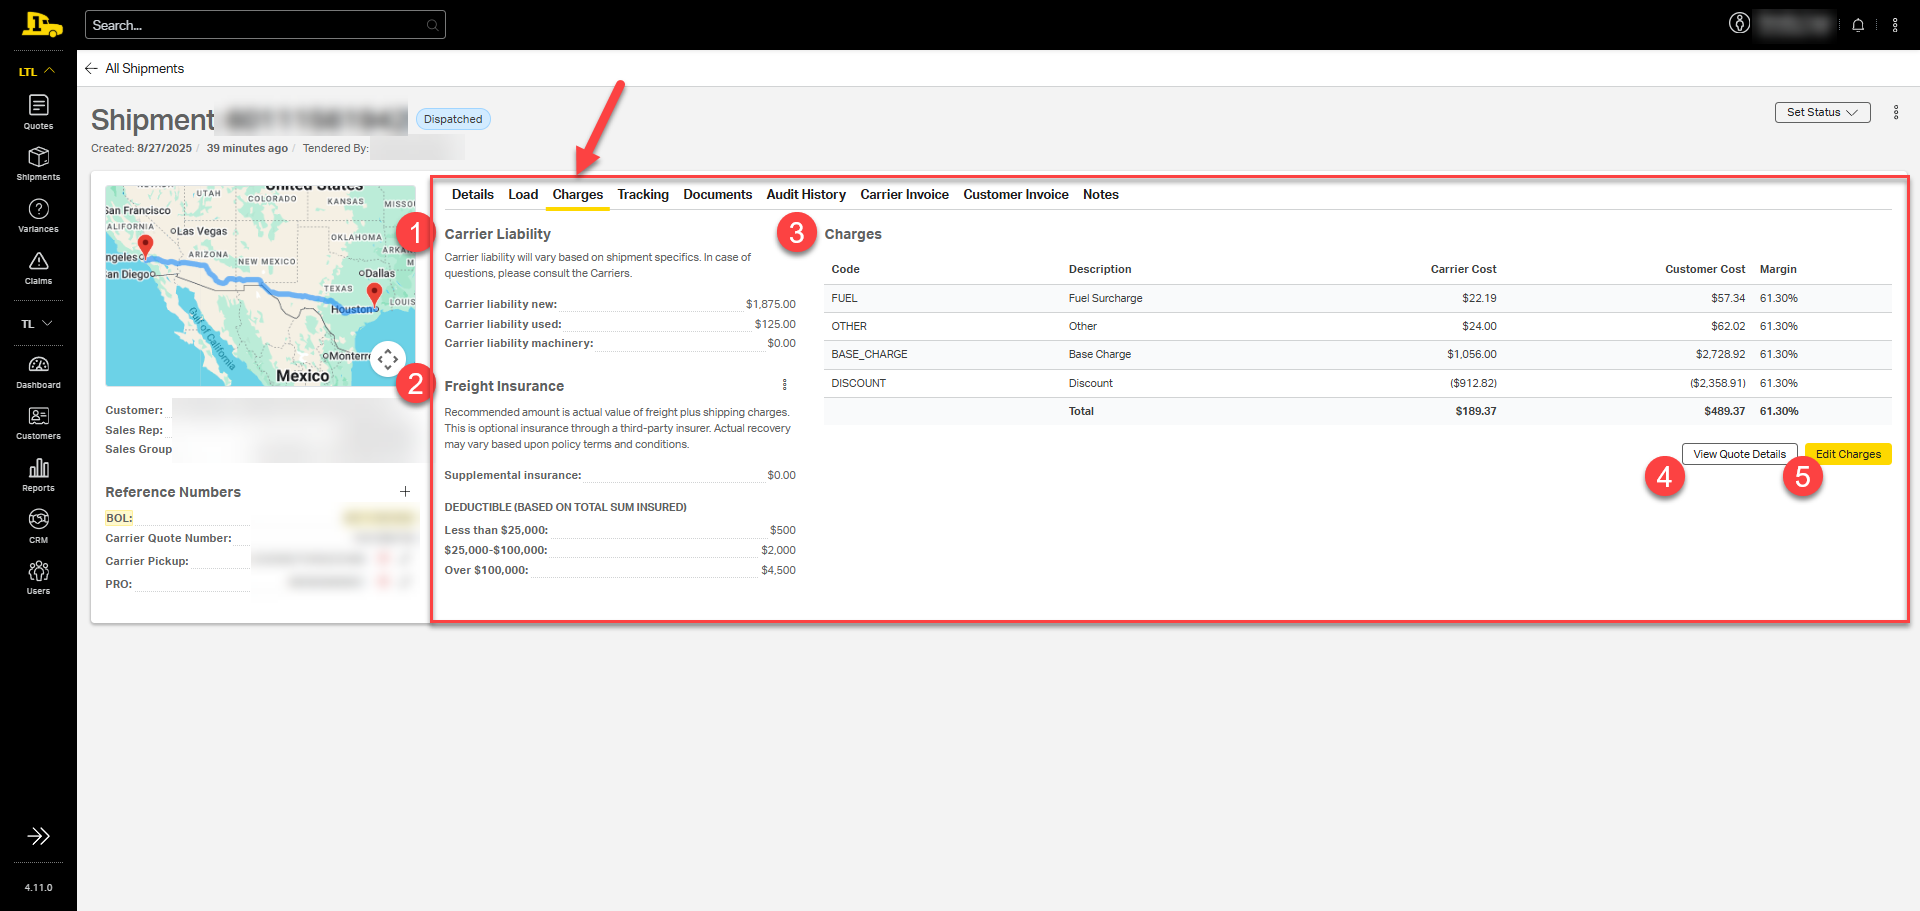
The Charges tab displays the carrier's liability, freight insurance information, and a breakdown of the charges.
- Carrier Liability: Coverage provided by the carrier for new, used, or machinery items.
- Freight Insurance: Supplemental insurance selected by the customer (if any), including deductible amounts for different value ranges.
- Charges: A full breakdown of the carrier's fees, including fuel, base charge, accessorial fees, and any applied discounts, with additional columns showing the customer's cost and the margin for each line item.
- View Quote Details: Review quoted rates from other carriers.
- Edit Charges: Adjust the carrier and/or customer cost for individual line items.
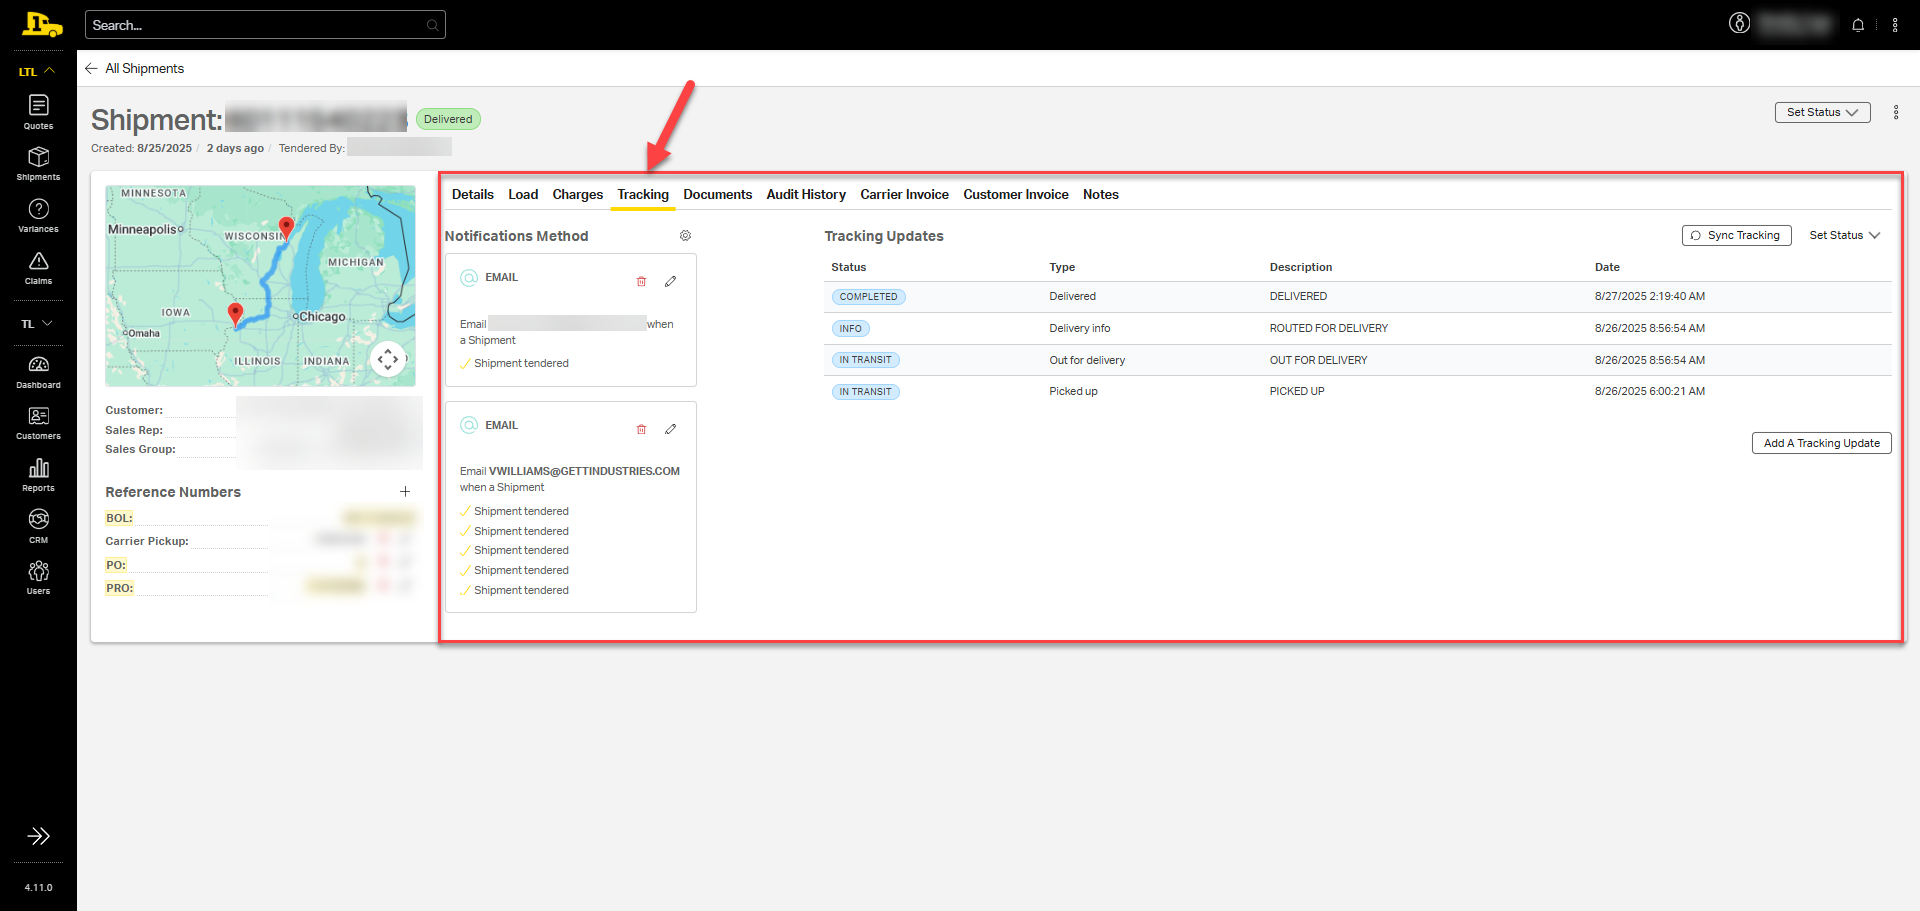
Tracking Tab
The Tracking tab displays all shipment updates and allows users to set up notifications for any contact, whether it's a customer, the customer's customer, or a distribution email list.
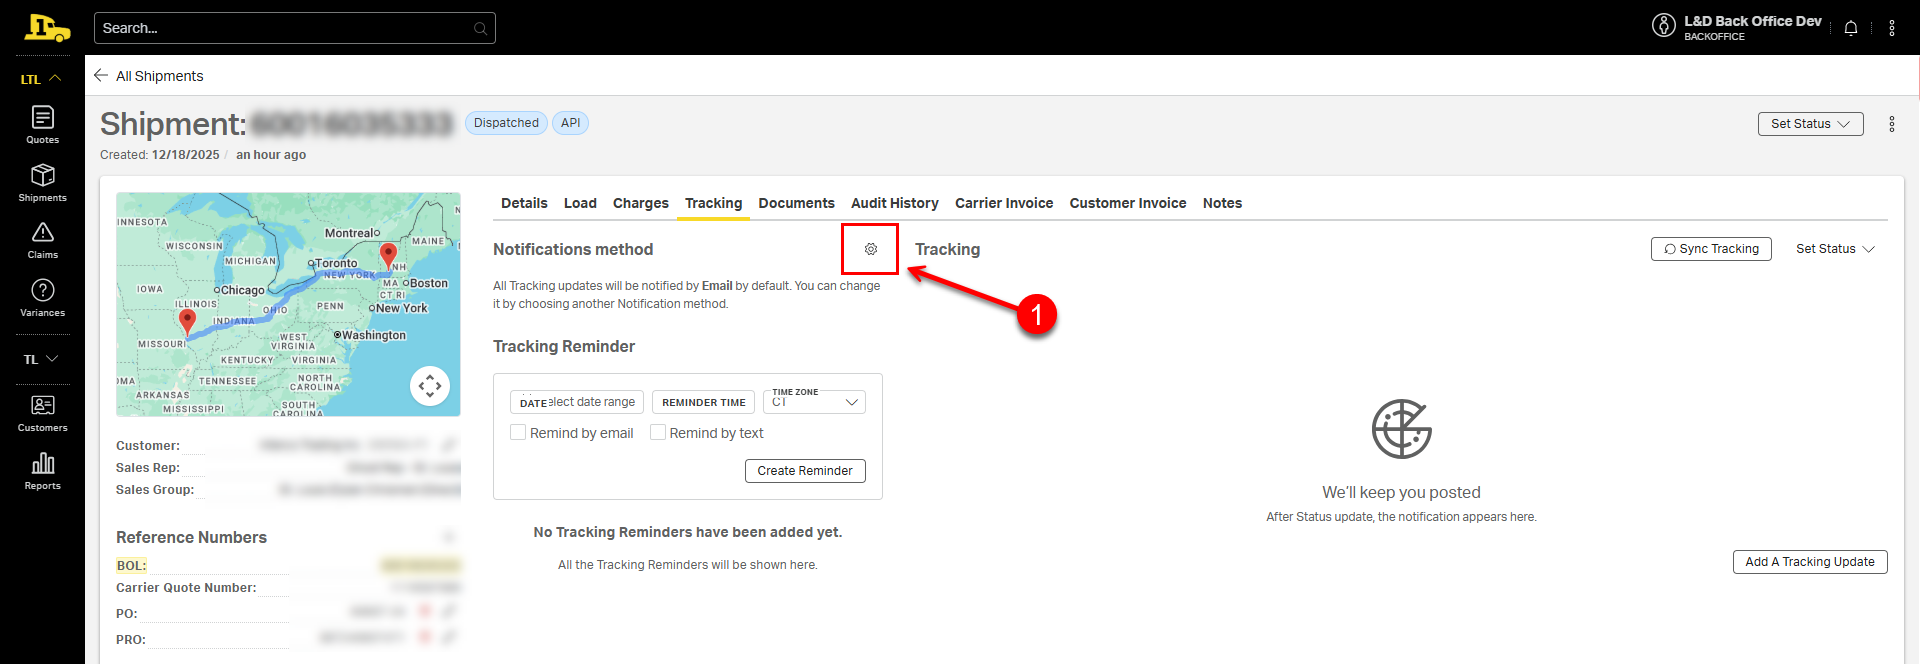
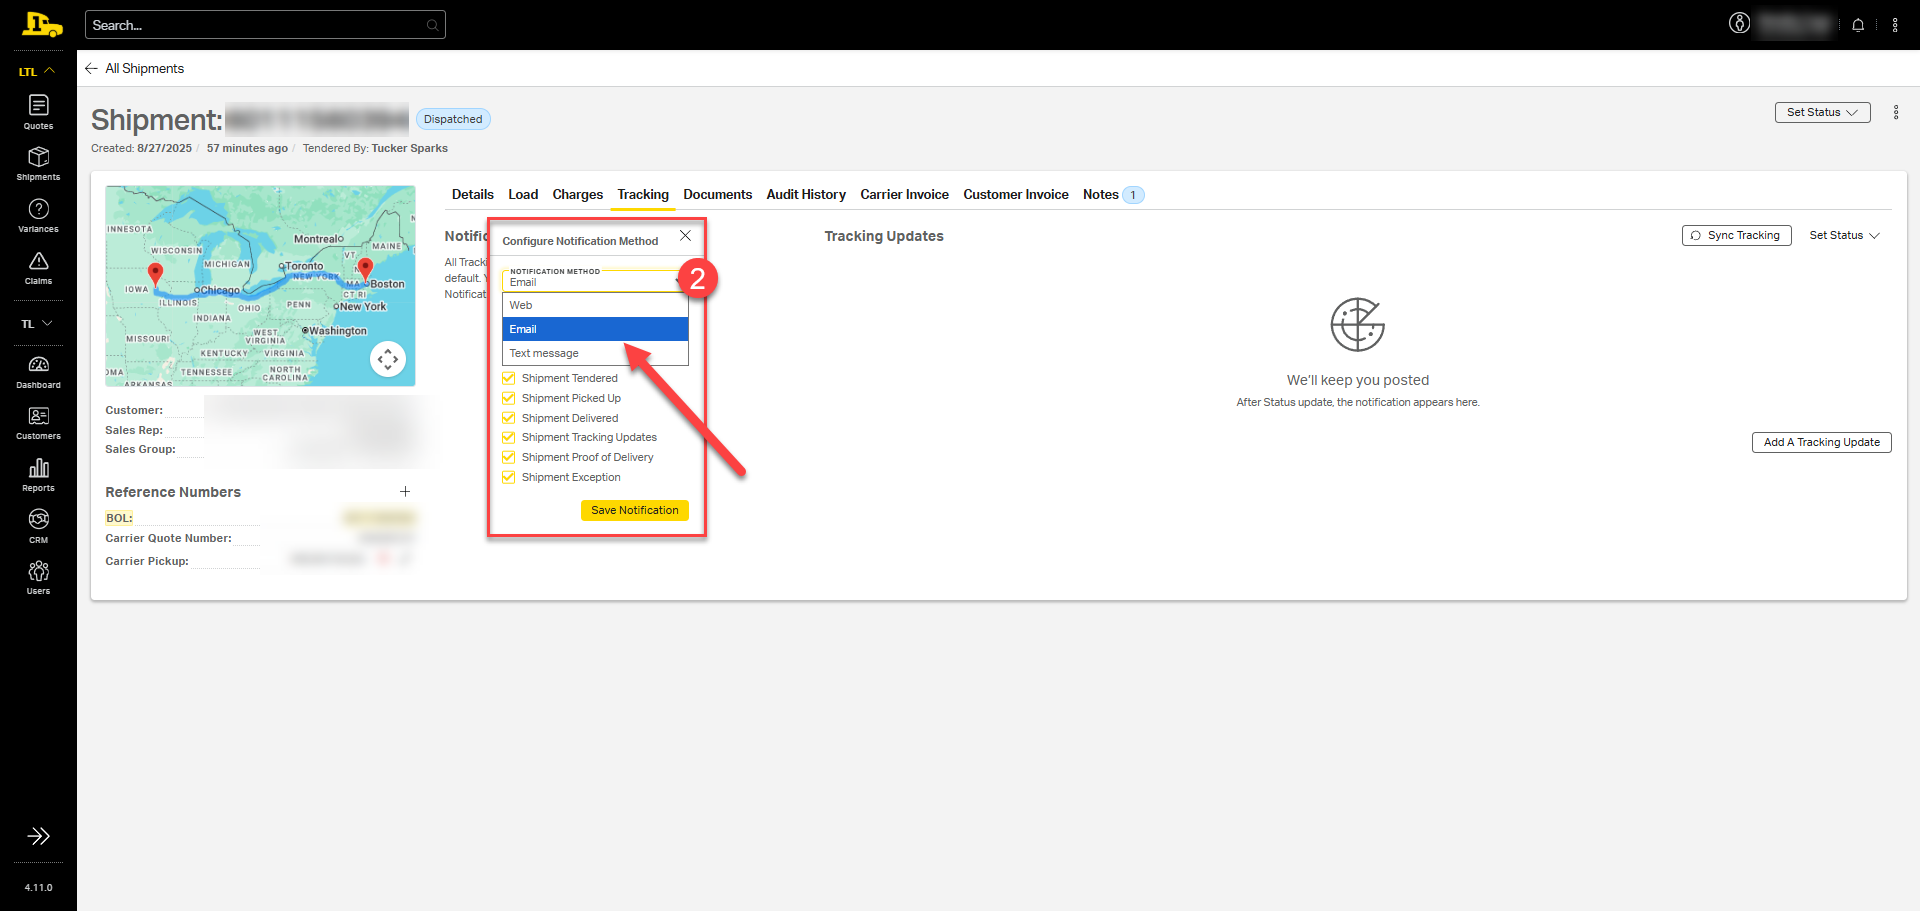
Setting Up Tracking Notifications
By default, all tracking updates are sent via email. To change notification methods, follow these steps:
1. Select the gear wheel next to Notifications Method.
2. Select a notification method from the dropdown.
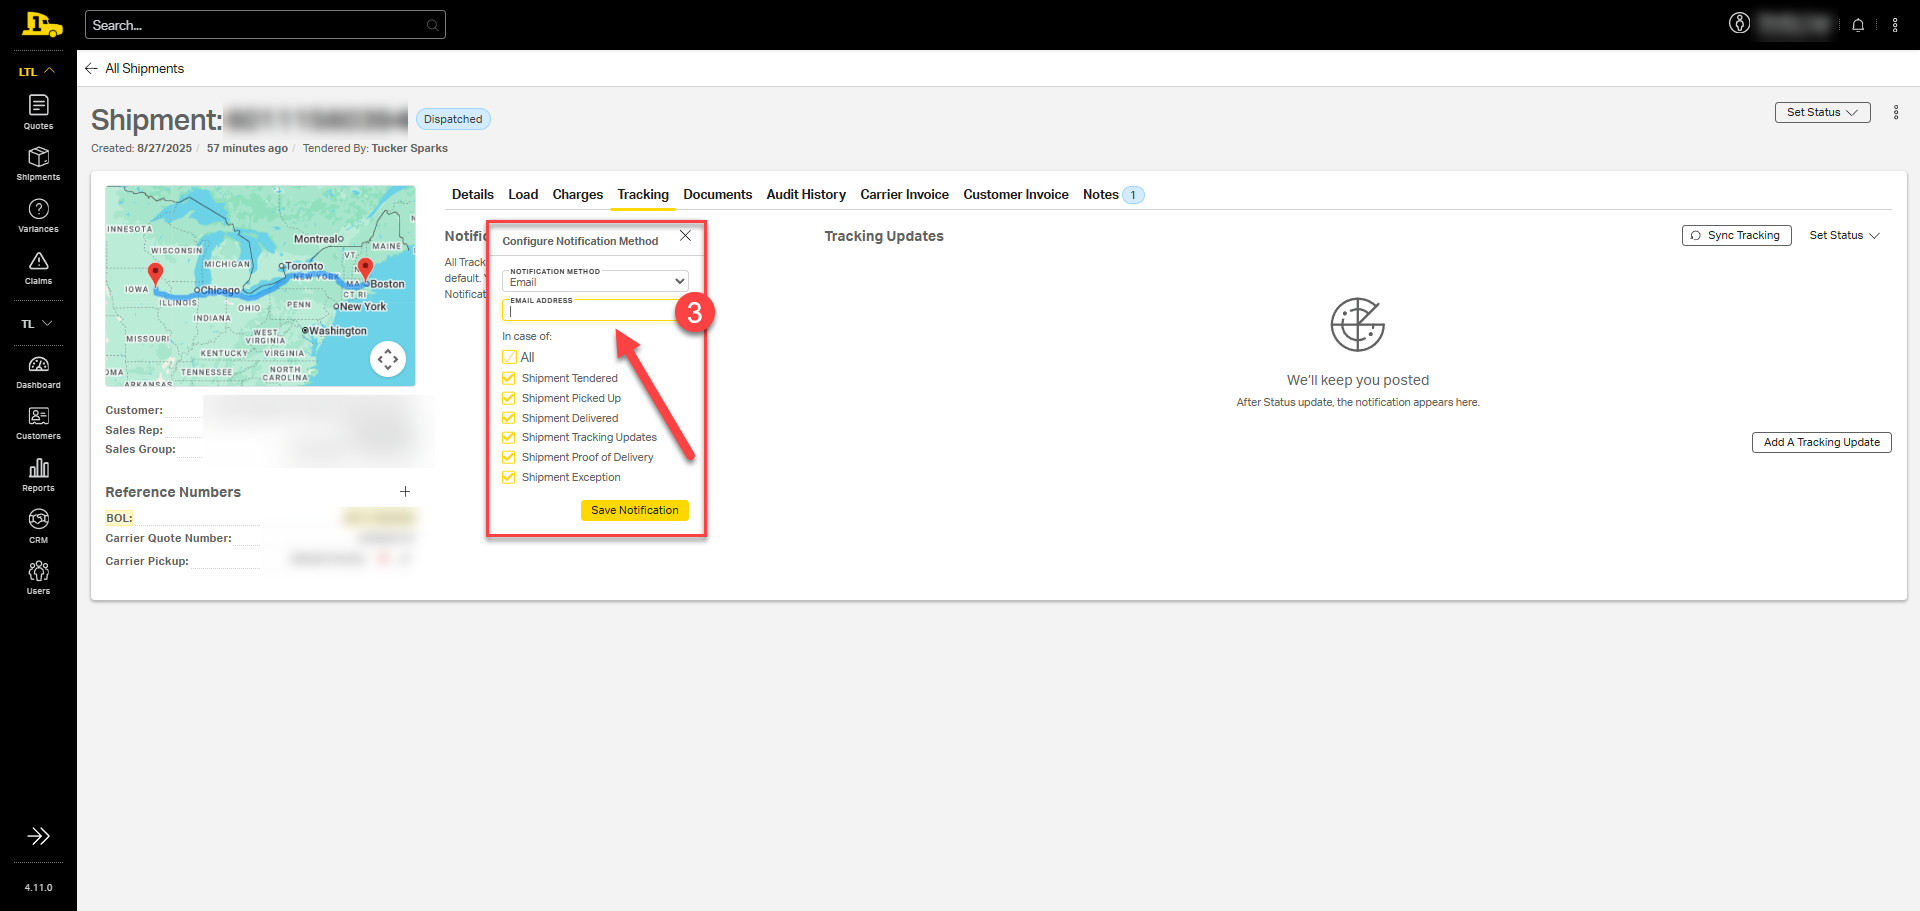
3. Enter the appropriate email address or phone number in the text box.
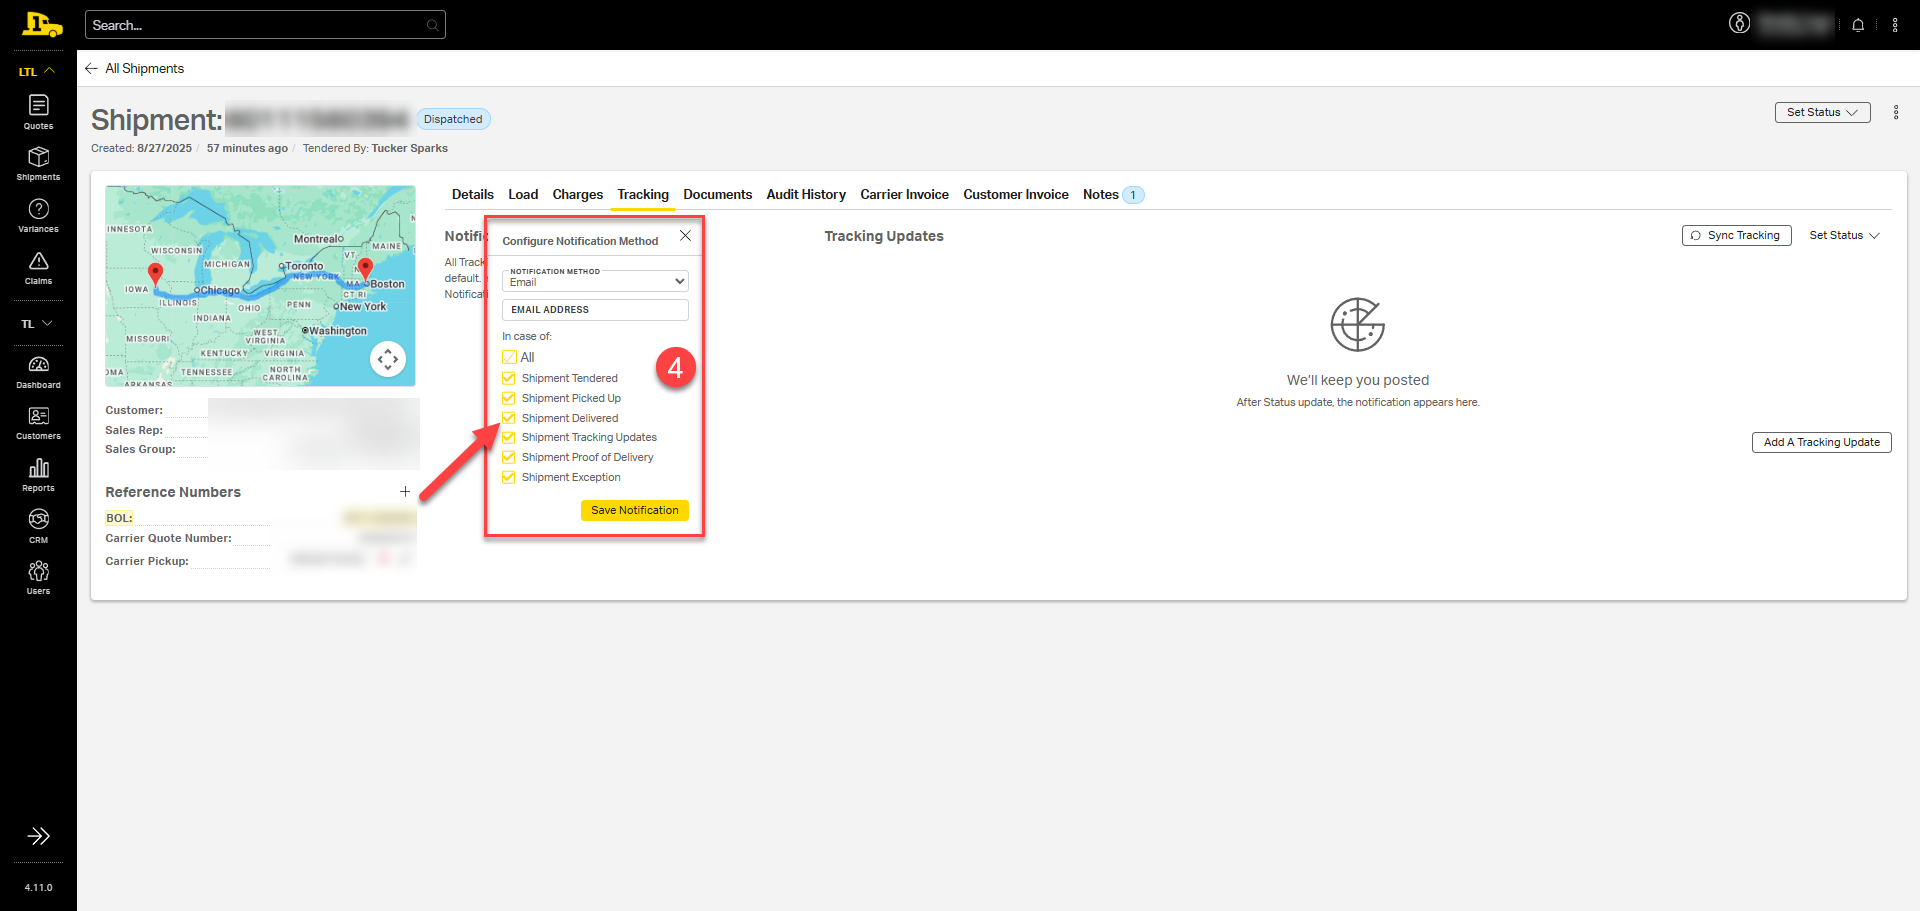
4. Select the appropriate tracking notifications
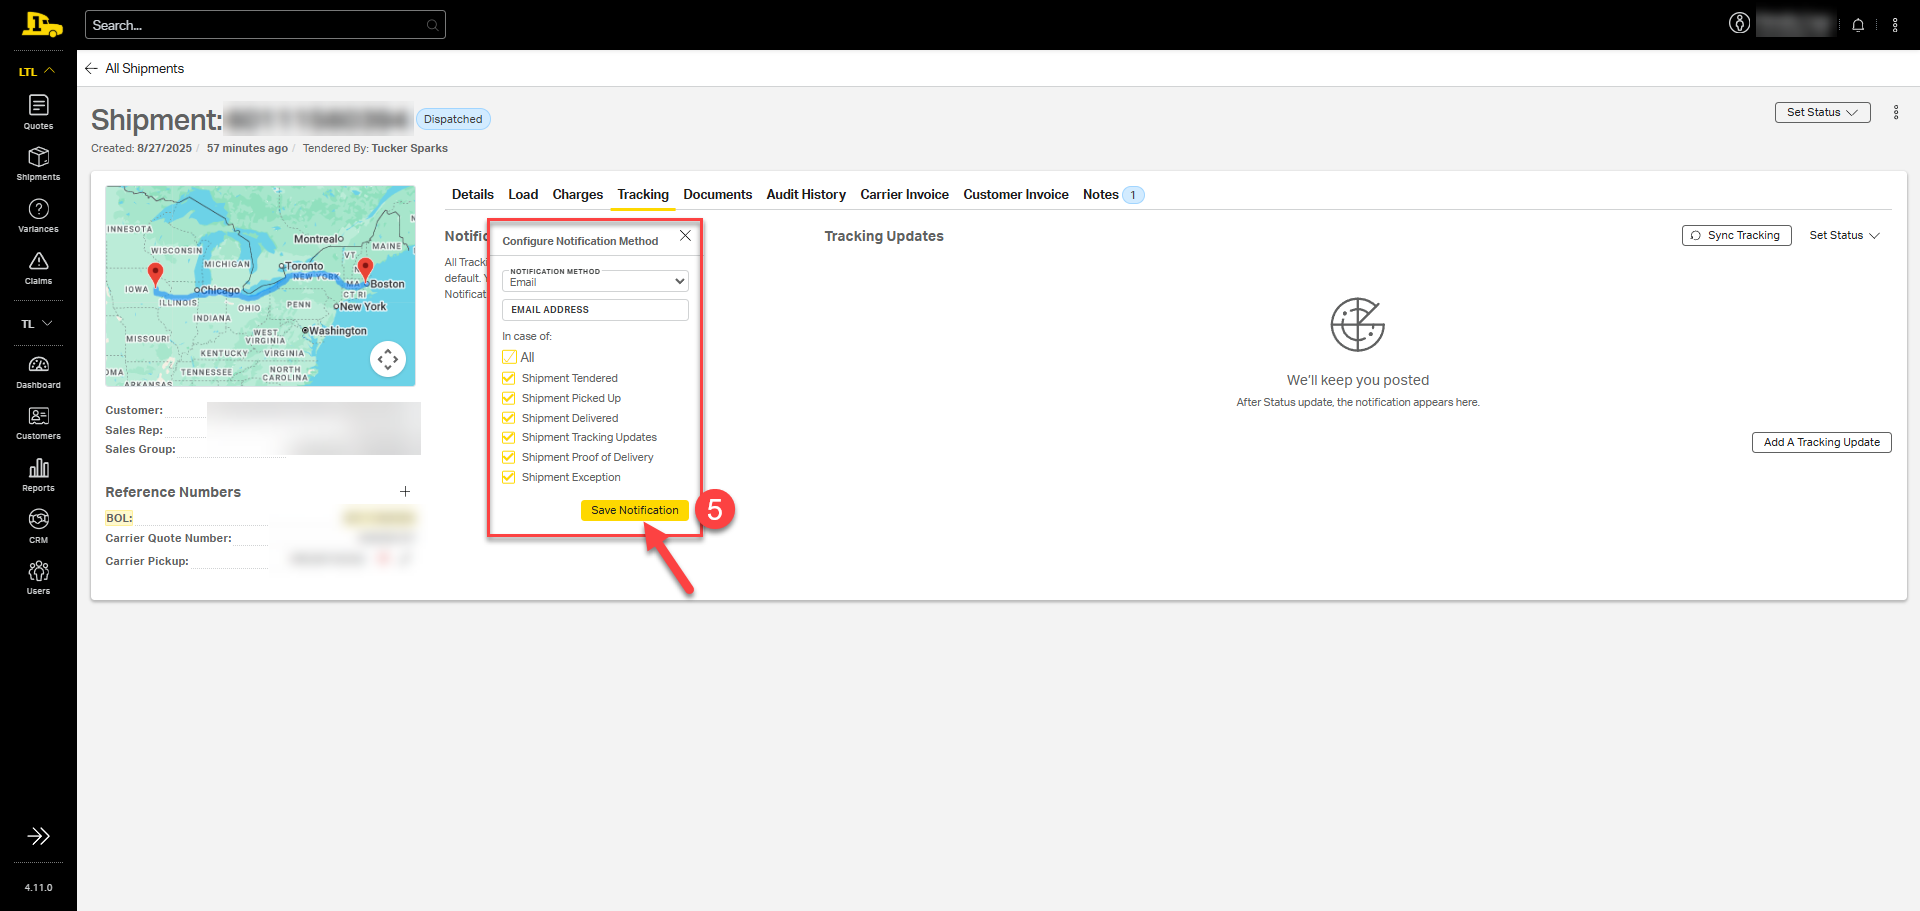
5. Select Save Notification.
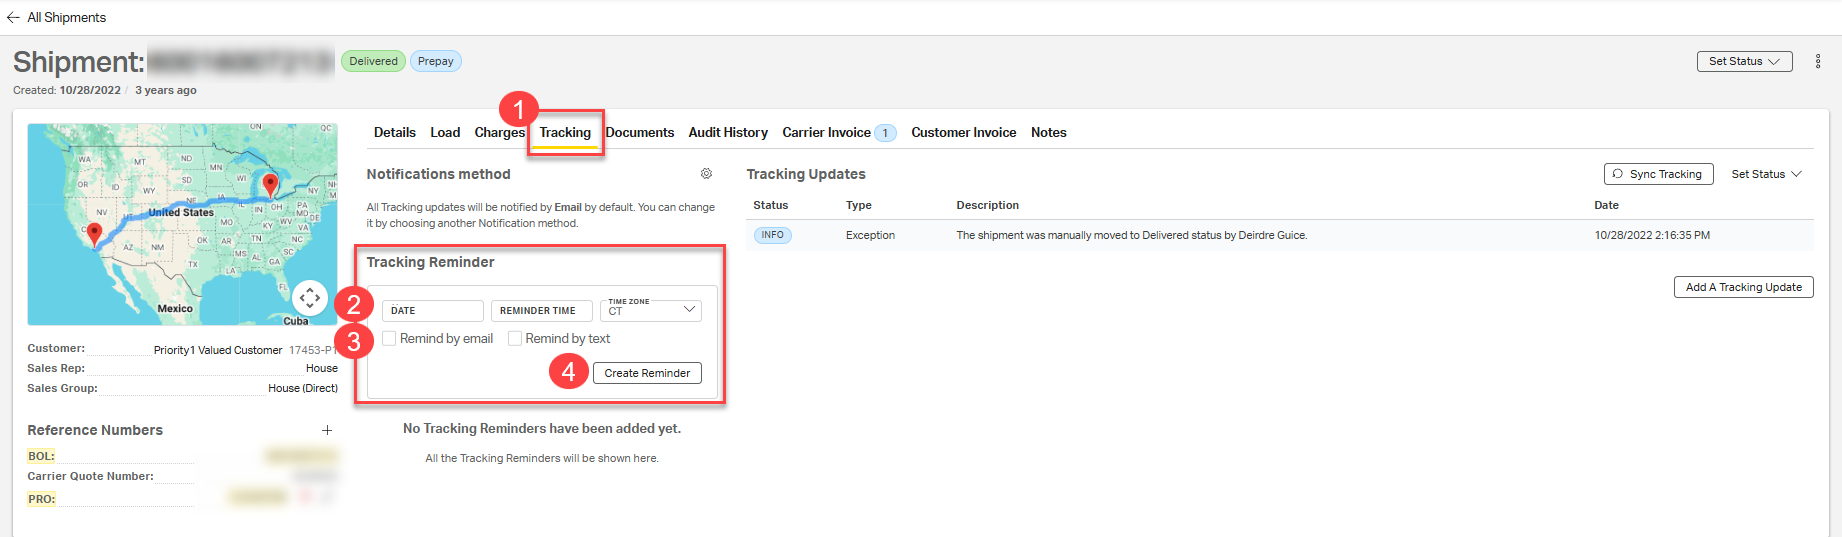
Setting Up Tracking Reminders
Add tracking reminders for any individual shipment in the Tracking Notification Setup section. These manual notifications prompt users to review the shipment's status at a specified date and time.
To create a Tracking Reminder:
- On the Shipment page, open the Tracking tab, scroll to the Tracking Reminder section.
- Select a Date, Reminder Time and select the your Time Zone.
- Select to be reminded by email, text, or both.
- Click Create Reminder.
Your reminder will trigger at the selected time and method, prompting users to follow up on the shipment. This feature is especially helpful for monitoring critical, delayed, or claim-related shipments that require manual check-ins beyond standard tracking notifications.
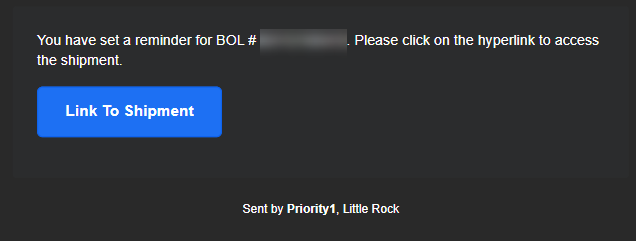
Example tracking reminder email from Cabo.
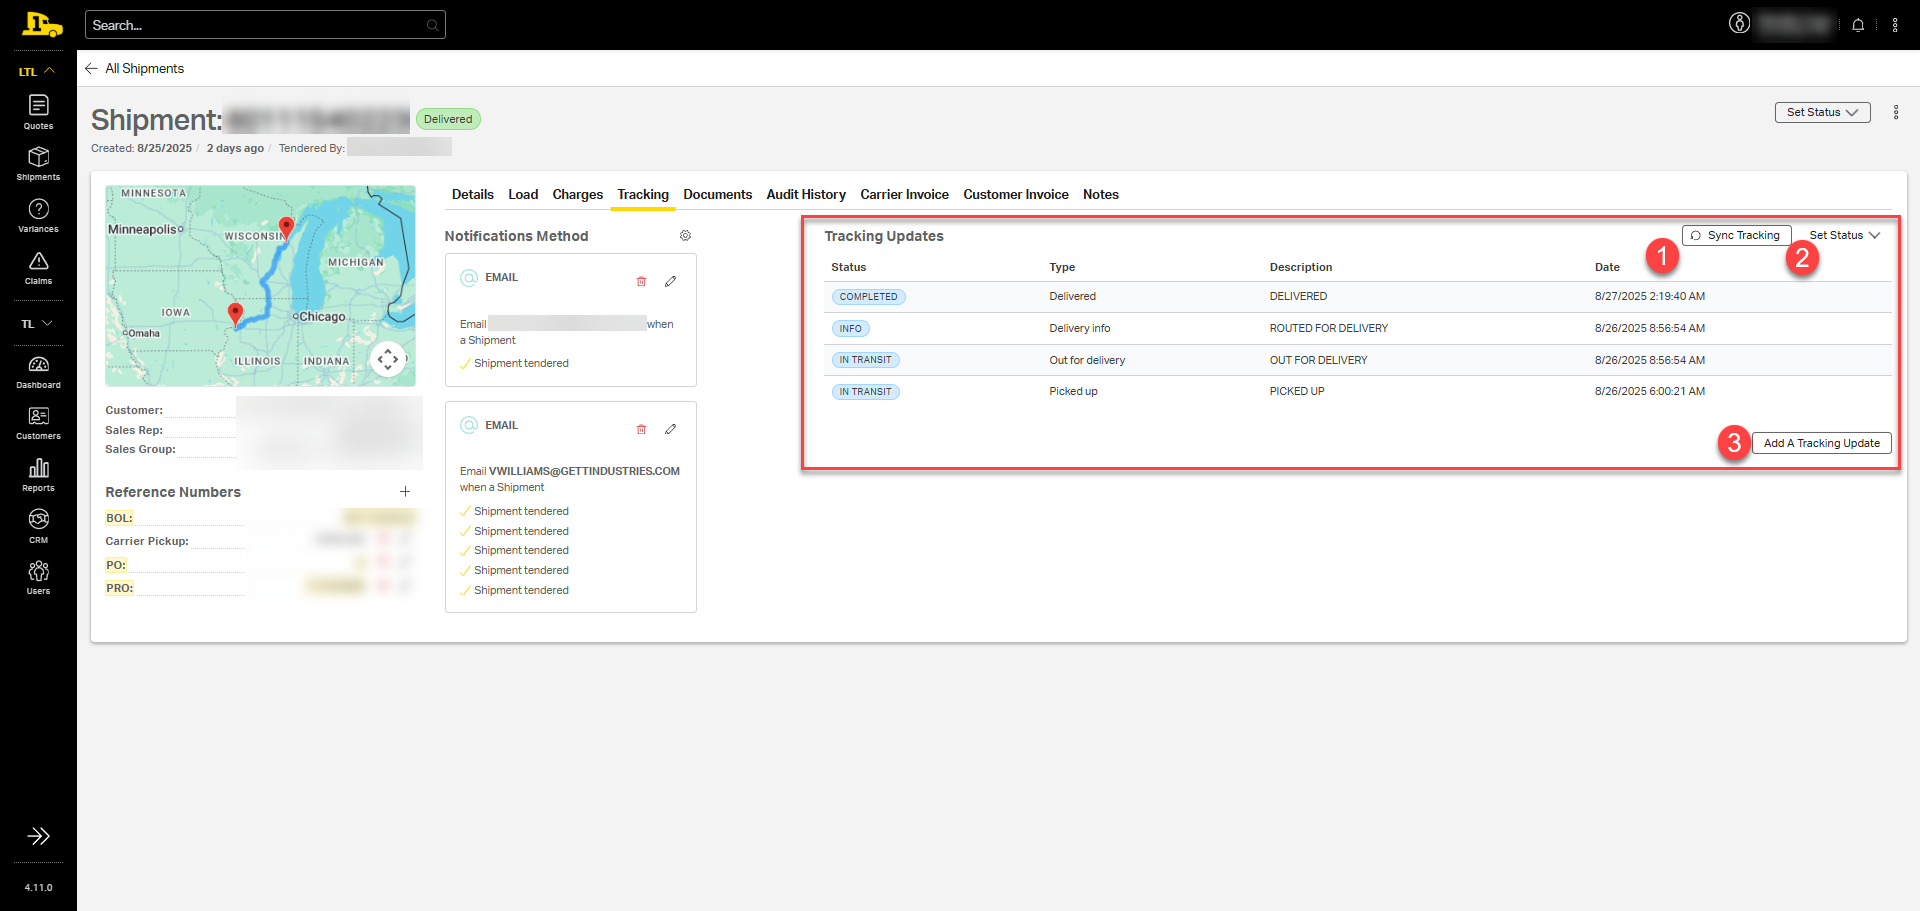
Tracking Updates
Tracking updates appear on the right side of the screen, including status, type, description, and date/time of each update. Users can manage tracking updates using three main functions:
1. Sync Tracking: Pull the latest updates from the carrier's website.
2. Set Status: Manually update the shipment's status.
3. Add a Tracking Update: Manually add a new tracking entry.
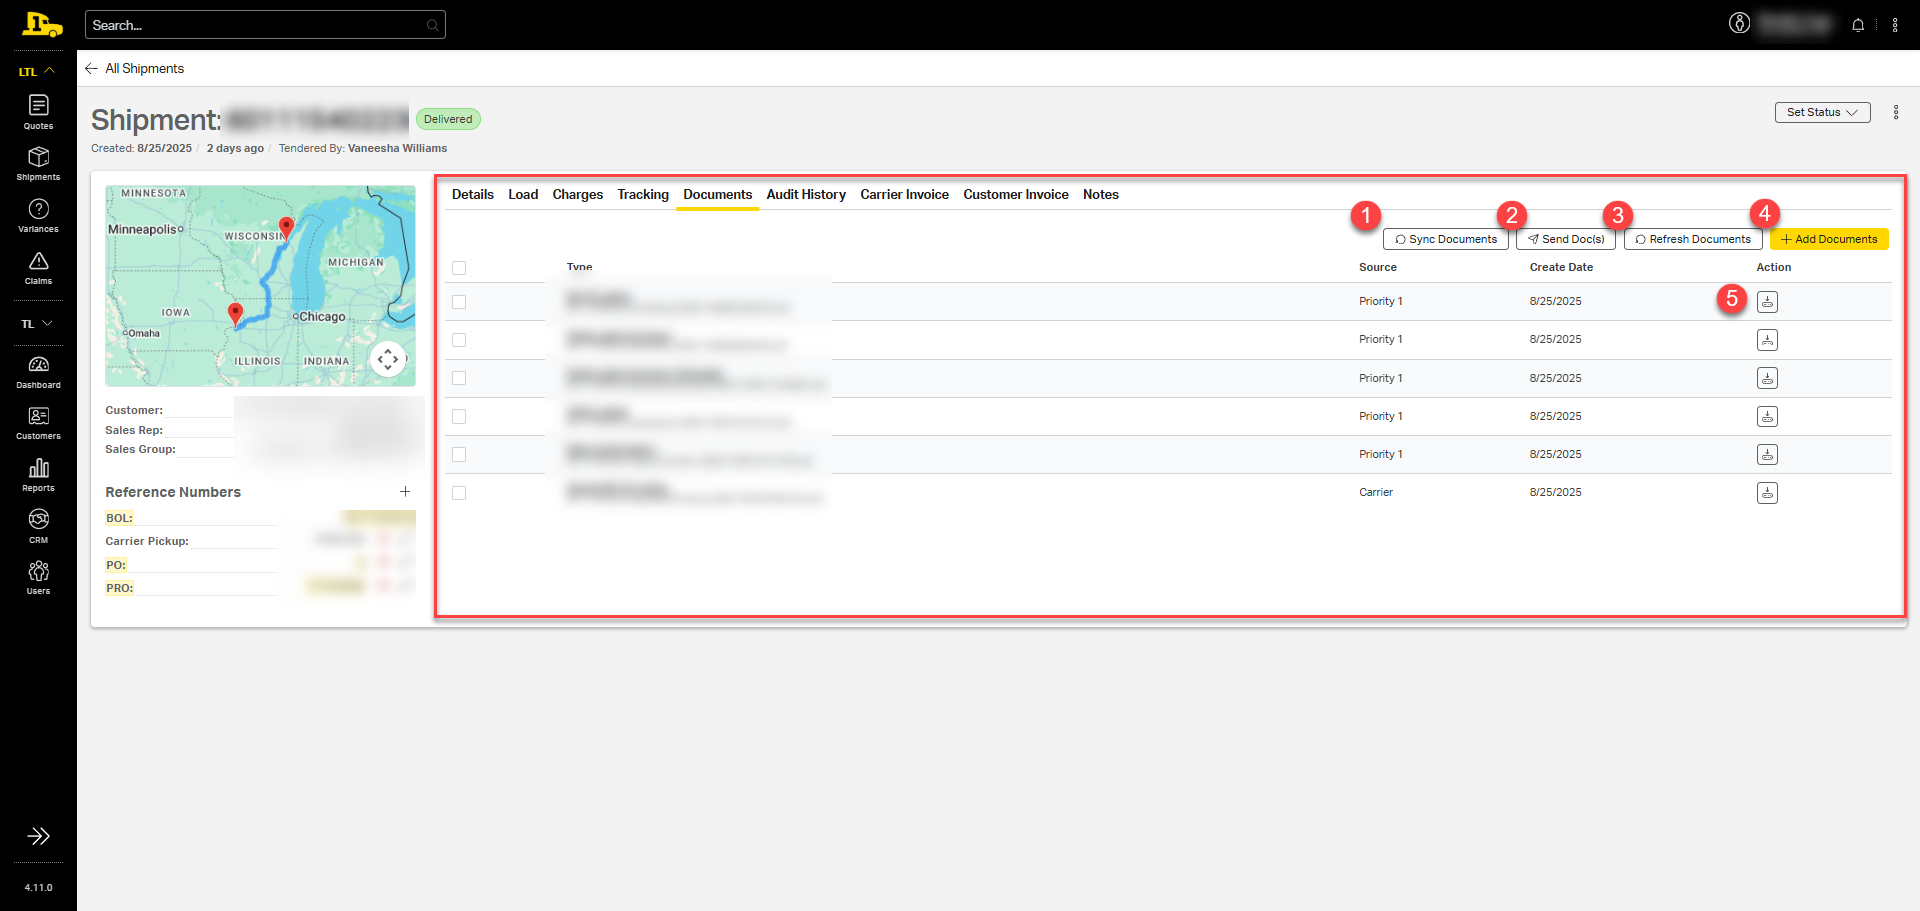
Documents Tab
The Documents tab displays all files linked to the shipment, including BOL, pallet labels, rate confirmation, and other relevant documents.
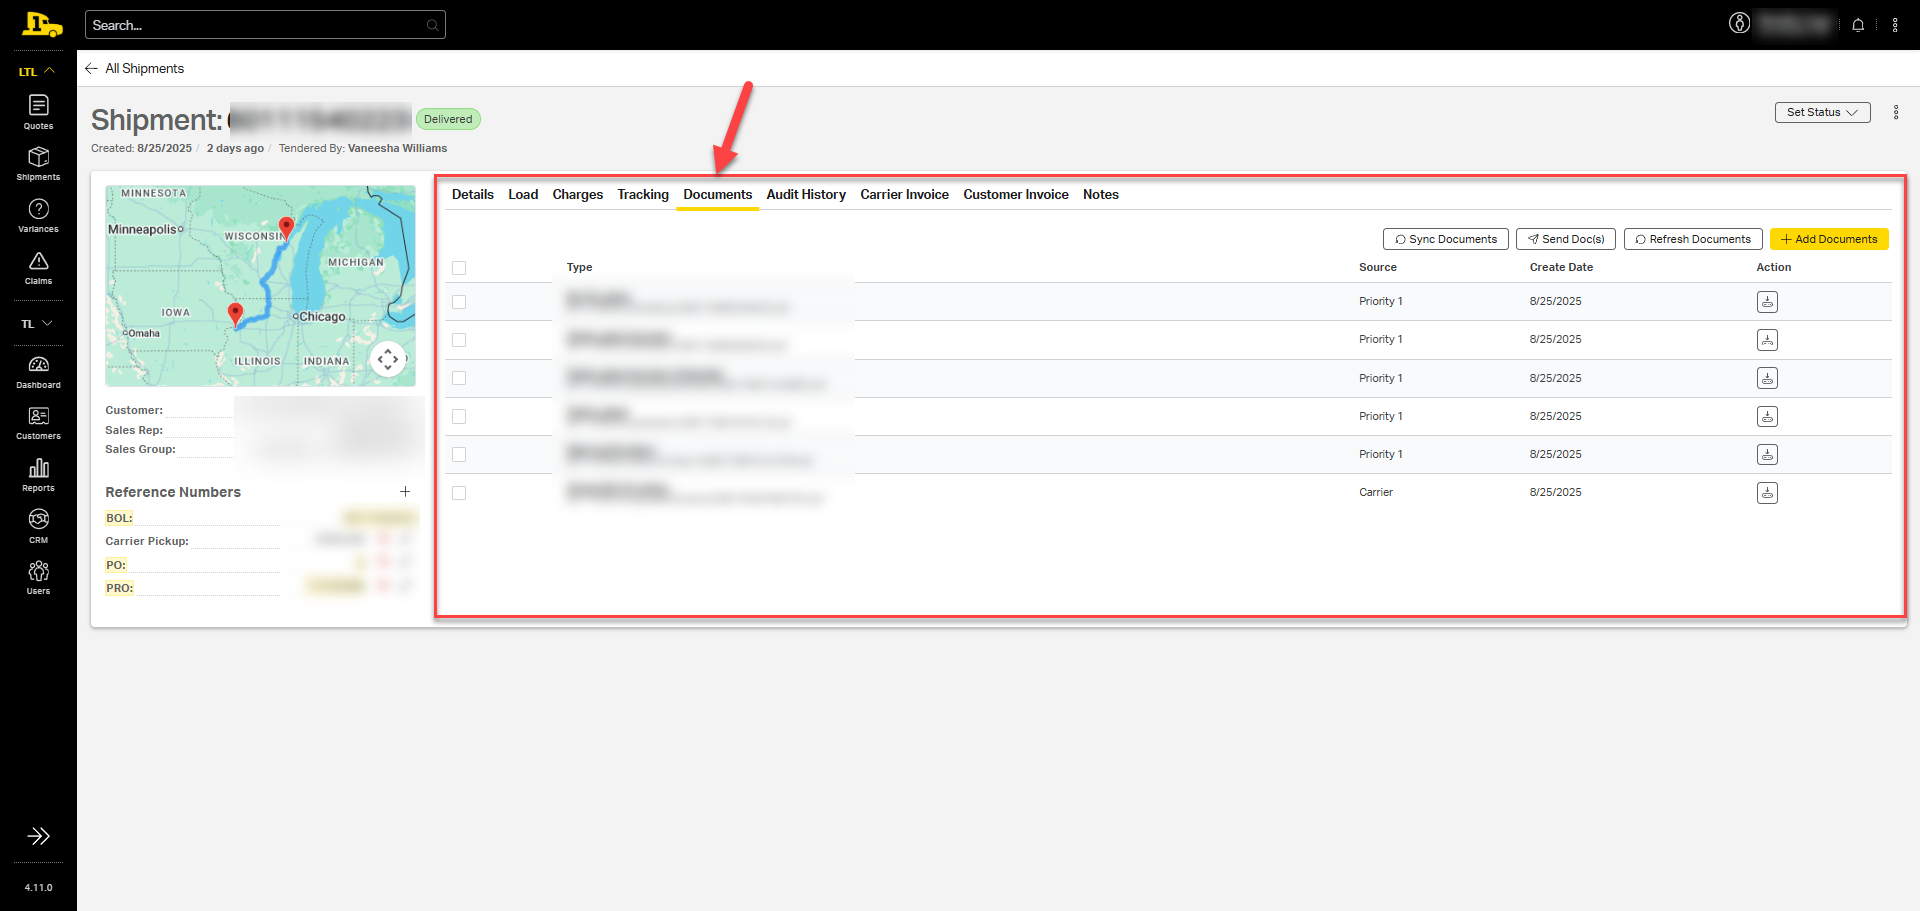
Users have five options for managing and interacting with shipment documents:
1. Sync Documents: Pull the latest documents related to this shipment.
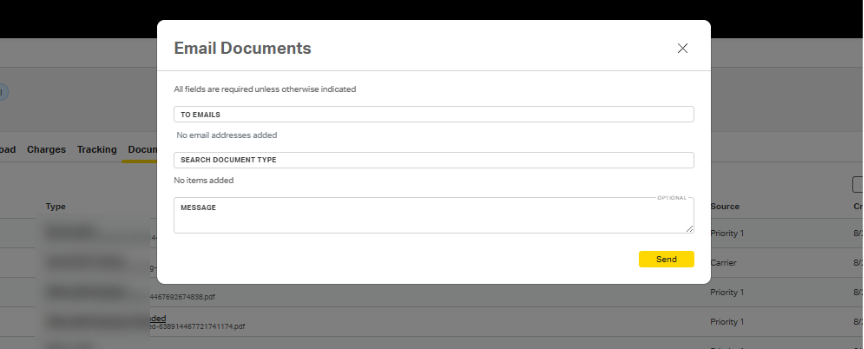
2. Send Documents: Email specific documents to a customer. Selecting this option opens a new window where users can enter email addresses, choose document types, and add a message for the customer.
3. Refresh Documents: Reload the page to view added or updated documents.
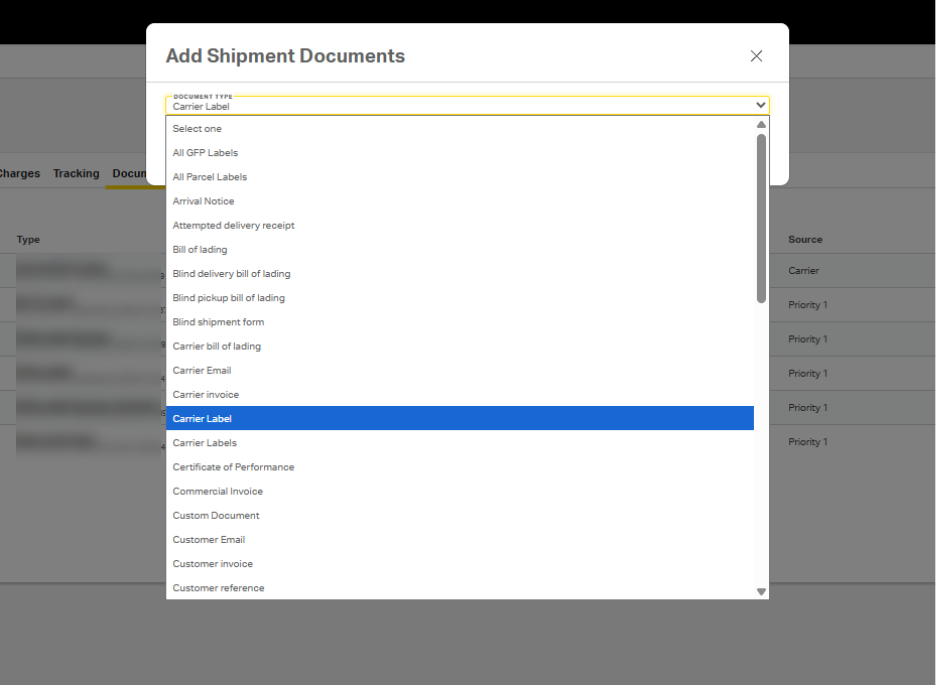
4. Add Documents: Manually upload new documents to the shipment. Selecting this option opens a new window where users can select documents from a dropdown. Each selection may require additional steps. For example, Carrier Label may require users to upload the carrier's label from their own files.
5. Open or Download Documents: Click on the document name to open the document in a new tab, or select the download icon under Actions to save the document to your computer.
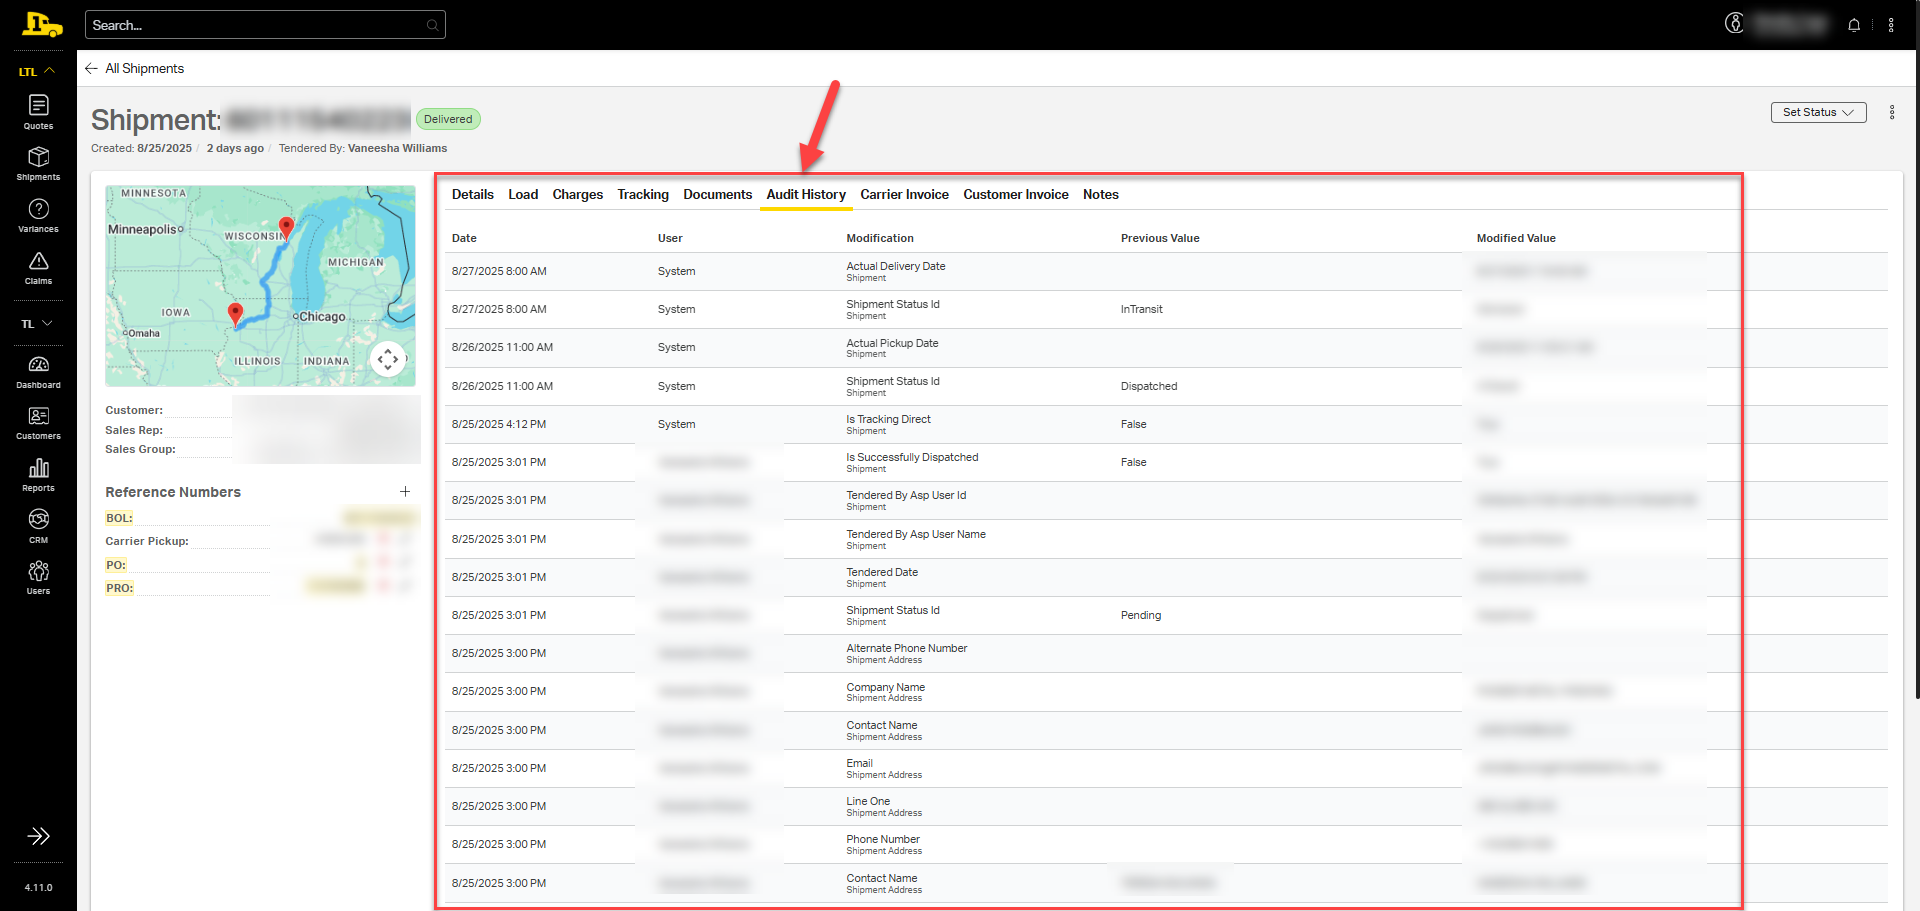
Audit History Tab
The Audit History tab lists any changes or updates made over the lifecycle of the shipment, including date/time, user, modification type, previous value, and modified value. For example, if the revenue on the shipment was updated and caused a variance, the person who updated the cost will appear here, along with the date the update occurred.
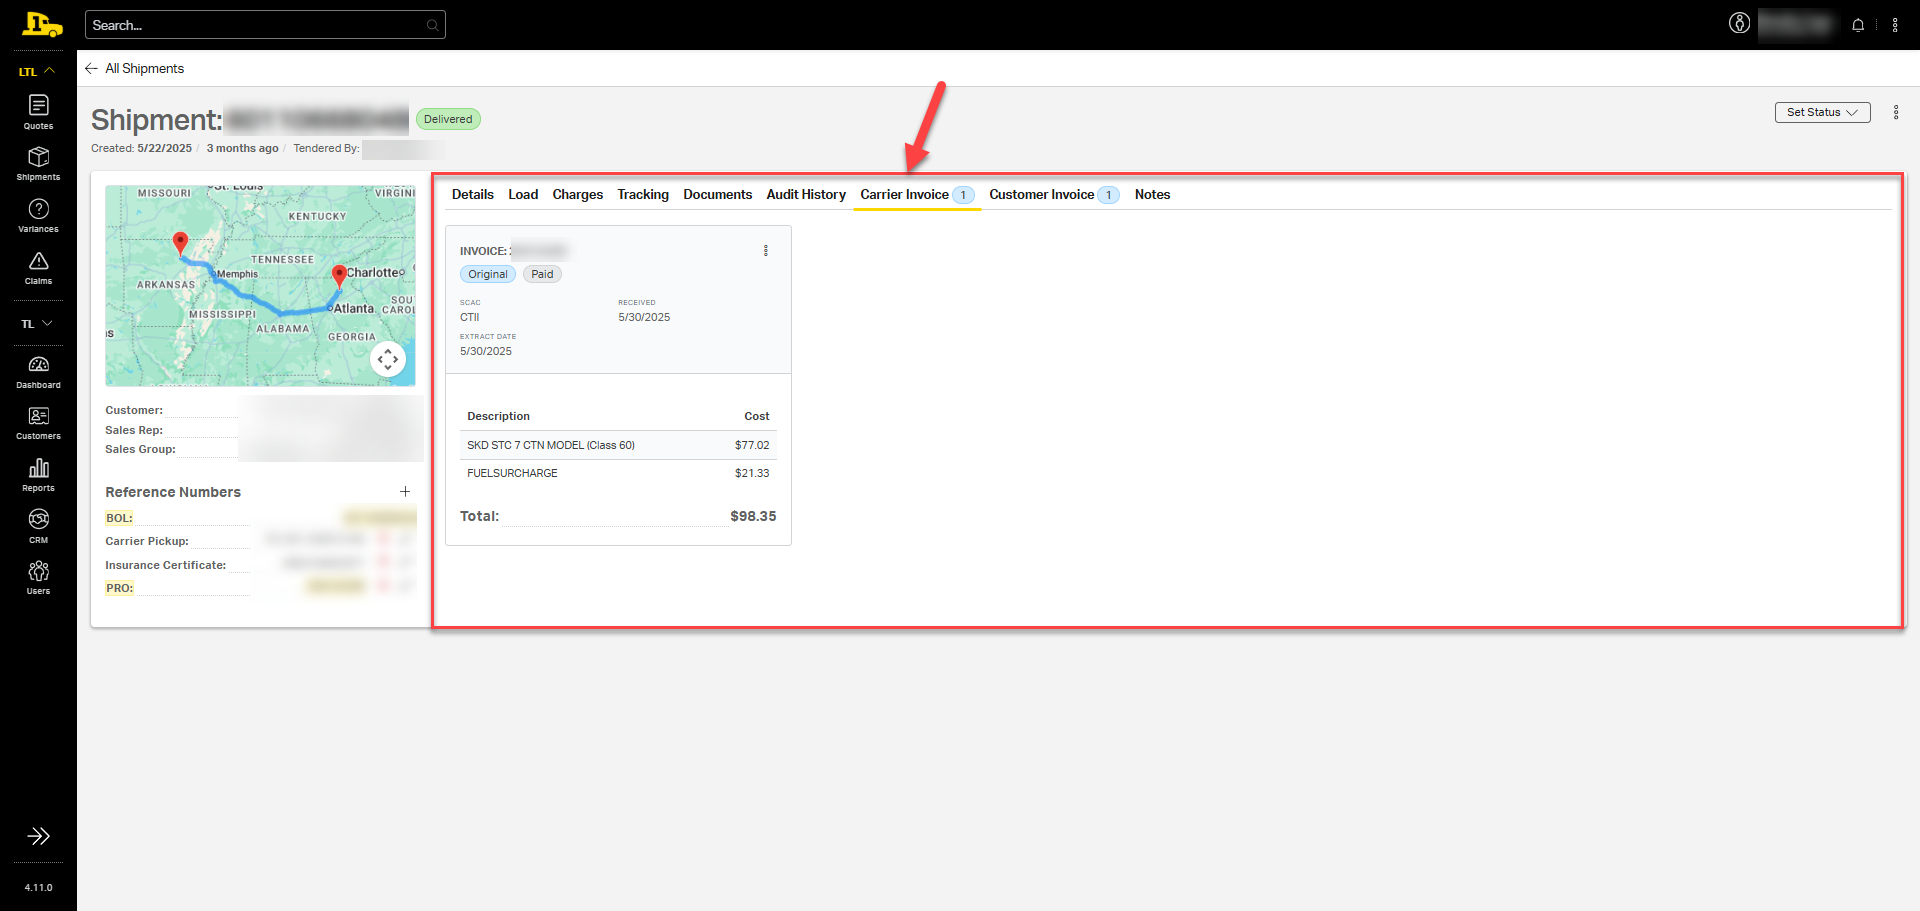
Carrier Invoice Tab
The Carrier Invoice tab displays invoice details for the shipment, including invoice number, a rate breakdown, received date, and extraction date.
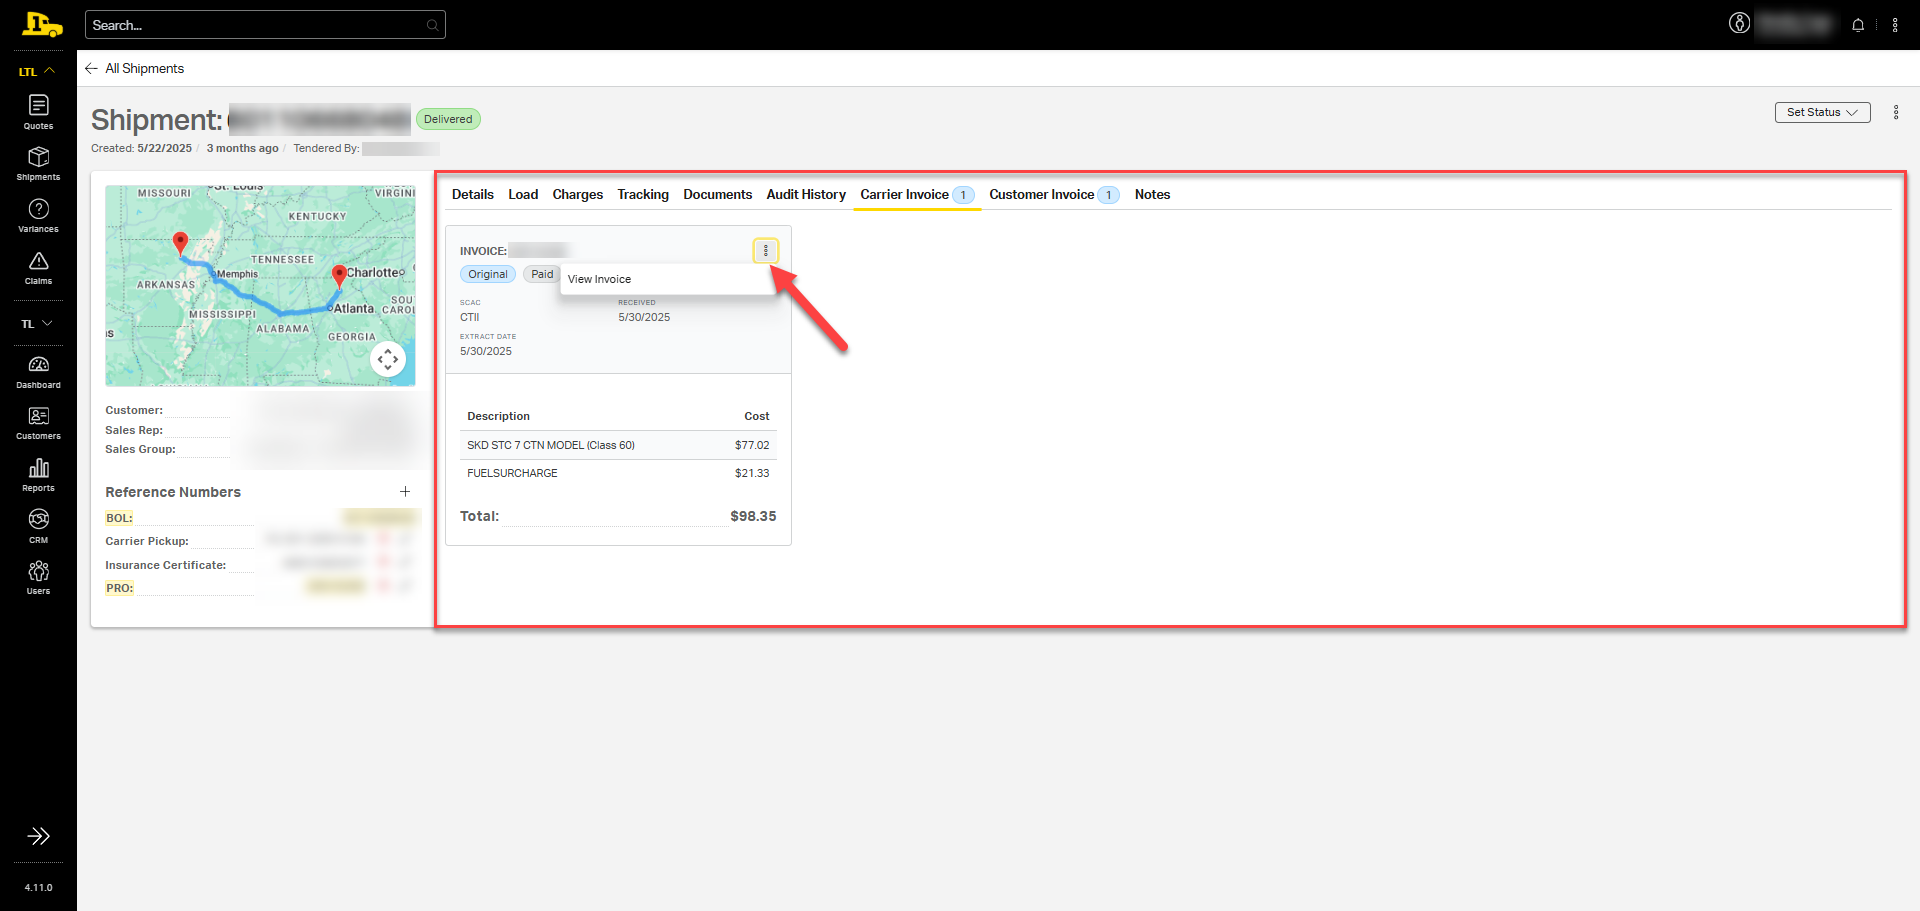
Viewing a Carrier Invoice
Select the kebab menu in the top right corner of the invoice card to view and download the invoice.
⚠️ The carrier invoice does not include margin. Never send a carrier invoice to a customer.
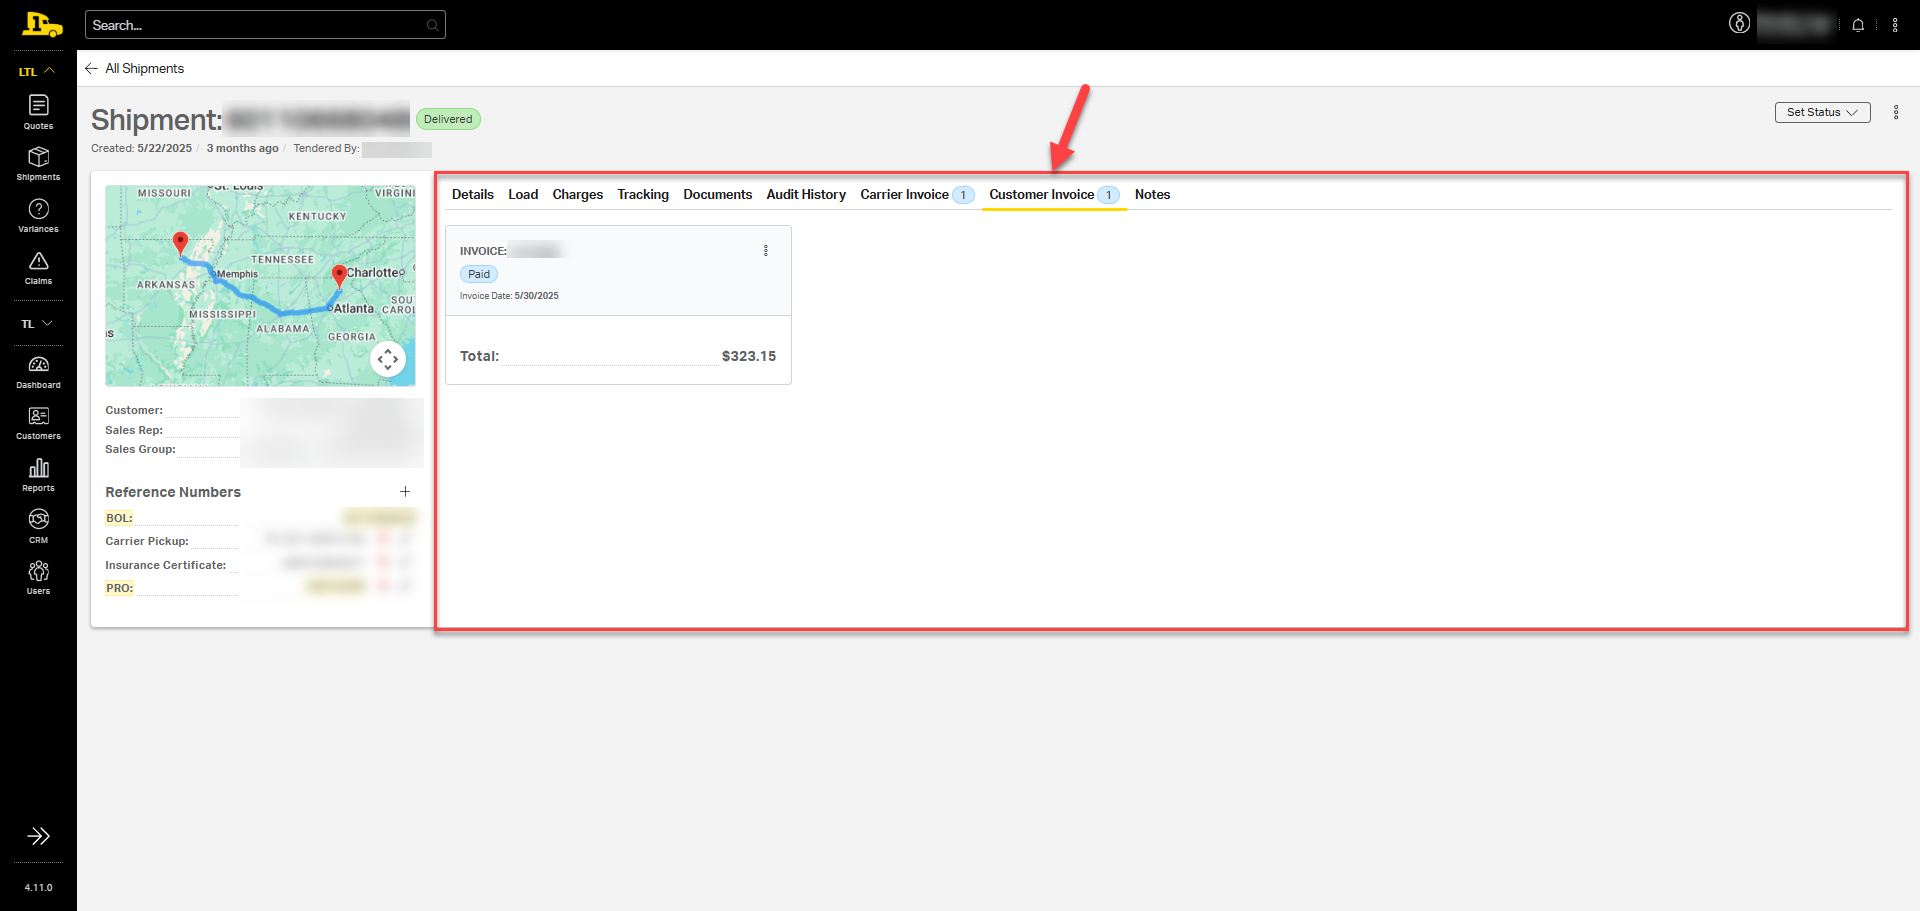
Customer Invoice Tab
The Customer Invoice tab displays invoice details for the shipment, including invoice number, total amount, and date.
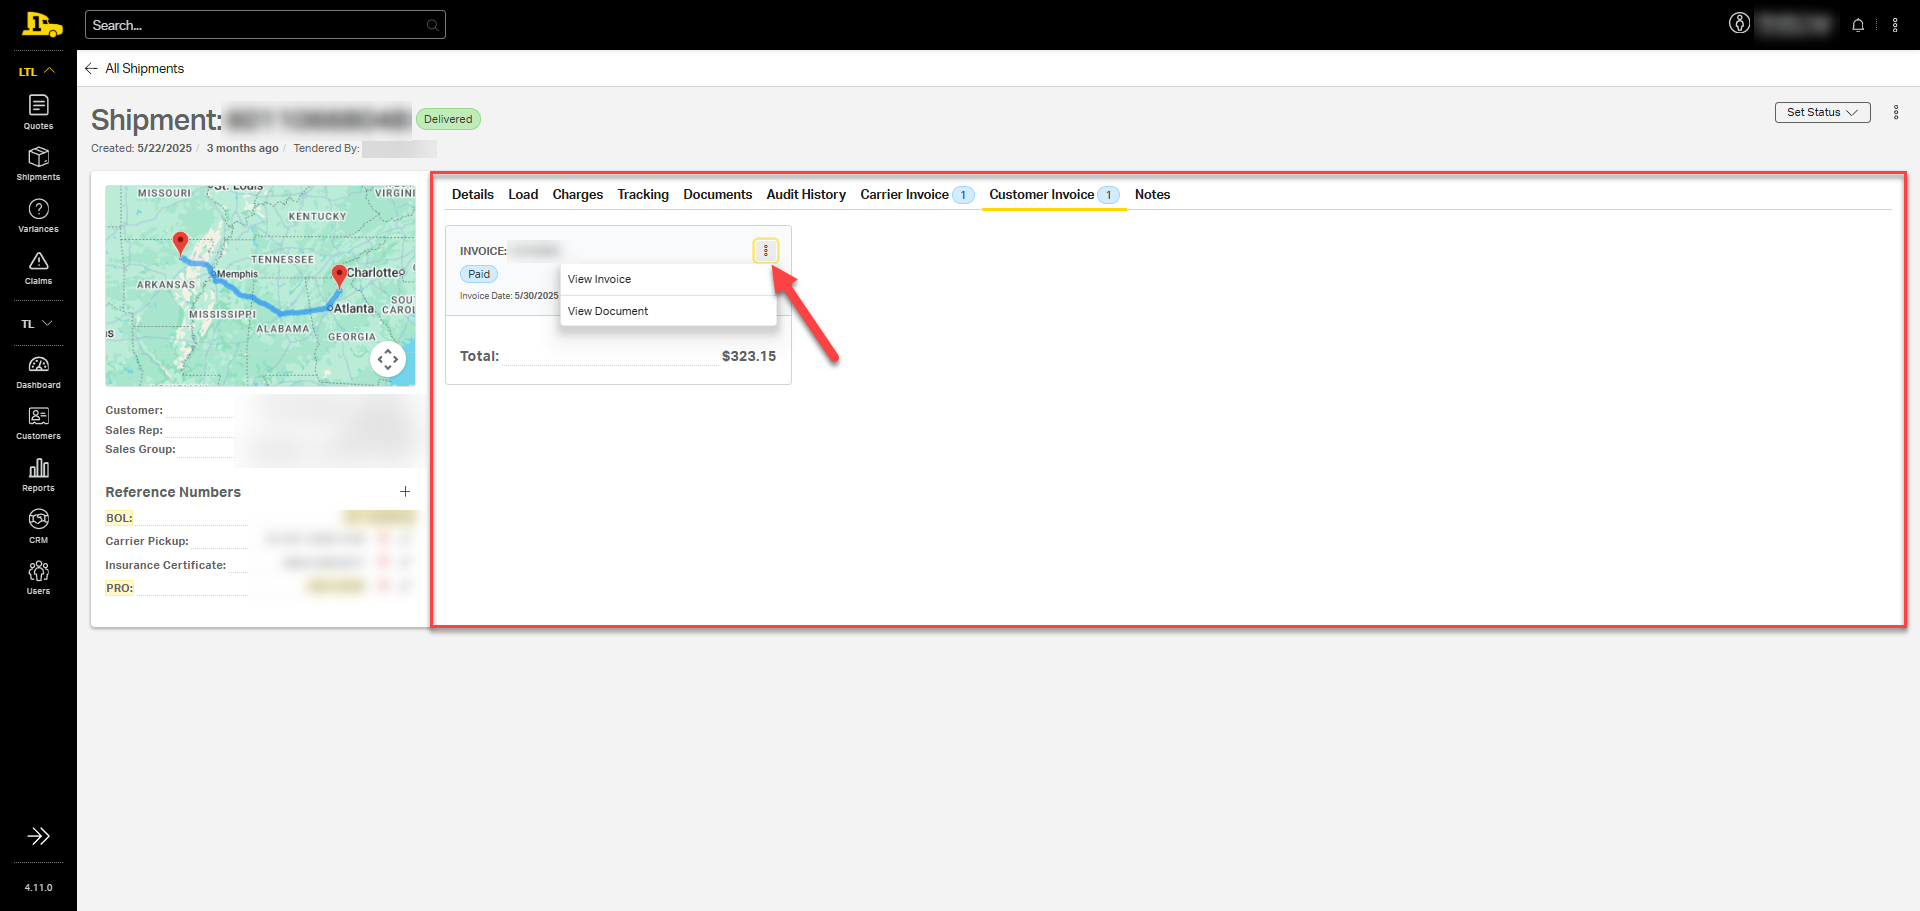
Viewing a Customer Invoice
Select the kebab menu in the top right corner to view and download the invoice or view the invoice page details.
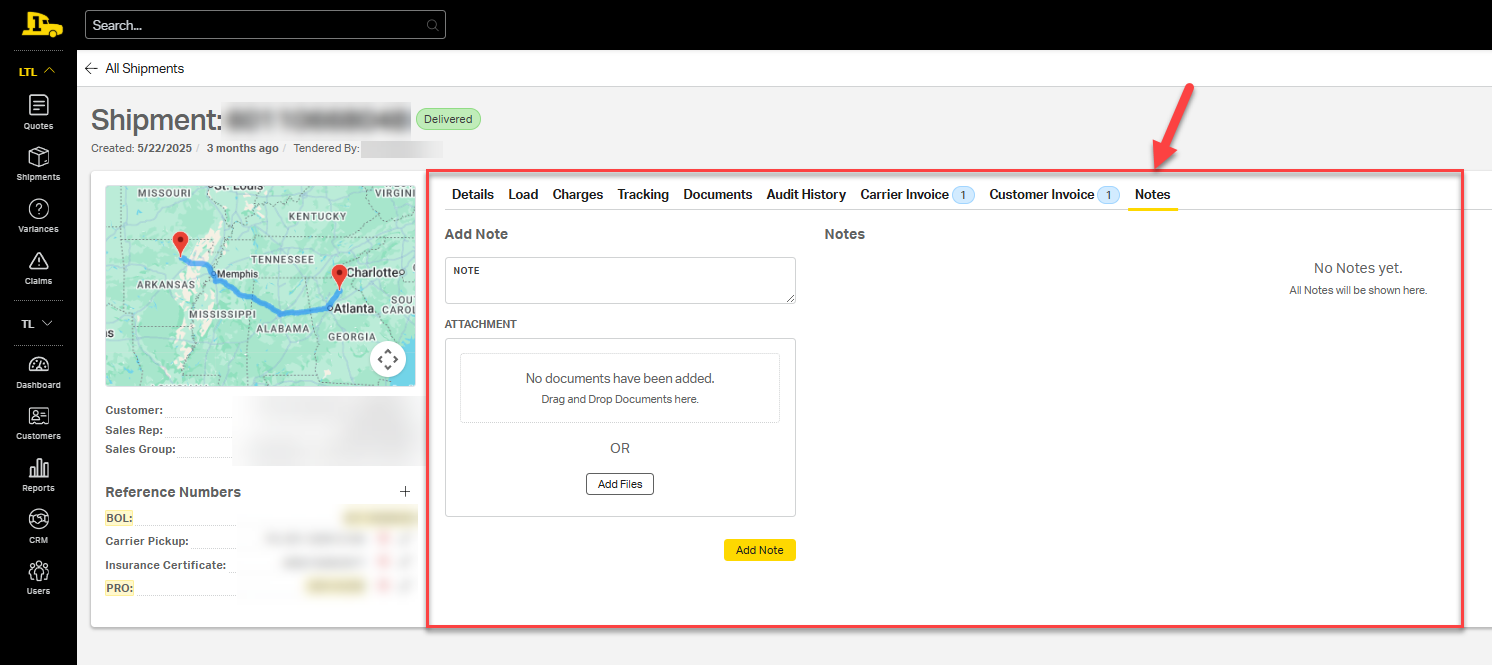
Notes Tab
The Notes tab displays any notations added by internal employees, including relevant details or updates. Users can also create a new note and attach files as needed.
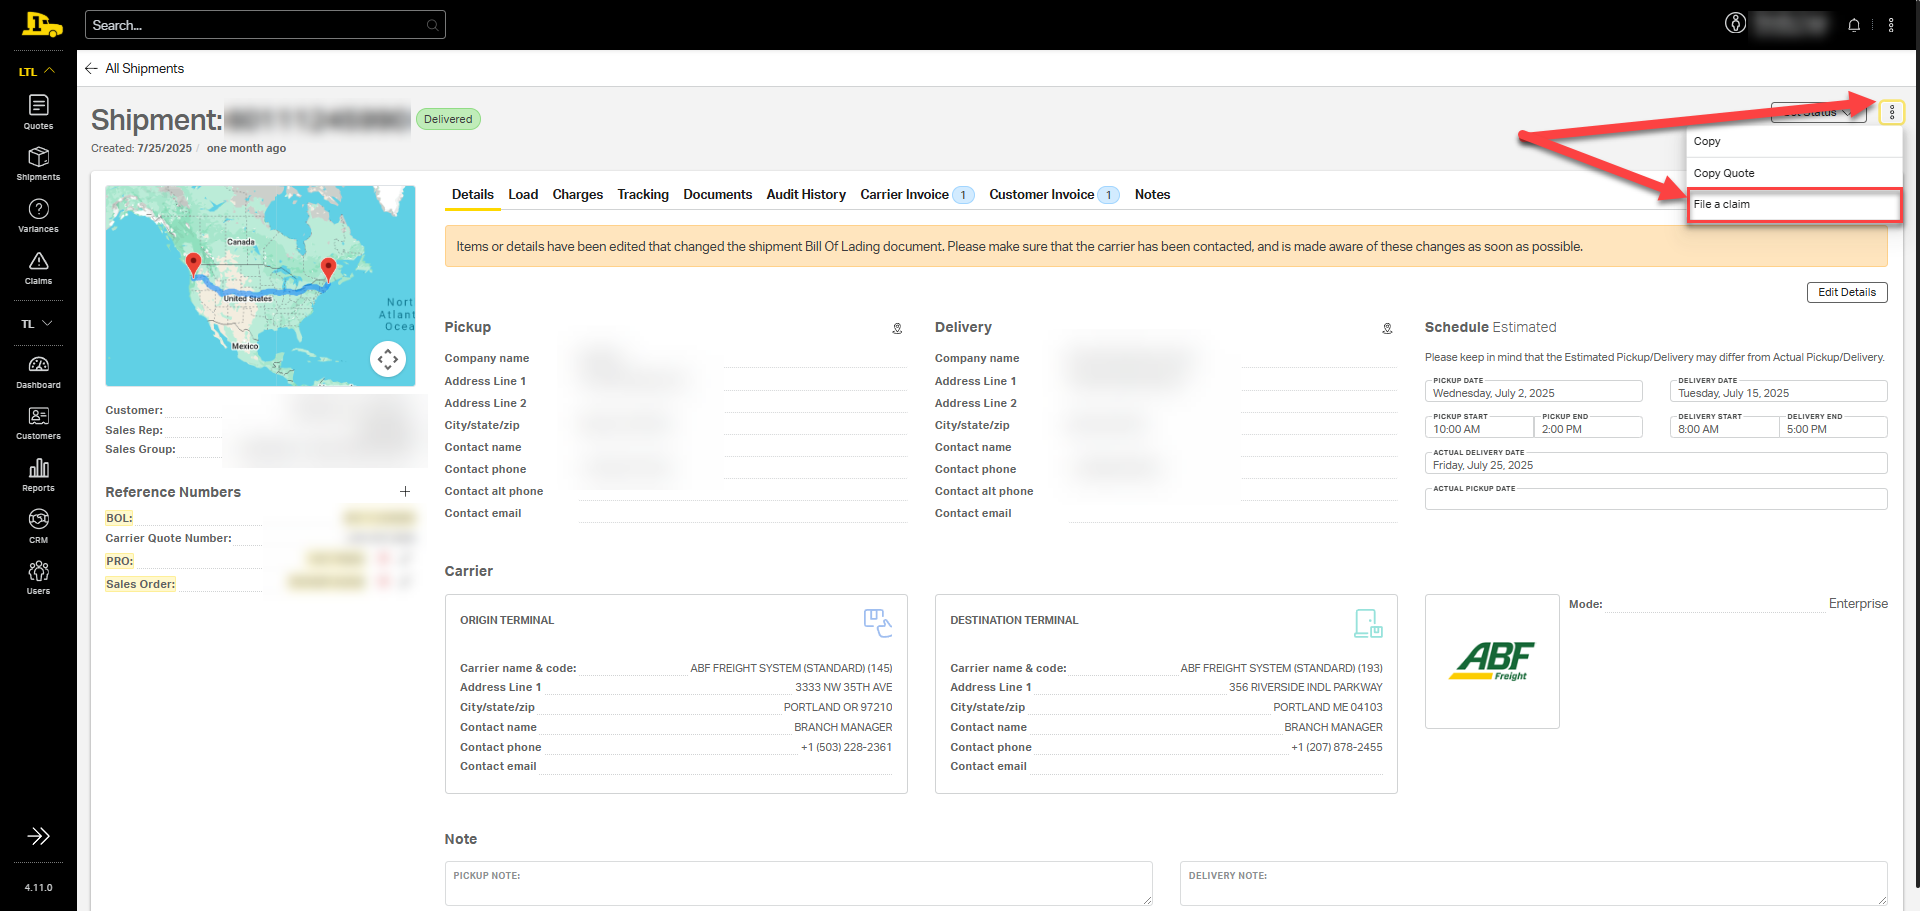
Filing a Claim
To initiate a claim for a lost or damaged shipment, select the kebab menu in the top right corner of the Shipments page. Selecting File a Claim will take you to the Claims page where you can begin the claims process.
Related Articles